
Introduction to Chicken Chimichangas
If you’re searching for a delectable and satisfying homemade meal, look no further than chicken chimichangas! These golden, crispy treats are not only a crowd-pleaser but also a fantastic way to spice up your dinner routine. Imagine wrapping shredded chicken, refried beans, and a medley of spices in a warm flour tortilla, then frying or baking them to perfection. It’s a flavor explosion waiting to happen!
But why are chicken chimichangas the perfect choice for your next homemade meal? For starters, they are incredibly versatile. You can customize the fillings based on what you have on hand, whether it’s leftover chicken, a variety of beans, or even veggies. Plus, they are just as delicious whether you choose to bake them for a healthier option or pan-fry them for that classic crispy texture.
Additionally, many of the ingredients can be sourced locally, including refried beans and spices like cumin and chili powder, which enhance the overall taste. You’ll be left savoring every bite while enjoying the satisfaction of a homemade meal. So roll up your sleeves and let’s delve into the process of making these delightful chicken chimichangas!
Ingredients for Chicken Chimichangas
When it comes to creating delicious Chicken Chimichangas, having the right ingredients is essential for that perfect balance of flavor and texture. Let’s break down what you’ll need!
Essential ingredients for the filling
The heart of your chimichangas lies in the filling. For a flavorful mixture, include:
- 2 cups cooked chicken (chopped or shredded)
- 1 can refried beans for creaminess and protein
- ½ cup salsa, your favorite blend for that tangy kick
- 1 teaspoon cumin to deepen the flavor
- ½ teaspoon dried oregano, crushed for an aromatic touch
- 1 teaspoon chili powder for a bit of heat
- 1 cup shredded cheese (cheddar or a Mexican blend works great)
- 2 green onions, chopped for a fresh finish
Ingredients for the tortillas
For wrapping all that scrumptious filling, you’ll need:
- 6 large flour tortillas, which will provide a soft yet sturdy shell
Optional toppings for serving
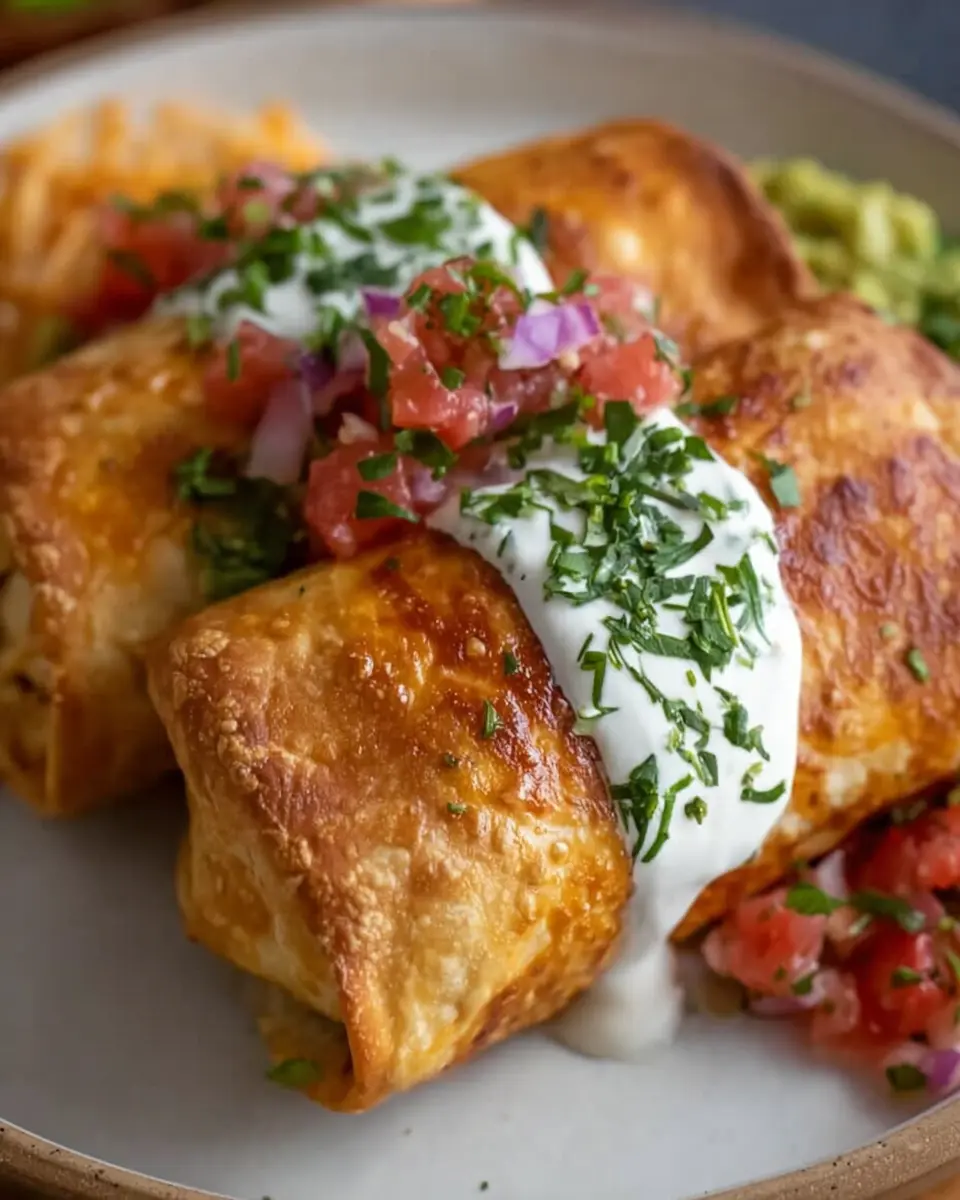
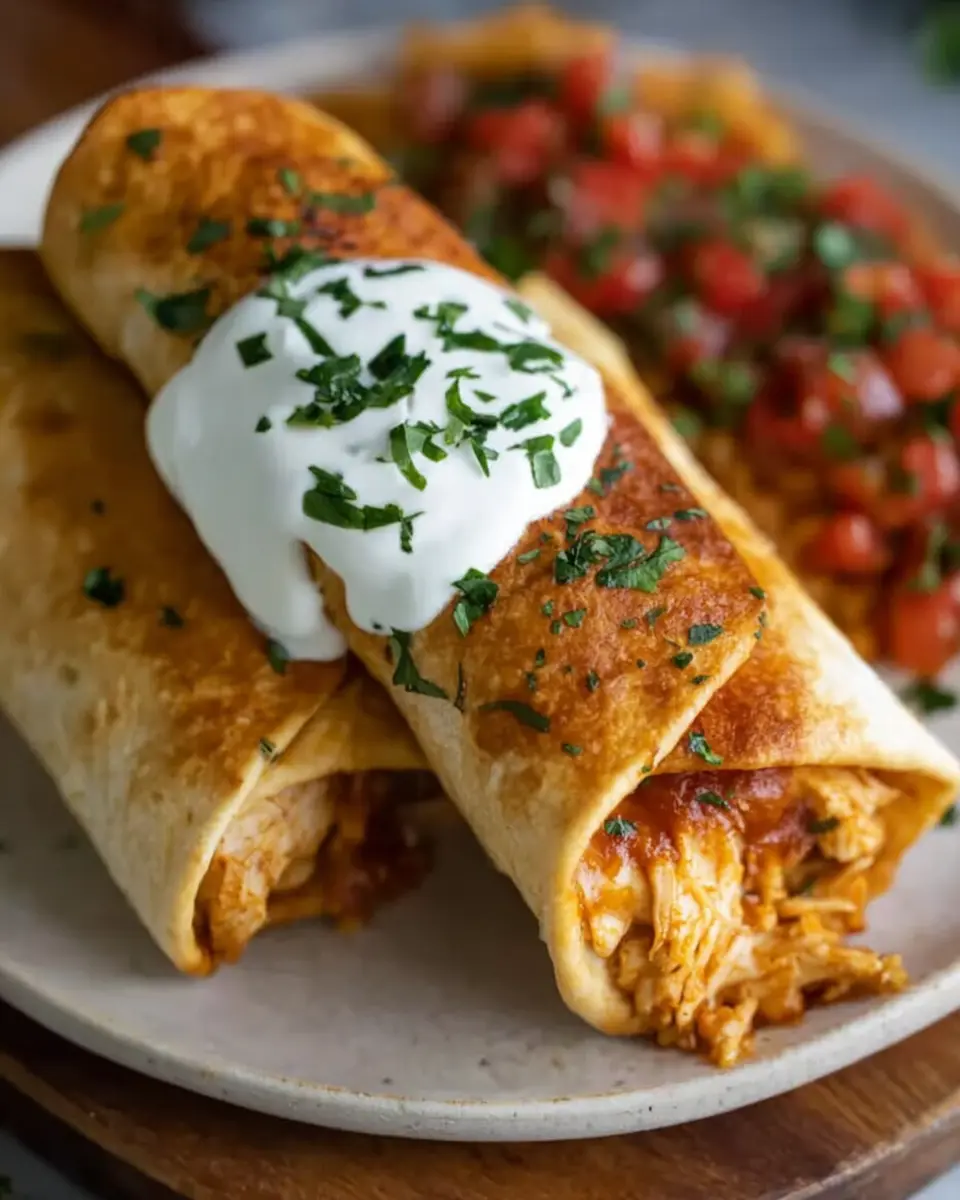
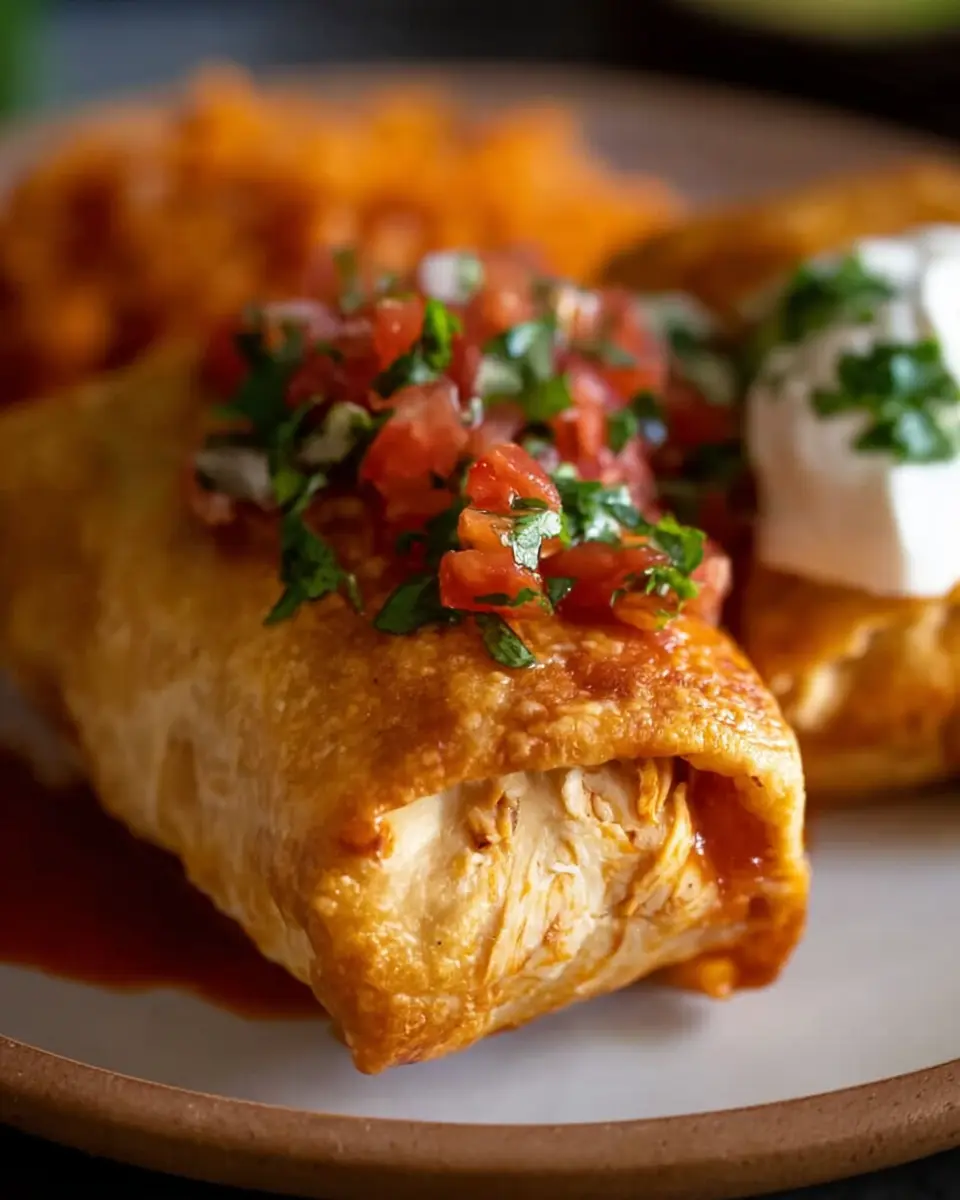
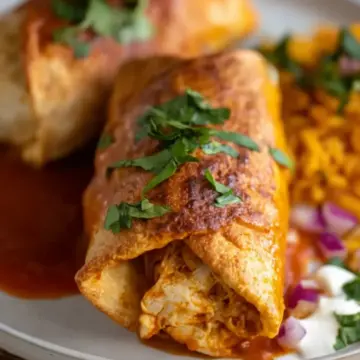
Now, let’s talk presentation! To elevate your Chicken Chimichangas, consider these optional toppings:
- Salsa
- Sour cream
- Guacamole
These toppings not only add flavor but also bring a nice visual appeal to your dish. Enjoy making this delightful meal!
Step-by-step preparation of Chicken Chimichangas
Preparing Chicken Chimichangas at home is not only fun but also a fantastic way to impress your friends with a delicious meal. Let’s walk through the steps together!
Cook the chicken
Start by prepping your chicken. Grill or sauté the chicken breasts in a frying pan drizzled with a little oil until they are tender and no longer pink—about 6-8 minutes on each side, depending on thickness. Once it's cooked, let it rest for a few minutes before chopping or shredding. This resting period is crucial as it allows the juices to distribute evenly throughout the meat, making it more flavorful. If you're short on time, rotisserie chicken is a great shortcut—just pick one up on your way home!
Prepare the filling mixture
Now that your chicken is ready, it's time to create that delicious filling. In a large mixing bowl, combine the chopped chicken, 1 can of refried beans, ½ cup of your favorite salsa, spices (cumin, dried oregano, chili powder), shredded cheese, and green onions. Mix everything well until combined. This filling is what will elevate your Chicken Chimichangas to their full potential, bursting with flavor.
Assemble the chimichangas
Time to roll! Take one of your six large flour tortillas and place about ½ cup of the filling mixture in the center. Fold the opposite sides over the filling and then roll it up tightly like a burrito. Make sure the seam is facing down to keep it from unrolling during cooking. Repeat this process with the remaining tortillas and filling. Keep a damp paper towel handy to cover the assembled chimichangas; this will prevent them from drying out while you finish assembling.
Choose your cooking method
Now comes the fun part—how you want to cook your chimichangas!
-
For baked chimichangas: Preheat your oven to 400°F (204°C). Lightly brush the chimichangas with oil and arrange them seam-side down on a baking sheet. Bake for about 25 minutes, or until they achieve a lovely golden and crispy finish.
-
For pan-fried chimichangas: Heat a skillet over medium heat. Once warm, add oil and place the chimichangas seam-side down in the skillet. Turn them every 2-3 minutes until all sides are golden brown. This method gives you that crispy exterior many people love.
Serve and enjoy!
Once your chimichangas are cooked to perfection, serve them warm with optional topping favorites like salsa, sour cream, or guacamole on the side. Pair them with a side of Authentic Mexican Rice for a satisfying meal. Your friends will be raving about your culinary skills!
So now that you know how to prepare delicious Chicken Chimichangas, why not invite some friends over for a fun night of cooking together? Enjoy the process as much as the meal, and these chimichangas will definitely become a go-to recipe in your kitchen.
Variations on Chicken Chimichangas
Enhancing your chicken chimichangas offers delightful twists that cater to different diets and taste preferences. Here are two delicious variations to try!
Vegetarian Chimichangas with Black Beans
For a meatless option, swap the chicken for black beans. Combine them with refried beans, cheese, and your choice of spices for a hearty filling. This version is rich in protein and fiber, making it a satisfying meal even without the meat. Plus, black beans bring a unique flavor that complements the dish beautifully!
Spicy Chicken Chimichangas with Jalapeños
If you're craving a kick, add diced jalapeños to your chicken mixture. This fiery addition elevates the chicken chimichangas with a bold, zesty flavor. Balance the heat with a cooling drizzle of sour cream or guacamole on top, and you’ll have a dish that’s sure to impress your guests or brighten up a weeknight dinner!
Explore more options at Tastes Better From Scratch for various bean and spice combinations.
Cooking tips and notes for Chicken Chimichangas
Tips for crispy chimichangas
To achieve irresistibly crispy chimichangas, consider lightly brushing the tortillas with oil before baking or frying. This not only enhances the crunch but also gives them a beautiful golden-brown hue. If baking, make sure your oven is preheated to 400°F for optimal results. If frying, allow the oil to reach medium heat before adding the chimichangas to avoid sogginess.
Importance of ingredient quality
When preparing your Chicken Chimichangas, the quality of your ingredients makes all the difference. Opt for fresh, high-quality chicken and flavorful spices. Using homemade refried beans can elevate the dish significantly—if you're interested, check out this refried beans recipe. Remember, fresh ingredients lead to a more delicious and satisfying meal!
Serving Suggestions for Chicken Chimichangas
Pairing Options for a Complete Meal
To elevate your Chicken Chimichangas into a delightful full meal, consider serving them alongside:
- Authentic Mexican Rice for a hearty side dish that complements the flavors.
- A crisp green salad or Mexican street corn to add freshness and balance.
- Refried beans as a protein-packed accompaniment.
These options not only enhance the meal but also provide a colorful and inviting presentation.
Creative Garnishing Ideas
Adding a few simple garnishes can really take your Chicken Chimichangas to the next level:
- Top with fresh cilantro and a squeeze of lime for an explosion of flavor.
- Serve with sour cream and guacamole on the side for creaminess and texture.
- Sprinkle with diced avocado and chopped green onions for an extra layer of freshness.
These small touches can make your dish look restaurant-worthy and delicious!
Time Breakdown for Chicken Chimichangas
Preparation time
Get your kitchen prepped and ready in just 15 minutes! This is when you’ll gather ingredients, chop the chicken, and mix everything together to create a delicious filling.
Cooking time
Take another 25–30 minutes here, depending on whether you decide to bake or pan-fry your chimichangas. Trust me; the anticipation will be worth it when that golden goodness comes out!
Total time
All in all, you’re looking at around 45–55 minutes from start to finish. In less than an hour, you'll have homemade Chicken Chimichangas that are sure to impress at any gathering!
Nutritional Facts for Chicken Chimichangas
Calories per serving
Each serving of Chicken Chimichangas contains approximately 263 calories. This makes them a delicious yet manageable option for lunch or dinner when you're watching your caloric intake.
Key Nutritional Highlights
- Protein: With 17g of protein, they provide a satisfying boost, perfect for post-workout meals.
- Carbohydrates: At only 7g, they can fit into low-carb diets.
- Fat: Contains 17g of fat (including 4g of saturated fat), which can be moderated based on your dietary needs.
- Vitamins & Minerals: A good source of Vitamin A and Calcium, offering essential nutrients to help keep you healthy.
- Fiber: Each serving includes about 2g of fiber, which is beneficial for digestive health.
For more detailed nutritional information, you might want to check resources like the USDA Food Composition Databases or registered dietitian blogs. Enjoy savoring your Chicken Chimichangas while getting a wholesome dose of nutrients!
FAQs about Chicken Chimichangas
Can I make chicken chimichangas ahead of time?
Absolutely! You can prepare the filling and roll up the chicken chimichangas and store them in the refrigerator for up to a day. Just make sure to wrap them tightly in plastic wrap or foil to keep them from drying out. When you're ready to cook, you can bake or fry them straight from the fridge!
What’s the best way to reheat leftovers?
To reheat your leftover chicken chimichangas, the oven is your best friend. Preheat it to 350°F (175°C) and place the chimichangas on a baking sheet for about 15-20 minutes. This will keep them crispy on the outside while ensuring the filling is hot. Microwaving can make them soggy, so try to avoid that if you can!
How can I make chimichangas gluten-free?
Making chicken chimichangas gluten-free is simple! Just swap regular flour tortillas for gluten-free tortillas. You'll find that many stores carry delicious options that work perfectly. You can also check out a recipe for homemade gluten-free tortillas online for added freshness!
Conclusion on Chicken Chimichangas
Bringing homemade goodness to your table
In conclusion, Chicken Chimichangas offer a delightful way to enjoy a comforting meal at home. With their warm, crispy exterior and flavorful filling, they create a satisfying dish that friends and family will love. Try them out this week and delight in the homemade goodness!
Chicken Chimichangas
Equipment
- Frying pan
- Mixing Bowl
- Skillet
- Oven
Ingredients
Filling
- 2 cups cooked chicken, chopped or shredded
- 1 can refried beans
- 0.5 cup salsa your favorite kind
- 1 teaspoon cumin
- 0.5 teaspoon dried oregano, crushed
- 1 teaspoon chili powder
- 1 cup shredded cheese cheddar or Mexican blend
- 2 green onions, chopped
- 3 Tablespoons oil (vegetable or canola oil)
- 6 large flour tortillas
Toppings
- salsa optional
- sour cream optional
- guacamole optional
Instructions
Cooking Instructions
- Cook chicken breasts in frying pan until tender and no longer pink. Allow to rest for a few minutes before chopping.
- Add refried beans, chicken, cheese, salsa, spices, and green onions to a mix bowl and mix to combine.
- Place about ½ cup of the chicken mixture in the center of each tortilla.
- Fold opposite sides over filling and roll up like a burrito.
- For baked chimichangas, preheat oven to 400 degrees F. Brush chimichangas lightly with oil and bake for about 25 minutes, until golden and crispy.
- For pan fried chimichangas, heat a skillet over medium heat. Once hot, add oil to skillet and place chimichangas seam side down. Turn lightly every 2-3 minutes until lightly golden on all sides.
- Serve warm, topped with salsa and sour cream and a side of Authentic Mexican Rice.

Leave a Reply