
Introduction to Crispy Japanese Chicken Katsu
What is Chicken Katsu and why is it popular?
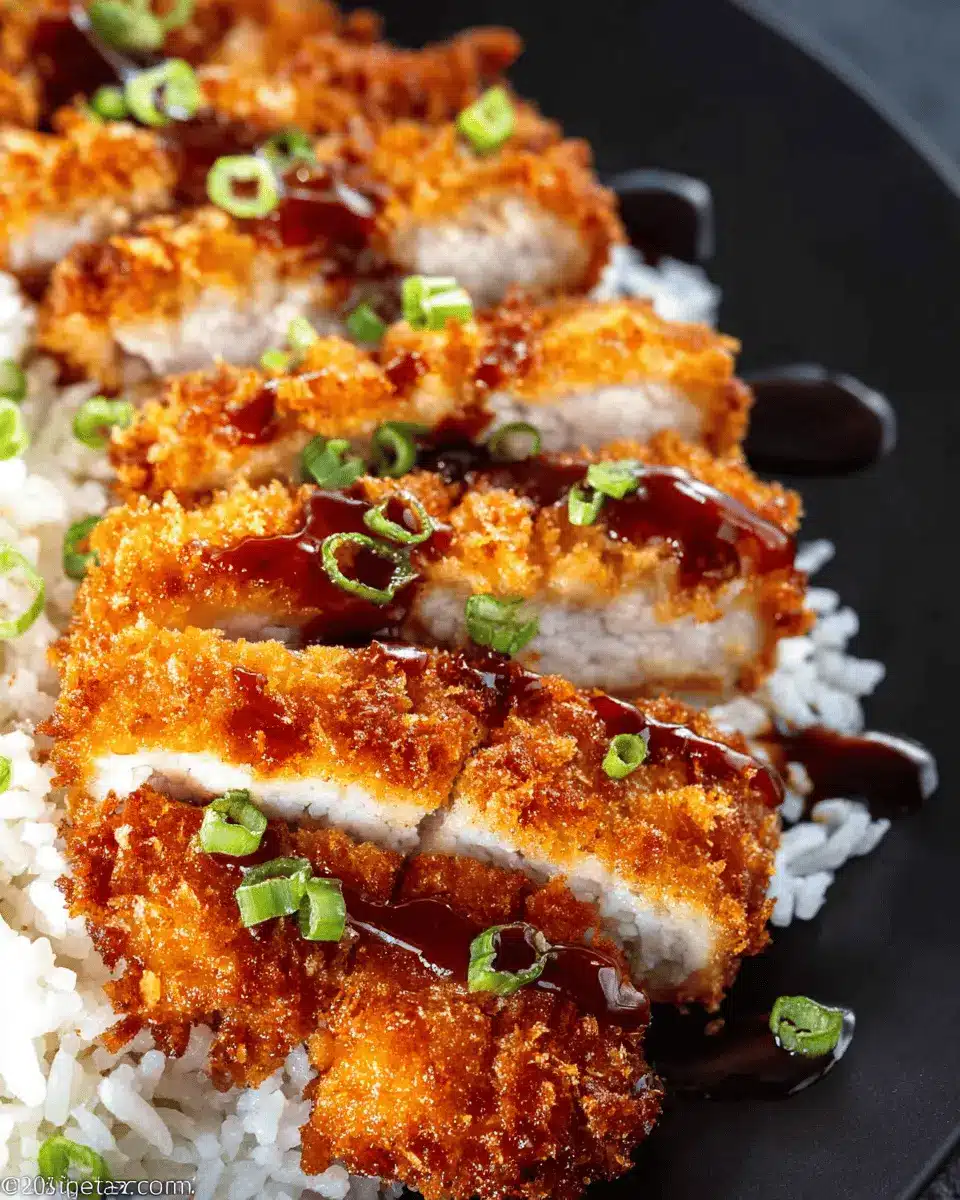
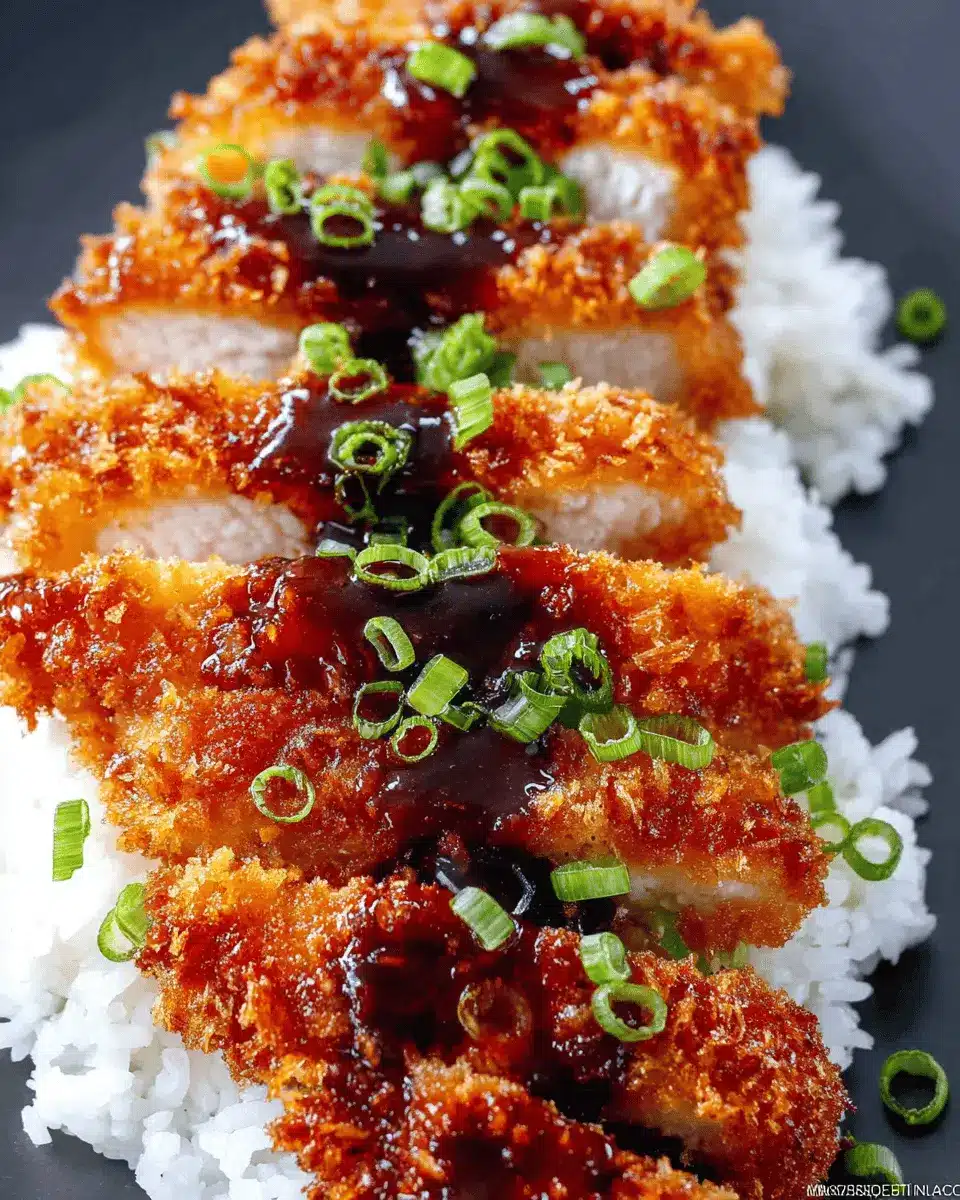
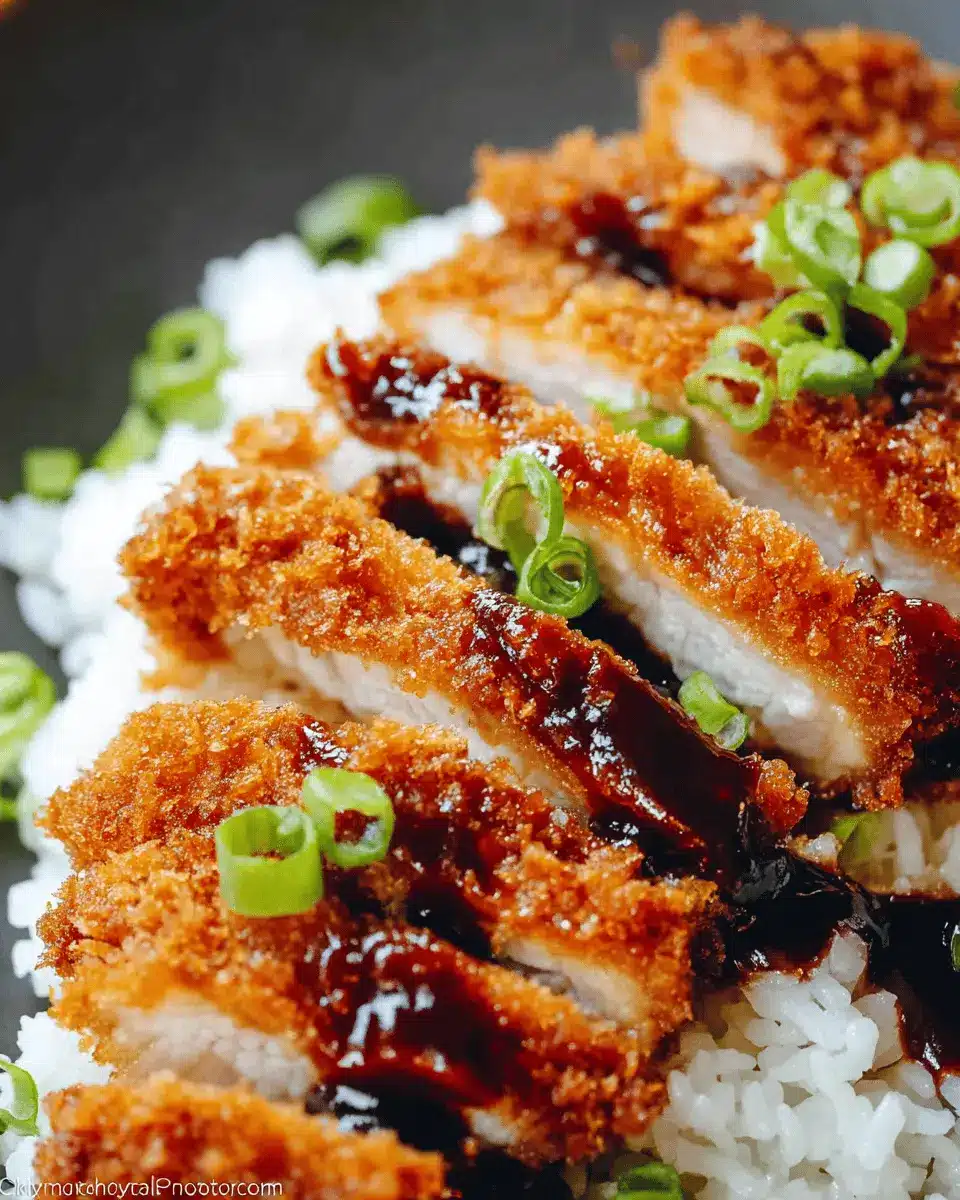
If you’re looking for a dish that beautifully marries crunch and flavor, look no further than crispy Japanese chicken katsu. This beloved dish features tender, juicy chicken fillets that are breaded and fried to golden perfection. It’s a staple in many Japanese households and restaurants, making it a go-to choice for those yearning for comfort food with a twist.
So, why has chicken katsu captured the taste buds of so many? The answer lies in its simplicity. Made with just a few ingredients—chicken, panko breadcrumbs, and a simple sauce—it’s easy to whip up for a weeknight dinner or impress your friends at a weekend gathering. The umami-rich tonkatsu sauce adds a delightful depth of flavor, elevating this approachable dish. Plus, the crispy texture makes it a fun dish to eat, whether served with rice or on its own.
Curious to try making it at home? Not only will you enjoy the cooking process, but you’ll also create a dish that can evoke memories of cozy Japanese eateries or simply be a new favorite at your table. Ready to get started? Let's dive into the recipe for crispy Japanese chicken katsu with homemade tonkatsu sauce!
Ingredients for Crispy Japanese Chicken Katsu
When crafting your crispy Japanese chicken katsu, the magic lies in the quality of your ingredients. Let's break them down:
Katsu Sauce Ingredients
To whip up a delicious homemade katsu sauce, you'll need:
- ½ cup ketchup: A flavorful base that gives depth.
- 2 tablespoons soy sauce: For that umami punch.
- 2 teaspoons brown sugar: Adds a hint of sweetness.
- 1 tablespoon mirin: A touch of sweetness that balances the flavors.
- 2 teaspoons Worcestershire sauce: Adds complexity.
- 1 teaspoon freshly grated ginger: For a zesty kick.
- 1 teaspoon finely minced garlic: An aromatic essential.
Chicken Katsu Ingredients
For the crispy chicken katsu, gather the following:
- 1 pound boneless skinless chicken breast: Halved for even cooking.
- Salt: Essential for seasoning.
- 1 ½ cups all-purpose flour: For the first coating layer.
- 3 eggs: To bind your breadcrumbs.
- 1 ½ tablespoons water: To loosen the egg mixture.
- 3 cups panko breadcrumbs: The secret to that signature crispy texture.
- Vegetable oil: For frying; choose something neutral like canola.
Now that you're equipped with these ingredients, you're well on your way to creating a delightful meal. Enjoy the process and don’t forget to savor each bite of your crispy Japanese chicken katsu! If you're curious about the cooking techniques, you can find more tips on Asian cooking methods to elevate your dish!
Preparing Crispy Japanese Chicken Katsu
Creating crispy Japanese chicken katsu at home is not only rewarding but also surprisingly easy once you get the hang of it. This dish is perfect for a weeknight meal or a casual dinner with friends. Let’s break down the steps together to ensure that you achieve that golden, crunchy exterior and juicy interior.
Prepare and Pound the Chicken
To start, take your boneless chicken breasts and slice them in half horizontally. This not only helps reduce the cooking time but also ensures a tender outcome. Place each piece between two sheets of plastic wrap and gently pound them with a meat mallet or rolling pin until they are about ¼ inch thick. This step is crucial; it tenderizes the meat, making sure each bite is succulent. After you pound the chicken, liberally season it with salt, then cover and refrigerate for about an hour. Not only does this allow the salt to penetrate, but it also helps keep the chicken juicy during cooking.
Prepare the Katsu Sauce
While the chicken is resting, take a moment to whip up your homemade tonkatsu sauce. In a small bowl, combine:
- ½ cup ketchup
- 2 tablespoons soy sauce
- 2 teaspoons brown sugar
- 1 tablespoon mirin
- 2 teaspoons Worcestershire sauce
- 1 teaspoon freshly grated ginger
- 1 teaspoon minced garlic
Mix the ingredients well and let them sit at room temperature for at least 30 minutes. The flavors meld wonderfully during this time, resulting in a deliciously tangy sauce.
Set Up the Breading Station
A well-organized breading station can make all the difference. Grab three bowls:
- Fill the first with all-purpose flour.
- In the second, whisk together the eggs with 1½ tablespoons of water until smooth.
- Place panko breadcrumbs in the third.
Having everything ready will streamline the process and keep your kitchen mess to a minimum.
Bread the Chicken
Now for the fun part! Take your salted chicken and follow these steps for that perfect coating:
- Dredge the chicken in the flour, shaking off any excess.
- Dip it in the egg wash, ensuring a thorough coating.
- Finally, roll it in panko breadcrumbs, pressing gently to ensure it adheres.
Place the breaded chicken on a wire rack for a moment to let the coating set. This will help you achieve a crispier finish.
Cook the Chicken
Heat vegetable oil in a large skillet over medium heat until it reaches about 350°F. Add the chicken carefully, cooking for 1 to 2 minutes until the crust starts to set. Flip and cook for another 1 to 2 minutes until golden brown. Keep an eye on it—flipping regularly helps ensure an even cook.
Finish Cooking in the Oven
Once browned, transfer the chicken to a clean wire rack and pop it in a 200°F oven to finish cooking through. Depending on thickness, it may take an additional 7 to 8 minutes to reach that perfect 165°F internal temperature.
Slice and Serve
Once cooked, let the chicken rest for a moment before slicing it into strips. This makes it easy to pick up with chopsticks. Serve your crispy chicken katsu with a generous drizzle of your homemade tonkatsu sauce and a side of rice. It’s a meal that’s bound to impress!
Variations on Crispy Japanese Chicken Katsu
Chicken Katsu with Different Sauces
While the classic Crispy Japanese Chicken Katsu with Homemade Tonkatsu Sauce is a delightful option, experimenting with different sauces can elevate your dish. Try pairing it with spicy mayo for a kick, or a tangy ponzu sauce to add a citrus twist. Even a yogurt-based sauce can provide a refreshing contrast, perfect for warmer days.
Vegetarian Alternatives
For a vegetarian take on chicken katsu, consider using eggplant or zucchini. Slice your favorite vegetable, batter it just like the chicken, and fry until crispy. It's an excellent option that doesn’t skimp on crunch or flavor. Additionally, you can explore tempeh or tofu for a protein-packed substitute that absorbs the sauce beautifully.
Gluten-Free Options
If you’re looking to create a gluten-free version of crispy Japanese chicken katsu, swap out the all-purpose flour with a gluten-free blend or almond flour. For the breadcrumbs, gluten-free panko is widely available and delivers the same satisfying crunch. Enjoy your Japanese-inspired meal without worrying about gluten!
Cooking tips and notes for Crispy Japanese Chicken Katsu
Importance of resting the chicken
Resting your chicken is vital for achieving tender, juicy meat in your crispy Japanese chicken katsu. After pounding and seasoning your chicken, refrigerate it for about an hour. This step not only enhances the flavor but also helps the chicken retain moisture during cooking. Trust me, the extra time is worth it!
Tips for achieving the perfect crunch
To get that sought-after crunch, use fresh panko breadcrumbs—they provide a light, airy texture. When breading, make sure each chicken piece is coated evenly, shaking off excess flour and egg. Cook in hot oil (around 350°F) for that perfect golden color. Rest the fried chicken on a wire rack to keep it crispy; this allows air circulation and prevents sogginess as it cools. For more tips, you can check out this useful guide on the science of breading!
Serving suggestions for Crispy Japanese Chicken Katsu
Ideal side dishes
To elevate your crispy Japanese chicken katsu, consider serving it alongside a fluffy bowl of steamed rice or fragrant coconut rice. Pairing it with a fresh salad, such as a simple cucumber salad dressed with rice vinegar, adds a refreshing crunch. For a more traditional touch, include pickled vegetables (tsukemono) which enhance the flavors beautifully.
Pairing with beverages
When it comes to beverages, a chilled green tea or a sparkling lemonade complements the dish wonderfully, offering a crisp contrast to the savory flavors of the katsu. If you’re in the mood for something a bit more adventurous, try serving it with a light and fruity mocktail—refreshing and delightful!
For additional serving tips, check out this guide on Japanese cuisine.
Time Breakdown for Crispy Japanese Chicken Katsu
Preparation Time
Getting everything ready for your crispy Japanese chicken katsu is a breeze, requiring just 20 minutes. This includes marinating the chicken and prepping the katsu sauce.
Cooking Time
Once you’re ready to fry, the cooking process takes about 20–25 minutes. Patience is key as you achieve that perfect golden brown crust.
Total Time
In under an hour, you can enjoy a delightful meal that’s not just a treat for your taste buds but also a satisfying cooking experience! The total time to savor this dish is around 50 minutes.
For more tips on next-level cooking, you can check out this guide on meal prepping by Food Network! Happy cooking!
Nutritional Facts for Crispy Japanese Chicken Katsu
Calories
Crispy Japanese chicken katsu packs approximately 760 calories per serving, making it a hearty meal that truly satisfies your cravings. It’s perfect for those who need a solid energy source for the day ahead.
Protein
With about 39 grams of protein, this dish is an excellent choice for anyone looking to boost their protein intake. It’s ideal for active individuals seeking to maintain or build muscle while enjoying a delicious meal.
Sodium
Keep an eye on your salt intake; this chicken katsu contains around 509 milligrams of sodium per serving. While delicious, pairing it with low-sodium sides can help keep your overall sodium levels in check. For more tips on healthy eating, check out this article on Nutrition Basics from the Academy of Nutrition and Dietetics.
Enjoy your crispy chicken katsu while keeping these nutritional facts in mind!
FAQs about Crispy Japanese Chicken Katsu
Can I make Chicken Katsu in advance?
Absolutely! You can prepare the crispy Japanese chicken katsu ahead of time. After breading the chicken, store it in the refrigerator for a few hours or freeze it if you want to prep even further in advance. Just remember to cook it straight from frozen; you might need to extend the cooking time slightly.
What should I serve with Chicken Katsu?
This dish pairs beautifully with steamed rice and a side of shredded cabbage for crunch. You could also serve it alongside a light salad or some pickled vegetables to balance the meal. For dipping, don’t forget the robust tonkatsu sauce, which adds a delightful zing!
Can I substitute ingredients in the recipe?
Indeed! If you don’t have panko breadcrumbs, regular breadcrumbs work, though they won't be quite as crunchy. Also, for a gluten-free version, use gluten-free flour and breadcrumbs. Mirin can be swapped with a mix of sugar and water if needed, or you can leave it out altogether. Cooking is all about personalization, so feel free to get creative! For more ideas, check out Serious Eats for general cooking tips and tricks.
Conclusion on Crispy Japanese Chicken Katsu
There you have it—crispy Japanese chicken katsu that's perfectly golden and delicious! This dish is not only a delight for your taste buds but also easy to prepare at home. Pair it with your homemade tonkatsu sauce and some rice, and enjoy a fantastic meal that impresses. Happy cooking!

Crispy Japanese Chicken Katsu with Homemade Tonkatsu Sauce
Equipment
- Skillet
- baking rack
- Mixing bowls
Ingredients
Katsu Sauce
- ½ cup ketchup
- 2 tablespoons soy sauce
- 2 teaspoons brown sugar
- 1 tablespoon mirin
- 2 teaspoons Worcestershire sauce
- 1 teaspoon freshly grated ginger
- 1 teaspoon finely minced garlic
Chicken Katsu
- 1 pound boneless skinless chicken breast cut in half horizontally
- salt to taste
- 1 ½ cups all-purpose flour
- 3 large eggs
- 1 ½ tablespoons water
- 3 cups panko breadcrumbs
- vegetable oil for cooking
Instructions
Katsu Sauce
- Place all of the ingredients in a small bowl, and stir to combine.
- Let the sauce rest at least 30 minutes before serving.
Chicken Katsu
- Place halved chicken breast between some plastic wrap and gently pound out the chicken until it is about ¼ inch thick.
- Salt the chicken liberally, cover, and place in the refrigerator for about 1 hour.
- Set up a breading station with three bowls. Place the all-purpose flour into one bowl.
- Beat the eggs and 1 ½ tablespoons of water together very well, and pour into a second bowl.
- Place the panko breadcrumbs into the third bowl.
- Coat the chicken as follows: Place the chicken into the flour and shake off any excess. Dip into the egg wash, coat well, and shake off any excess. Dredge in the panko breadcrumbs.
- Place the coated chicken on a wire rack.
- Preheat the oven to 200°F.
- Add enough vegetable oil to coat the bottom ½ inch of either an iron skillet or a stainless steel pan and heat to 350°F.
- Add the chicken to the pan and cook for 1 to 2 minutes, just until the crust sets.
- Flip over and cook for another 1 to 2 minutes.
- Continue cooking the chicken and flipping it over until it is golden brown on both sides.
- Remove the chicken and place on a clean wire rack. Place into the preheated oven to finish cooking.
- Depending on the thickness of your chicken, the chicken may need another 7 or 8 minutes of cooking.
- Chicken should be 165°F before consuming.
- When the chicken is fully cooked, cut into thin strips that you can pick up with chopsticks.
- Serve with rice, tonkatsu sauce, or your favorite brown sauce.

Leave a Reply