
Introduction to Mini No-Bake Cheesecakes
Mini no-bake cheesecakes are a delightful treat that perfectly fit the bustling lifestyles of young professionals. Between meetings, gym sessions, and social engagements, finding the time to whip up an elaborate dessert can feel daunting. These mini cheesecakes are a convenient solution! Not only are they simple to prepare, but they also require no baking, which means less time spent in the kitchen and more time enjoying life.
Imagine coming home after a long day to find a refreshing and creamy dessert waiting for you in the refrigerator. With the filling taking only minutes to combine and the graham cracker crust needing minimal effort, you'll be amazed at how quickly these little gems come together. Plus, they’re easily customizable; whether you’re in the mood for fruit toppings, chocolate ganache, or something uniquely your own, the choice is yours.
The concept of mini desserts like these has gained popularity, especially among busy individuals who want to indulge without the commitment of a large cake. According to a report by The New York Times, single-serve desserts are on the rise, making this recipe not just timely but trendy. So, if you're ready to impress your friends or treat yourself, you’re in for a sweet experience with these mini no-bake cheesecakes!
Ingredients for Mini No-Bake Cheesecakes
If you're ready to whip up your delightful mini no-bake cheesecakes, let's dive into the ingredients you'll need for that perfect balance of texture and flavor!
Essential Ingredients for the Graham Cracker Crust
The foundation of any great cheesecake is its crust! For these mini delights, you’ll need:
- Graham cracker crumbs: 2 cups (about 16 full-sheet crackers) give that classic crunch.
- Brown sugar: ⅓ cup adds a touch of sweetness and deep flavor.
- Unsalted butter: ½ cup, melted, acts as the glue that holds it all together.
These ingredients come together to create a buttery, sweet crust that complements the rich filling beautifully.
Key Ingredients for the Creamy Filling
Now, let’s talk about the star of the show—the creamy filling! Here’s what you’ll need:
- Cold heavy cream: 1 cup for that luscious texture and airy consistency.
- Full-fat brick cream cheese: 16 ounces, softened, ensures a rich and smooth filling.
- Granulated sugar: ⅓ cup adds just the right amount of sweetness.
- Sour cream or plain yogurt: 2 tablespoons help balance flavors and contribute creaminess.
- Fresh lemon juice: 1 teaspoon brightens up the taste without overpowering.
- Pure vanilla extract: ½ teaspoon provides a lovely aromatic backdrop.
These ingredients create a flavor profile that's rich and satisfying, perfect for any occasion! Don’t forget to check out resources like EatingWell for more tips on ingredient selection and substitutions.
Step-by-Step Preparation of Mini No-Bake Cheesecakes
Creating mini no-bake cheesecakes is simpler than you might think, making them perfect for a gathering or simply to satisfy your sweet tooth. Let's dive into the preparation process, where I’ll guide you step-by-step!
Gather Your Tools and Prepare the Muffin Pans
Start by assembling your supplies. You’ll need two standard 12-count muffin pans and some cupcake liners. Do you have enough space in your fridge for both pans? Make sure your muffin pans are lined properly so your cheesecakes can be easily removed later. The fun is about to begin!
Make the Graham Cracker Crust
The base of any great cheesecake is its crust. Here, you’ll want to crush about 16 graham crackers—either in a food processor or with a rolling pin inside a sealed bag. Once you have those fine crumbs, mix them with:
- ⅓ cup brown sugar
- ½ cup melted butter
The mixture should feel like wet sand. Spoon approximately 1 and ½ tablespoons into each cupcake liner, pressing it down firmly. This layer is key for that delightful crunch!
Optional Step: Bake the Crust for Sturdiness
This step isn’t absolutely necessary, but I highly recommend it. If you’d like a sturdier crust, pop the muffin pans into a 350°F oven for about 5 minutes. Allow them to cool for 10 minutes before adding the cheesecake filling—this helps set a robust base.
Whip the Heavy Cream and Prepare the Filling
Now let’s whip things up! Using either a hand mixer or a stand mixer, beat 1 cup of cold heavy cream until stiff peaks form. Set that aside. In a separate bowl, beat 16 ounces of softened cream cheese and ⅓ cup granulated sugar until it’s creamy and free of lumps. Then, mix in 2 tablespoons of sour cream, 1 teaspoon lemon juice, and ½ teaspoon vanilla extract until smooth.
Combine the Filling and Add the Whipped Cream
Gently fold the whipped cream into the cream cheese mixture. Mixing slowly helps maintain that airy texture you love in cheesecake. It’ll take a bit of elbow grease, but trust me, it’s worth it!
Fill the Muffin Cups with Cheesecake Filling
Using a spoon or a piping bag, distribute about 2 tablespoons of the lush cheesecake filling over each crust. For a cleaner finish, piping is a great option—just fit the bag with a big star tip and go to town. Smooth the tops with a spoon to finish.
Refrigerate the Cheesecakes to Set
Now comes the hardest part—waiting! Chill your mini cheesecakes in the refrigerator for at least 3 hours, but they can last up to 2 days. Cover them with plastic wrap or foil if you're preparing them in advance.
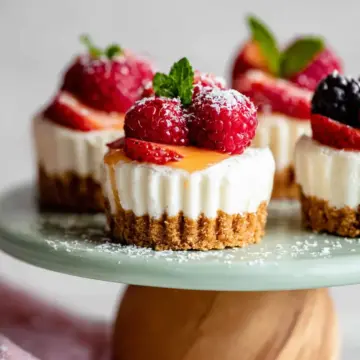
Optional Step: Add Toppings Before Serving
When it's time to indulge, consider adding a delicious topping to each cheesecake. Fresh strawberries, berry preserves, or a drizzle of chocolate ganache can easily elevate your treats. Just spoon a bit on right before serving for that extra wow factor!
Following these steps will lead you to delightful mini no-bake cheesecakes that could impress any guest. They're versatile and delicious—perfect for any occasion!
Variations of Mini No-Bake Cheesecakes
Strawberry Mini No-Bake Cheesecakes
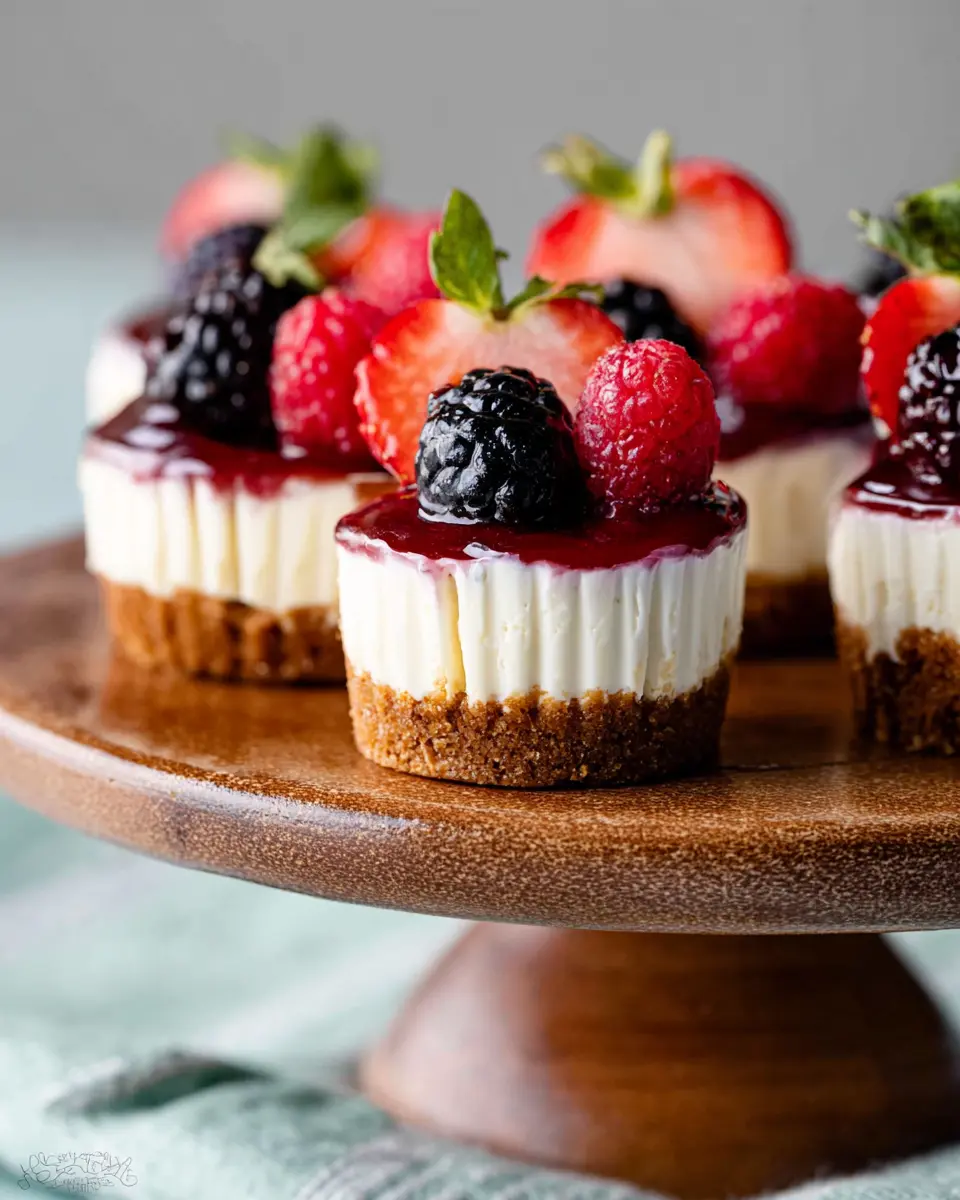
Imagine creamy, luscious mini no-bake cheesecakes topped with a vibrant, homemade strawberry sauce. Simply blend ripe strawberries with a bit of sugar and cook until thickened. Drizzle this delightful sauce over your cheesecake for a burst of fresh flavor. Pairing strawberries complements the tangy filling perfectly, creating an irresistible treat for any occasion.
Lemon Flavored Mini No-Bake Cheesecakes
If you love zesty flavors, then lemon flavored mini no-bake cheesecakes are a must-try. By swapping out the sour cream for added lemon juice and zest, you can enjoy a refreshing dessert that still maintains that classic cheesecake creaminess. The citrus really brightens the flavor, making it perfect for warm-weather gatherings or a cheerful brunch.
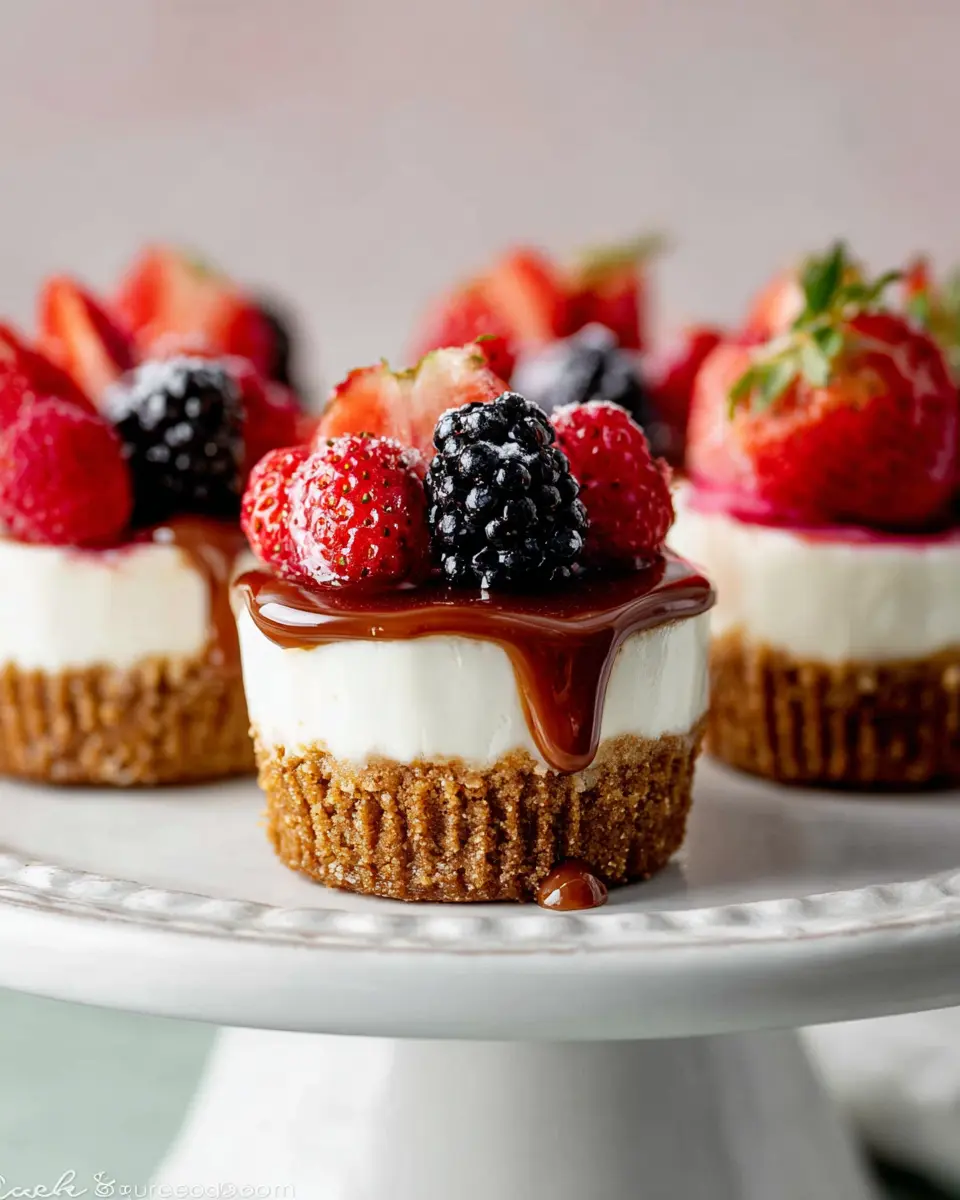
Chocolate Ganache Mini No-Bake Cheesecakes
For chocolate lovers, chocolate ganache mini no-bake cheesecakes are simply divine. Prepare a rich ganache by melting chocolate with heavy cream, then drizzle it over the cooled cheesecakes. This decadent addition takes your mini cheesecakes to the next level, impressing guests and satisfying cravings in one delicious bite.
These variations not only keep your dessert game interesting but are also easy to prepare, allowing you to cater to different tastes at your next gathering!
Cooking Tips and Notes for Mini No-Bake Cheesecakes
Importance of room temperature ingredients
To achieve that irresistibly creamy texture in your mini no-bake cheesecakes, it's crucial to use room temperature ingredients. Specifically, letting your cream cheese and sour cream warm up before mixing ensures a smooth filling, free from lumps. Cold ingredients, when beaten together, can lead to a chunky consistency that no one wants!
Tips for preventing lumps in the filling
To keep your filling ultra-smooth, beat the cream cheese with the sugar on medium speed until completely creamy before adding other ingredients. If you notice any lumps, just keep mixing! Experts recommend scraping down the bowl frequently to catch any stubborn bits hiding at the bottom. Also, folding the whipped cream in gently can help keep that lovely airy texture intact.
Freezing instructions for mini cheesecakes
Making ahead? These mini no-bake cheesecakes can be frozen too! After the initial chill, remove them from the muffin pans (with the liners still on). Place them in a single layer in a freezer-safe container and freeze for up to 3 months. Just remember to thaw them in the fridge for 24 hours before serving. This makes them a perfect treat for unexpected guests!
Serving Suggestions for Mini No-Bake Cheesecakes
Creative Topping Ideas
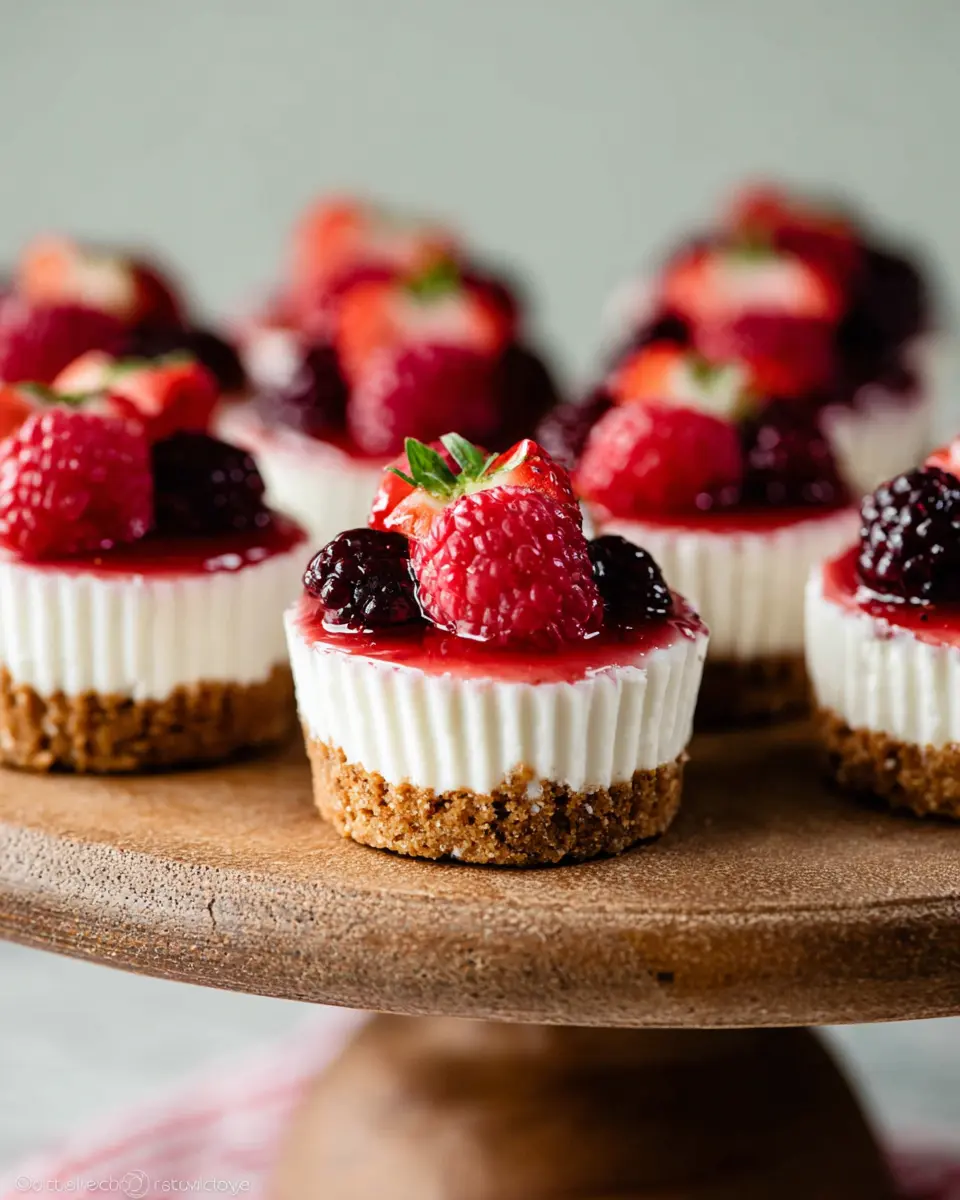
Elevate your mini no-bake cheesecakes with delightful toppings! Consider:
- Fresh fruit: Top with strawberries, blueberries, or raspberries for a burst of freshness.
- Sauces: Drizzle some homemade strawberry sauce or rich chocolate ganache for a decadent touch.
- Crushed cookies: Sprinkle crushed Oreos or vanilla wafers on top for added texture.
- Nuts: Chopped walnuts or pecans provide a crunchy contrast to the creamy filling.
Pairing Suggestions for Gatherings or Potlucks
These mini no-bake cheesecakes are perfect for any occasion! They make a delightful addition to:
- Potlucks: Easily transportable and always a hit!
- Dinner parties: Pair with a refreshing fruit salad or a light spring mix to balance the richness.
- Office celebrations: Individual servings simplify sharing—who wouldn’t want a mini cheesecake?
Embrace these serving suggestions, and watch your desserts disappear! For more inspiration, check out this guide on perfect potluck dishes.
Time Breakdown for Mini No-Bake Cheesecakes
Preparation Time
Getting everything ready for your mini no-bake cheesecakes takes about 30 minutes. This includes making the graham cracker crust and preparing the creamy filling.
Chilling Time
Once you've assembled your little desserts, pop them in the fridge for at least 3 hours. This chilling time is essential for the cheesecakes to set properly.
Total Time
In total, you're looking at around 3 hours and 30 minutes from start to finish. Perfect for a delicious and stress-free dessert!
For more quick and delightful desserts, check out Sally's Baking Addiction for more inspiration!
Nutritional Facts for Mini No-Bake Cheesecakes
When indulging in delightful mini no-bake cheesecakes, it’s helpful to know what’s in each serving. Here’s a quick breakdown of their nutritional value to help you enjoy them guilt-free.
Calories
Each mini cheesecake packs approximately 250 calories. While that’s a treat, it’s a lot less than some traditional cheesecakes, making it an enjoyable yet portion-controlled dessert option.
Sugars
With around 15 grams of sugar per serving, these cheesecakes bring just the right amount of sweetness. Consider using natural sweeteners like honey or maple syrup for a healthier twist!
Fats
Containing about 18 grams of fat, the combination of cream cheese and heavy cream provides that rich, creamy texture we adore. To lighten it, you could opt for reduced-fat cream cheese without sacrificing your flavor experience.
Whether you're prepping for a dinner party or simply treating yourself, understanding these nutritional facts helps you make informed choices while enjoying your delicious mini no-bake cheesecakes! For more insights on healthy desserts, check out the American Heart Association's guidelines on nutrition.
FAQ about Mini No-Bake Cheesecakes
How long can I store mini cheesecakes in the fridge?
You can keep your delightful mini no-bake cheesecakes in the refrigerator for up to 5 days! Just make sure they’re covered properly with aluminum foil or plastic wrap to maintain their velvety texture. If you’re making them a day or two ahead, this makes them an ideal dessert for gatherings or meal prep.
Can I use a different type of cookie for the crust?
Absolutely! While graham crackers give a classic taste, you can experiment with various cookies for the crust. Options like Oreos, Digestive biscuits, or even shortbread can add unique flavors and textures to your mini no-bake cheesecakes. Just ensure you adjust the sugar levels accordingly based on the sweetness of the cookies.
What is the best way to serve mini cheesecakes at a party?
For an impressive presentation at your next gathering, consider displaying your mini no-bake cheesecakes on a tiered stand or a colorful platter. You can drizzle them with toppings beforehand or set up a toppings bar where guests can personalize their desserts. Fun and interactive, right?
Conclusion on Mini No-Bake Cheesecakes
Mini no-bake cheesecakes are the ideal dessert for gatherings or a sweet treat at home. With their creamy texture and customizable toppings, they're both delightful and versatile. Easy to prepare, these mini delights allow anyone to impress with a delicious dessert that requires minimal effort. Enjoy every bite!
Mini No-Bake Cheesecakes
Equipment
- 12-count muffin pans
- cupcake liners
- Food Processor
- electric mixer
- silicone spatula
- Piping bag
Ingredients
Graham Cracker Crust
- 2 cups graham cracker crumbs (about 16 full sheet graham crackers)
- ⅓ cup brown sugar packed light or dark
- ½ cup unsalted butter melted
Filling
- 1 cup heavy cream cold
- 16 ounces cream cheese full-fat brick, softened to room temperature
- ⅓ cup granulated sugar
- 2 Tablespoons sour cream or plain yogurt, at room temperature
- 1 teaspoon fresh lemon juice
- ½ teaspoon pure vanilla extract
- optional toppings your desired toppings (see recipe Note)
Instructions
Preparation
- Line two standard 12-count muffin pans with cupcake liners. Make sure you have room in your refrigerator for both pans.
- Prepare the crust: Use a food processor to pulse the graham crackers into fine crumbs. Stir in brown sugar and melted butter until combined. Spoon 1.5 tablespoons of the mixture into each cupcake liner and pack it down.
- Optional: Bake the crusts in a 350°F (177°C) oven for 5 minutes, then cool for 10 minutes before adding filling.
- Make the filling: Whip the cold heavy cream into stiff peaks, then set aside. Beat the cream cheese and granulated sugar until smooth, then add sour cream, lemon juice, and vanilla extract.
- Fold the whipped cream into the cheesecake filling until combined.
- Transfer the filling over the crusts using a spoon or piping bag, smoothing the tops.
- Refrigerate the mini cheesecakes for at least 3 hours or up to 2 days before serving. Cover if refrigerating longer.
- Keep refrigerated until ready to serve. Serve with optional toppings.
- Store leftovers in the refrigerator for up to 5 days.

Leave a Reply