
Introduction to Sourdough Starter Recipe
The allure of homemade sourdough
There's something incredibly satisfying about creating your own sourdough starter. It’s not just about the end product (though we all know that a loaf of freshly baked sourdough is hard to resist!). It’s the process that hooks you in – the nurturing, the waiting, and ultimately, the transformation. With a bit of dedication, you can cultivate a living culture that’s full of flavor and personality, perfect for your baking adventures.
Making sourdough is like a science experiment, but one that yields delicious results. Each day, as you feed your starter with flour and water, you're not only fostering wild yeast but also building a connection with your food. Many bakers swear by the unique tang and texture that comes from using a homemade starter, which you just can’t replicate with store-bought options.
If the idea of crafting a vibrant, bubbly starter excites you, you're in the right place. Our sourdough starter recipe offers a straightforward guide to get you started on this flavorful journey. And remember, every starter is unique – much like the baker who creates it. Ready to dive into the world of sourdough? Let's get started!
For more inspiration on baking techniques, check out King Arthur Baking for tips and tricks.

Ingredients for Your Sourdough Starter
Essential ingredients for a successful starter
Creating a sourdough starter recipe begins with just a few simple ingredients that come together to create magic. The essential components include:
- Whole grain flour (preferably organic), which is rich in nutrients and encourages the growth of active yeast and bacteria.
- All-purpose flour to maintain and feed your starter as it matures.
- Filtered water to keep the environment clean and conducive for your starter’s growth.
These three ingredients are all you need for a robust sourdough starter that thrives on consistency and care. Remember, effective fermentation relies on nurturing the right balance of microorganisms.
Flour choices: Why whole grain matters
Using whole grain flours like rye or whole wheat plays a crucial role in your starter’s development. These flours contain more nutrients and enzymes compared to their refined counterparts, encouraging healthy yeast growth. Whole grain flours provide the food necessary for fermentation, ensuring a lively and bubbly starter. Plus, a heartier flavor profile will shine through in your final baked goods. If you're curious about the best flour options, check out resources from the King Arthur Baking Company.
Embrace the adventure of crafting your sourdough—it's more than just baking; it's about creating a living, breathing culture!
Step-by-step preparation of the Sourdough Starter
Creating a sourdough starter is a rewarding journey that breathes life into baking and gives your bread a unique flavor. Let's roll up our sleeves and dive into the process, one day at a time.
Day 1: Initiating your starter
Your sourdough adventure begins here! Start by choosing a clean glass or plastic jar (avoid metal, as it can react with the starter). Record the jar's weight and label it with today's date. This helps track the growth.
- Add 100 grams (¾ cup) of your chosen whole grain flour (rye or whole wheat) to the jar.
- Mix in 100 grams (½ cup) of room temperature filtered water.
- Stir well using a fork until you achieve a thick, lumpy batter. Scrape down the sides and cover loosely with a lid (a rubber band around the jar can mark growth). Let it sit at room temperature for the next 24 hours. Your starter is officially born!
Day 2: Patience is key
On day two, you might not notice any drastic changes. That's normal! Whether it looks the same or shows tiny bubbles, let it rest for another 24 hours. This phase is all about patience as your wild yeasts get to work—trust the process!
Day 3: Growth begins
Hooray! On day three, you might see some visible growth and tiny bubbles forming. It’s a good sign!
- Discard half of the starter (roughly 100 grams) to prevent overflow.
- Feed it by adding 100 grams (¾ cup) of all-purpose flour and 100 grams (½ cup) of room temperature water.
- Stir thoroughly, cover loosely, and let it rest for another 24 hours.
Day 4: Understanding the bubbles
By now, you should have even more bubbles. This means that fermentation is increasing!
- Again, discard half of the starter, leaving about 100 grams.
- Add 100 grams of all-purpose flour and 100 grams of water. Stir and cover loosely, allowing it to sit for another day. If your starter appears slow, keep feeding it—sometimes yeast just needs a little extra love!
Day 5: Consistency in growth
Consistency is crucial at this point. You may notice your starter has a pleasant sour aroma and a bubbly texture.
- Discard down to 100 grams again, feed it 100 grams of all-purpose flour, and mix in 100 grams of water. Let it rest for 24 hours.
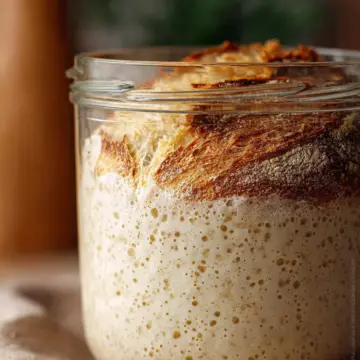
Days 6-7: Ready for action
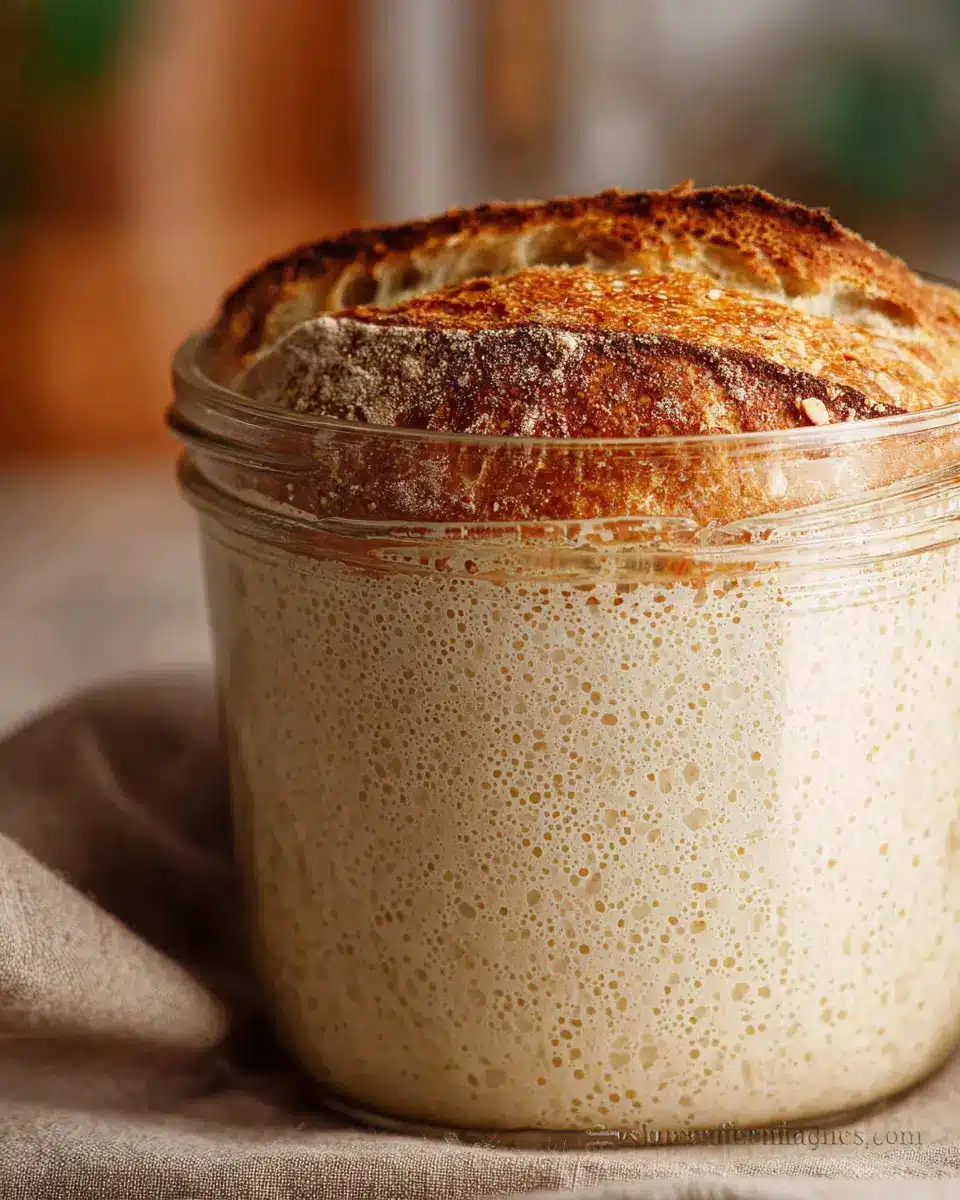
On days six and seven, you should see your starter doubling in size—this is what you’ve been waiting for!
- Once again, discard half, add 100 grams of all-purpose flour and 100 grams of water, and stir. Watch it grow!
Perform the “float test” by dropping a dollop of starter into a glass of water. If it floats, congratulations! Your sourdough starter is ready to elevate your baking game. If it doesn’t, don’t fret; it may just need more time.
Feel free to use your starter in various bread recipes, and share your sourdough starter recipe adventures with friends. The deliciously tangy bread in your future will be worth the wait! Happy baking!
Variations on Sourdough Starter
Rye vs. Whole Wheat: Which is better?
When it comes to choosing between rye and whole wheat flour for your sourdough starter recipe, the decision can significantly impact flavor and fermentation. Rye flour tends to create a more robust and tangy starter thanks to its higher nutrient content and natural sugars. This flour leads to a quicker fermentation process, making it a favorite for those looking for faster results. Whole wheat, on the other hand, offers a milder flavor and can yield a well-balanced starter. Both flours can create a successful sourdough starter, so experiment and see which flavor profile delights your palate more.
Gluten-free alternatives
If you’re avoiding gluten, don’t worry! You can still enjoy making your own sourdough. Consider using brown rice flour or buckwheat flour as a base for your sourdough starter recipe. These alternatives require slightly different feeding schedules but can yield excellent results. Some enthusiasts even swear by using chickpea flour, which adds a unique flavor to your bread. Just ensure you maintain a consistent feeding routine to cultivate healthy wild yeast cultures, helping you create delicious gluten-free bread that rivals its traditional counterpart. For more information on gluten-free baking, check out The Gluten-Free Baker.
Cooking Tips and Notes for Your Sourdough Starter
Temperature and Water Quality Do Matter
When it comes to your sourdough starter recipe, the right temperature and water quality play a significant role. Aim for a cozy environment between 68-75°F to help your yeast thrive. If your kitchen tends to be on the cooler side, consider using lukewarm water to kickstart the process. Additionally, always opt for filtered or spring water; chlorine can be a hurdle for your starter's growth. Did you know that letting tap water sit out for 24 hours can effectively dechlorinate it?
The Importance of Consistency
Consistency in feeding your starter can make all the difference. Try to keep your feeding schedule at the same time each day. Your starter will thank you by becoming active and bubbly! Remember, patience is key—some starters take longer to develop than others, so don’t rush the process or keep it in overly warm environments, as that may exhaust the yeast. For guidance on maintaining the health of your starter, check out resources like King Arthur Baking.

Serving suggestions for Sourdough Bread
Mix and match: Jam, butter, or smoked salmon
When it comes to enjoying your freshly baked sourdough bread, the possibilities are endless! Try spreading a generous layer of butter for a rich, creamy base. For a touch of sweetness, opt for your favorite jam—raspberry or fig works wonderfully. If you're feeling adventurous, indulge in smoked salmon with a sprinkle of capers and cream cheese for a savory delight. Each of these spreads enhances the tangy flavor of your bread and can easily be matched to your mood or the occasion.
Pairing your sourdough with dishes
Sourdough bread is not just a side; it can elevate any meal. Pair it with a warm bowl of tomato soup for a classic lunch, or serve it alongside your favorite salad for a delightful crunch. What about a cheese platter? Choose a mix of your favorites like sharp cheddar or brie—sourdough makes an excellent delivery vehicle for every cheesy bite. Don't forget a hearty stew or chili—tearing off pieces of bread for dipping adds an interactive element to your dining experience. For more creative serving suggestions, consider checking out this guide on pairing breads and dips for all occasions.
Time Breakdown for Sourdough Starter
Preparation Time
Creating your sourdough starter is a rewarding journey that begins with just a few minutes on Day 1. Mixing your initial ingredients takes about 10 to 15 minutes. Ensure you have a clean jar and your flour and water ready to go!
Feeding Time
After the initial preparation, you'll spend just a few minutes each day feeding your starter—around 5 minutes for each feeding. This involves discarding some of your starter and adding fresh flour and water. It’s a simple, nurturing process that builds character in your starter.
Total Project Timeframe
The complete process to develop a robust sourdough starter typically spans 7 days. With consistent feeding and care, you’ll notice visible growth and plenty of bubbles by the end of this timeframe. Patience is key, but the results are worth the wait!
For more tips on nurturing your starter, check out resources like King Arthur Baking or Culture Magazine to deepen your sourdough baking skills.
Nutritional Facts for Sourdough Bread
Calories per slice
A typical slice of sourdough bread contains approximately 80-100 calories, making it a smart choice for a wholesome meal option. When enjoyed in moderation, it can easily fit into most dietary plans.
Benefits of Sourdough Over Other Bread Types
Sourdough bread boasts several nutritional advantages compared to conventional bread. The fermentation process used in sourdough starter recipes enhances the bioavailability of vitamins and minerals, making nutrients easier to absorb. Additionally, sourdough often has a lower glycemic index, which means it causes a slower rise in blood sugar levels, making it a better option for energy control.
For a deeper dive into the benefits of sourdough, check out this article from Healthline. It's fascinating how something as simple as sourdough can enhance your meals!
FAQs about Sourdough Starter
How can I tell if my starter is ready to use?
A healthy sourdough starter should roughly double in size within 4-6 hours of feeding and have a delightful sour aroma. To test its readiness, drop a dollop into a bowl of water; if it floats, it's perfect for baking! This flotation test is a great way to gauge the yeast’s activity.
What should I do if my starter isn’t bubbling?
If you notice little to no bubbles, don’t fret! It could simply be that your starter needs more time or a warmer environment. Ensure you're using non-chlorinated water and feeding it consistently. Sometimes, a change in flour type can also work wonders. For more tips on creating a bubbly starter, check out the Sourdough Companion.
How do I maintain my sourdough starter over time?
For those baking frequently, keep your starter at room temperature and feed it daily. If you bake less often, store it in the fridge and feed it weekly. Be sure to give it a bit of time at room temperature after removing it from the fridge before feeding—about 1-2 hours will do the trick. For more detailed maintenance tips, visit King Arthur Baking.
Conclusion on Sourdough Starter Recipe
Creating your own sourdough starter recipe is not just about baking; it's a journey of patience and flavors. By following these simple steps, you're not only crafting bread but also embracing a rewarding experience. Remember, each starter has its own personality. Enjoy the process and happy baking!
Sourdough Starter Recipe
Equipment
- jar
- Spatula
- Fork
- Rubber Band
Ingredients
Flours
- 100 g Whole Grain Rye Flour or Whole Wheat Flour Preferably organic
- 500 g All-purpose Flour Preferably organic and avoiding bleached flour
Water
- 1 qt Filtered water Room temperature, spring water is better
Instructions
Day 1 Make your Starter
- Record the weight of your jar in grams before adding anything and label the jar with your starting date.
- Add 100 grams of whole wheat or rye flour and 100 grams of water. Stir together thoroughly, scrape down the sides, cover loosely, and let it rest for 24 hours.
- Mark the growth of your starter with a rubber band and label the jar.
Day 2: No Changes Noted
- Likely nothing is happening. Let it rest for another 24 hours.
Day 3 (stage 2) Visible Growth and Bubbles in Jar
- Remove and discard half of the starter, keeping 100 grams.
- Add 100 grams of all-purpose flour and 100 grams of room temp water. Stir thoroughly and rest for 24 hours.
Day 4
- Remove and discard all but 100 grams of starter. Add 100 grams of all-purpose flour and 100 grams of water. Stir thoroughly and rest for 24 hours.
Day 5: Visible growth and bubbles.
- Repeat the process of discarding all but 100 grams and adding flour and water. Stir thoroughly and rest for 24 hours.
Day 6-7: Your starter may double or more
- Repeat the process until the starter doubles in volume.
Testing Your Starter
- When ready, your starter should peak between 4-6 hours and smell sour. Drop a dollop into water; if it floats, it’s ready to use.
How to Maintain your starter
- For frequent bakers, store at room temperature and feed every 24 hours. For casual bakers, store in the fridge and feed weekly.


Leave a Reply