
Introduction to Blooming Onions
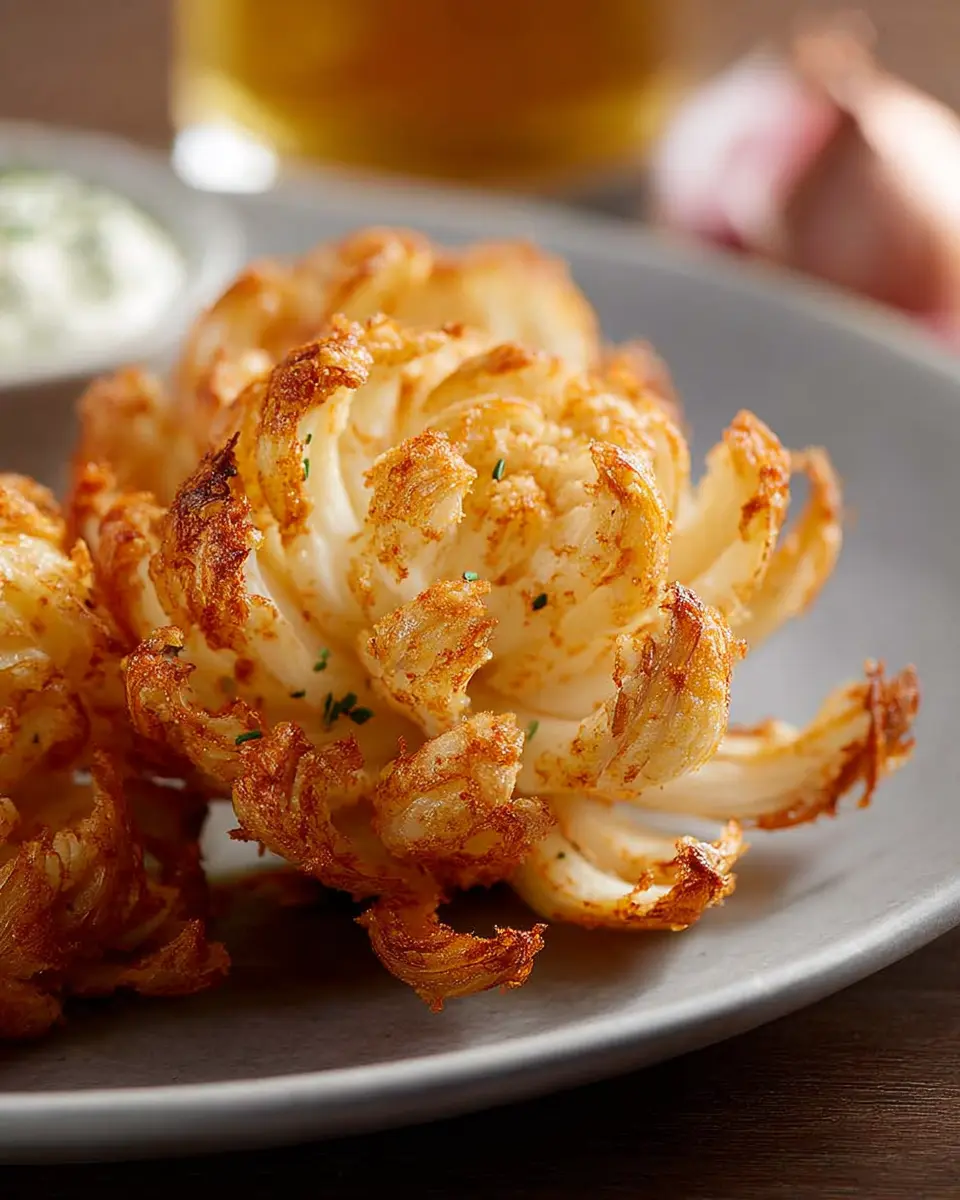
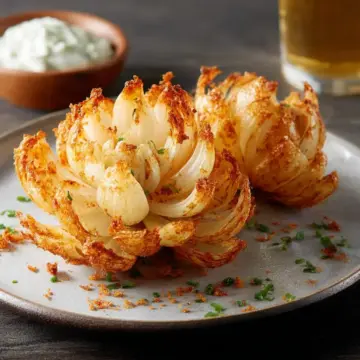
When it comes to snacking, blooming onions stand out as a delightful choice that’s both fun to eat and easy to make at home. Imagine this: crispy, golden petals of onion gently pulled apart, each holding a savory blend of flavors that make your taste buds dance. Whether you’re hosting friends for a game night or just craving a tasty treat on a quiet evening, blooming onions can effortlessly elevate your snacking game.
Why are they the perfect homemade snack? For starters, they’re customizable! You can adjust the seasoning, experiment with dipping sauces, and play with cooking methods—from baking to frying. According to the National Onion Association, onions are not only delicious but also packed with vitamins and antioxidants, making blooming onions a surprisingly healthy indulgence when prepared thoughtfully.
Beyond nutrition, blooming onions also create an experience. The way they bloom and present themselves adds a touch of artistry to your table. Plus, making them from scratch allows you to control the quality of ingredients, ensuring a fresher and more satisfying snack. So why not gather your ingredients and create this deliciously unique treat? It might just become your new go-to appetizer!
For the full delicious recipe, check out our section on blooming onions below!
Ingredients for Blooming Onions
Essential ingredients for a perfect blooming onion
Creating mouthwatering blooming onions starts with the right ingredients. Here’s what you’ll need for this delicious treat:
- 2 large sweet onions: These provide the perfect sweetness and texture.
- 1 tablespoon melted butter: A must for that rich flavor.
- 2 teaspoons Dijon mustard: For a zesty kick!
- 3 tablespoons dry bread crumbs: These create that delightful crunch.
- ¼ teaspoon salt and pepper: Essential for enhancing flavor.
For the sauce, you’ll need:
- ¼ cup fat-free sour cream
- ¼ cup fat-free mayonnaise
- 1-½ teaspoons dried minced onion
- ¼ teaspoon garlic powder
- ¼ teaspoon dill weed
These ingredients work in harmony to create a crispy exterior and a beautifully tender inside.
Suggested substitutes for dietary restrictions
If you have dietary restrictions, don’t worry! Here are some great substitutes:
- Instead of butter, you can use olive oil for a vegan option.
- For a gluten-free alternative, swap out the dry bread crumbs with gluten-free breadcrumbs or crushed nuts.
- If you’re avoiding dairy, consider using dairy-free sour cream and mayo.
Feel free to mix and match these ingredients to suit your needs while still savoring those delicious blooming onions! For more cooking tips, check out resources like the USDA Food Composition Database for nutritional information.
Step-by-step Preparation of Blooming Onions
Creating delicious blooming onions at home is easier than you might think! With just a few simple steps, you can impress friends and family with this crowd-pleasing appetizer. Let's dive into the preparation process together.
Prepping the onions
Start your blooming onion journey by selecting two large sweet onions. Sweet onions are ideal because their flavor adds a delightful touch when baked.
- Slice off about ½ inch off the tops of each onion and peel away the outer skin.
- Using a sharp knife, carefully cut each onion into 16 wedges. Make sure to cut down to about ½ inch from the root end—this helps hold the onion together while it bakes. For a detailed guide on how to cut onions, you can check out Serious Eats.
Baking the onions to perfection
Once your onions are prepped, it’s time to create that lovely tender texture.
- Place each onion on a double layer of heavy-duty foil (around 12 inches square).
- Wrap the foil around the onions tightly to create a sealed pocket and arrange them in an ungreased 11x7-inch baking dish.
- Bake in a preheated oven at 425°F for 20 minutes. This initial steaming phase softens the onion for better flavor and structure.
Making the butter and mustard mixture
While the onions are baking, prepare the buttery, flavorful mixture that will soon coat your blooming onions.
- In a small bowl, combine 1 tablespoon of melted butter and 2 teaspoons of Dijon mustard.
- This combo adds a savory kick that complements the sweetness of the onion wonderfully.
Adding the final touches with bread crumbs
Once the onions have steamed, they’re ready for the final touch!
- Carefully unwrap the foil to expose the onions.
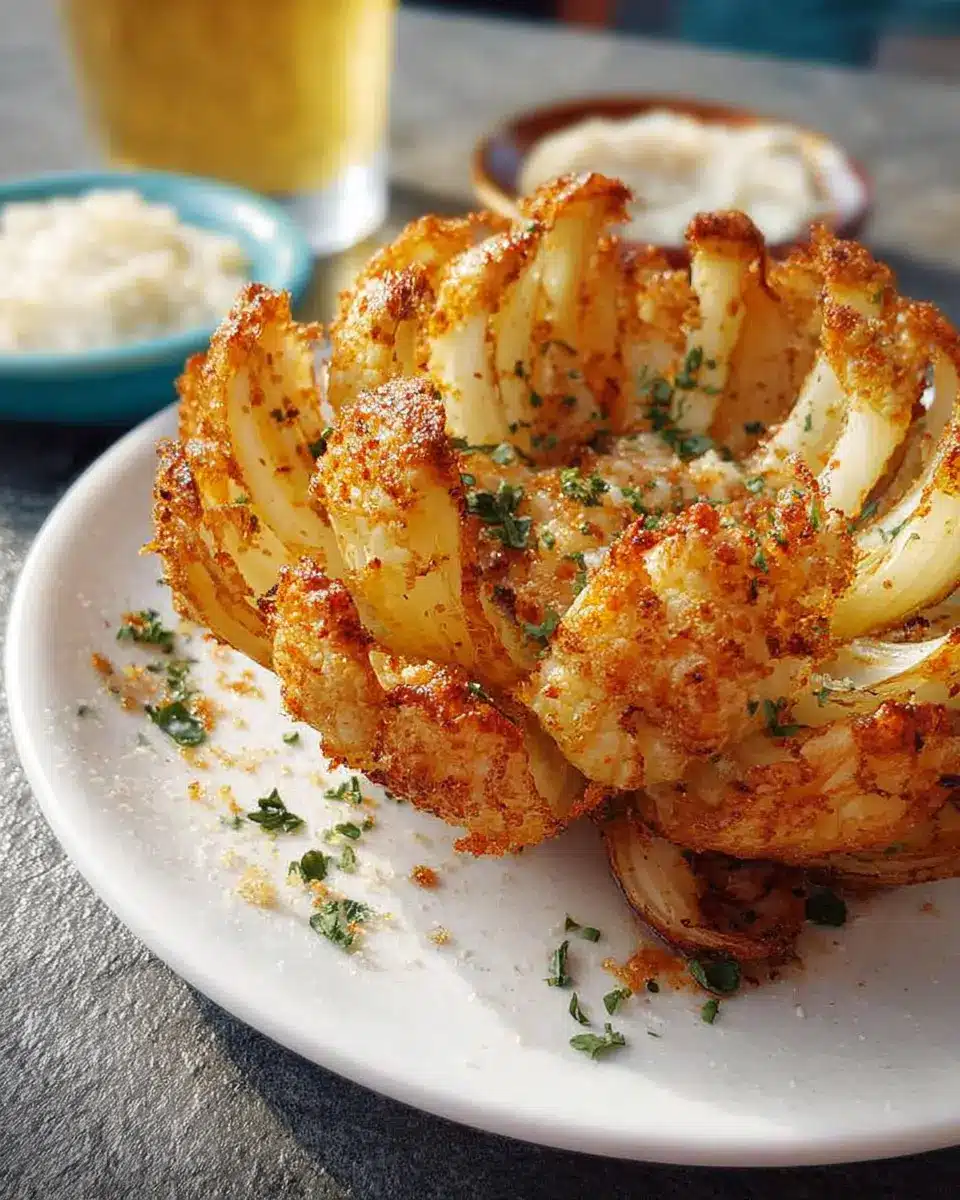
- Brush the butter and mustard mixture generously over the onions. Next, sprinkle them with 3 tablespoons of dry bread crumbs, along with a dash of salt and pepper.
- Pop those onions back in the oven, uncovered, for an additional 18-22 minutes. This will give them that crisp-tender texture we all love in a blooming onion.
Preparing the dipping sauce
No blooming onion experience is complete without a delicious dipping sauce!
- In a small bowl, combine ¼ cup of fat-free sour cream, ¼ cup of fat-free mayonnaise, 1-½ teaspoons of dried minced onion, ¼ teaspoon of garlic powder, and ¼ teaspoon of dill weed.
- Mix well and let it chill in the refrigerator for maximum flavor.
And there you have it—your blooming onions are ready to be served alongside the creamy dipping sauce! Enjoy this delightful dish that’s sure to be a hit at your next gathering. For more innovative recipes, check out blogs like Minimalist Baker for culinary inspiration!
Variations on Blooming Onions
Spicy Blooming Onions
If you’re looking to kick things up a notch, try these spicy blooming onions. Just add a teaspoon of cayenne pepper or your favorite hot sauce to the butter mixture before brushing it onto the onions. For an extra layer of flavor, consider incorporating diced jalapeños into the bread crumb topping. This will provide a delightful kick that pairs perfectly with the creamy dipping sauce!
Cheesy Blooming Onions
Cheese lovers will adore cheesy blooming onions. Grate some sharp cheddar or pepper jack cheese and sprinkle it generously over the bread crumbs. For an even heartier flavor, melt a little cream cheese into the butter mixture. The gooey goodness that oozes from the petals as you pull them apart will have everyone reaching for more. Want more tips? Check out this cheesy recipes guide for inspiration.
These variations not only enhance the classic recipe but also showcase your creativity in the kitchen!
Cooking Tips and Notes for Blooming Onions
Tools and Equipment You'll Need
To create your delicious blooming onions, the right tools can make all the difference! Here's what you’ll need:
- Sharp Knife: For that perfect onion cut.
- Baking Dish: A reliable 11x7-inch dish works best.
- Heavy-Duty Foil: To help steam your onions before finishing in the oven.
- Mixing Bowls: For combining ingredients like the butter mixture and dipping sauce.
Common Mistakes to Avoid
When preparing blooming onions, it's easy to trip up. Here are some tips to keep your dish on point:
- Cutting Too Deep: Make sure to cut your onion wedges without slicing all the way through; this keeps everything intact.
- Overcrowding the Oven: If you’re making multiple servings, bake them in batches for even cooking.
- Ignoring Personal Taste: Don’t hesitate to tweak the seasonings or dipping sauce to match your palate.
For more details on onion types and preparation techniques, check out this guide from the National Onion Association. Enjoy your culinary journey!

Serving Suggestions for Blooming Onions
Perfect Pairings for Dipping Sauces
Nothing elevates blooming onions like the perfect dipping sauce! While the creamy garlic sauce in the recipe is a classic, consider mixing it up with options like:
- A zesty honey mustard for a sweet and savory bite.
- A tangy barbecue sauce for those who enjoy a smoky flavor.
- An herby yogurt sauce with fresh dill or cilantro for a refreshing twist.
Dipping sauces can be versatile—explore different flavors to match your mood!
Ideal Occasions to Serve Blooming Onions
Blooming onions are perfect for a variety of occasions. Think of them for:
- Game Day: They make for great finger food while watching the game.
- Family Gatherings: Serve them as a fun appetizer that everyone can enjoy together.
- Cookouts: Pair these delightful treats with grilled chicken ham and vegetables for a stellar barbecue spread.
Whatever the occasion, blooming onions are sure to impress your guests! Looking for more inspiration? Check out this guide on entertaining to help you elevate your gatherings.
Time Breakdown for Blooming Onions
Preparation time
Getting your blooming onions prepped takes about 15 minutes. You'll be slicing and dicing those onions, so don’t forget to have your sharp knife at the ready!
Baking time
The actual baking stretches over two stages: First, you’ll cover and bake for 20 minutes, then uncover for another 18-22 minutes until they’re perfectly crisp-tender.
Total time
All in all, you’re looking at around 55-60 minutes from prep to plate. Trust us, the outcome is worth every second!
For more tips on perfecting your onions, check out these cooking techniques. And if you ever feel like diversifying your onion game, be sure to explore other delicious onion recipes on Food Network.
Nutritional Facts for Blooming Onions
Calories per serving
Each serving of blooming onions contains approximately 65 calories, making it a relatively low-calorie option for your appetizer or snack cravings. This allows you to enjoy a tasty treat without significantly impacting your daily caloric intake.
Breakdown of macronutrients
In terms of macronutrients, one serving of blooming onions provides:
- Fat: 2g (1g saturated fat)
- Cholesterol: 6mg
- Sodium: 205mg
- Carbohydrates: 11g
- Sugars: 5g
- Fiber: 1g
- Protein: 2g
These stats make blooming onions a delightful choice that offers a mix of flavors while being mindful of your dietary needs. For those monitoring their nutritional intake, it's certainly worth considering the balance of crunchy goodness and light indulgence.
For more about maintaining a balanced diet, check out articles from Nutrition.gov or the American Heart Association for expert tips!
FAQs about Blooming Onions
Can I make blooming onions in advance?
Absolutely! You can prep your blooming onions ahead of time by slicing and seasoning them. Just wrap them tightly in foil, place them in the fridge, and bake them when you’re ready to serve. This way, you'll have more time to enjoy your guests!
How do I store leftovers?
If you have any blooming onions left over (which can be rare!), simply store them in an airtight container in the fridge. They’ll last about 2-3 days. To reheat, pop them in the oven or air fryer for a few minutes until crispy again. Check out this storage guide for more tips!
Can I use onion alternatives for blooming onions?
Certainly! While traditional recipes call for large sweet onions like Vidalia, you can experiment with Vidalia onion alternatives such as shallots or even sweet potatoes if you're seeking a veggie twist. They won’t bloom the same, but can still deliver great flavor!
Conclusion on Blooming Onions
Why you should try making blooming onions at home
Making blooming onions at home is a rewarding culinary adventure that impresses guests and satisfies your cravings. They’re easy to prepare, and you can customize the flavors to suit your taste. Enjoy this crispy, flavorful delight at your next gathering for a guaranteed hit!
By exploring more about cooking techniques and ingredients, you can enhance your culinary skills and find inspiration for future recipes. For further tips on making the perfect appetizer, check out Top Cooking Techniques for some great insights.
Blooming Onions
Equipment
- Oven
- baking dish
- Foil
- Mixing Bowl
- knife
Ingredients
Onions
- 2 large sweet onions
Toppings
- 1 tablespoon butter, melted
- 2 teaspoons Dijon mustard
- 3 tablespoons dry bread crumbs
- ¼ teaspoon salt
- ¼ teaspoon pepper
Sauce
- ¼ cup fat-free sour cream
- ¼ cup fat-free mayonnaise
- 1-½ teaspoons dried minced onion
- ¼ teaspoon garlic powder
- ¼ teaspoon dill weed
Instructions
Preparation and Baking
- Preheat oven to 425°. With a sharp knife, slice ½ in. off the top of each onion; peel onions. Cut each into 16 wedges to within ½ in. of root end.
- Place each onion on a double thickness of heavy-duty foil (about 12 in. square). Fold foil around onions and seal tightly. Place in an ungreased 11x7-in. baking dish. Bake for 20 minutes.
- In a small bowl, combine butter and mustard. Open foil. Brush butter mixture over onions; sprinkle with bread crumbs, salt and pepper.
- Bake, leaving foil open, until crisp-tender, 18-22 minutes.
- Meanwhile, in a small bowl, combine sauce ingredients. Serve with onions.

Leave a Reply