
Introduction to Homemade Apple Cider
When it comes to fall favorites, homemade apple cider surely tops the list! There's just something magical about the aroma of simmering apples, spices, and sugar wafting through your home. But why make it yourself instead of picking up a bottle from the store?
Why make homemade apple cider?
Here are a few reasons to roll up your sleeves and try this delightful project:
-
Freshness: By making your own cider, you can use the freshest apples, ensuring optimal flavor and nutrition. Plus, you control what goes in, avoiding preservatives often found in store-bought options.
-
Customization: Homemade cider is all about personal preference. Want it a bit sweeter? Add more sugar. Prefer a spicier kick? Adjust the cinnamon and allspice to your heart's content!
-
Cost-effective: If you're a regular cider drinker, making your own can save you some bucks, particularly during apple season when prices are low.
If you’re ready to dive into this flavorful endeavor, keep reading for a straightforward recipe that yields about 16 servings of cozy, spiced goodness. First, let’s gather your ingredients and get started on creating a warming treat that’s perfect for any gathering or a quiet night in. For more tips on selecting the best apples, check out resources like Purdue University's Extending Apples.

Ingredients for Homemade Apple Cider
Creating your own homemade apple cider is not only a fun project but also a delightful way to enjoy the flavors of fall. To grab your taste buds' attention, let’s talk about the key ingredients you'll need.
Essential Ingredients
To make a hearty batch of cider, gather the following:
- 10 large apples, quartered: This will form the base of your cider.
- Water, to cover: Ensure the apples are fully submerged for maximum flavor extraction.
- ¾ cup white sugar: This adds sweetness and helps balance the natural tartness of the apples.
- 1 tablespoon ground cinnamon: For a warm, comforting spice.
- 1 tablespoon ground allspice: It enhances the complexity of flavors.
Suggested Apples for Best Flavor
For the most delicious homemade apple cider experience, consider using a mix of apple varieties. Honeycrisp, Granny Smith, and Fuji are fantastic options that complement each other beautifully. Honeycrisp brings a sweet crunch, Granny Smith offers tartness, and Fuji adds a rich depth of flavor. You can also explore local apple varieties at your nearby farmers' market for even fresher options!
Ciders made from a blend not only taste better but also create a unique profile that can delight your palate. Now that you have the essentials, let’s jump into the cooking process!
Step-by-step preparation of Homemade Apple Cider
Creating your own homemade apple cider is a wonderful way to embrace the delicious flavors of autumn right in your kitchen. Plus, it’s a fun and rewarding process! Let's walk through the steps together.
Gather the ingredients
Before you embark on your cider-making adventure, let's ensure you have everything you need. For this recipe, gather:
- 10 large apples, quartered (mix different varieties for complexity!)
- Enough water to cover the apples by at least 2 inches
- ¾ cup white sugar
- 1 tablespoon ground cinnamon
- 1 tablespoon ground allspice
Gathering these ingredients is the first step in crafting a cozy drink that will warm the hearts of your friends and family. If you want to learn more about the benefits of each ingredient, check out this article from Healthline.
Prepare the apples
Once you've rounded up your ingredients, it's time to prepare those apples! Start by washing them thoroughly to remove any dirt or pesticide residues. After washing, quarter each apple. Don't worry about removing the peels or cores – they’ll infuse the cider with beautiful flavor as they cook.
Placing all your cut apples into a large stockpot is next. This will be your cider laboratory, so make sure it's big enough to hold everything without making a mess!
Cooking the mixture
Now, let’s get cooking! Add water to the pot until it covers the apples by at least 2 inches. Stir in the sugar, cinnamon, and allspice, and bring the mixture to a boil over medium-high heat.
Here’s where the magic begins! Allow the pot to boil uncovered for about 1 hour. After boiling, reduce the heat to low, cover it, and let it simmer for 2 hours. This slow cooking process extracts all the flavors and aromas, filling your kitchen with an irresistible scent!
Straining the cider
Once your kitchen smells heavenly, it's time to strain the mixture. Using a fine-mesh sieve, pour the cooked apple mixture to separate the liquid from the solids. You can discard the solids freely, as they’ve done their job to enrich the cider.
For an extra smooth finish, drain the cider again through a cheesecloth-lined sieve, ensuring there are no bits left in your final drink. And voilà! You now have fresh, homemade apple cider!
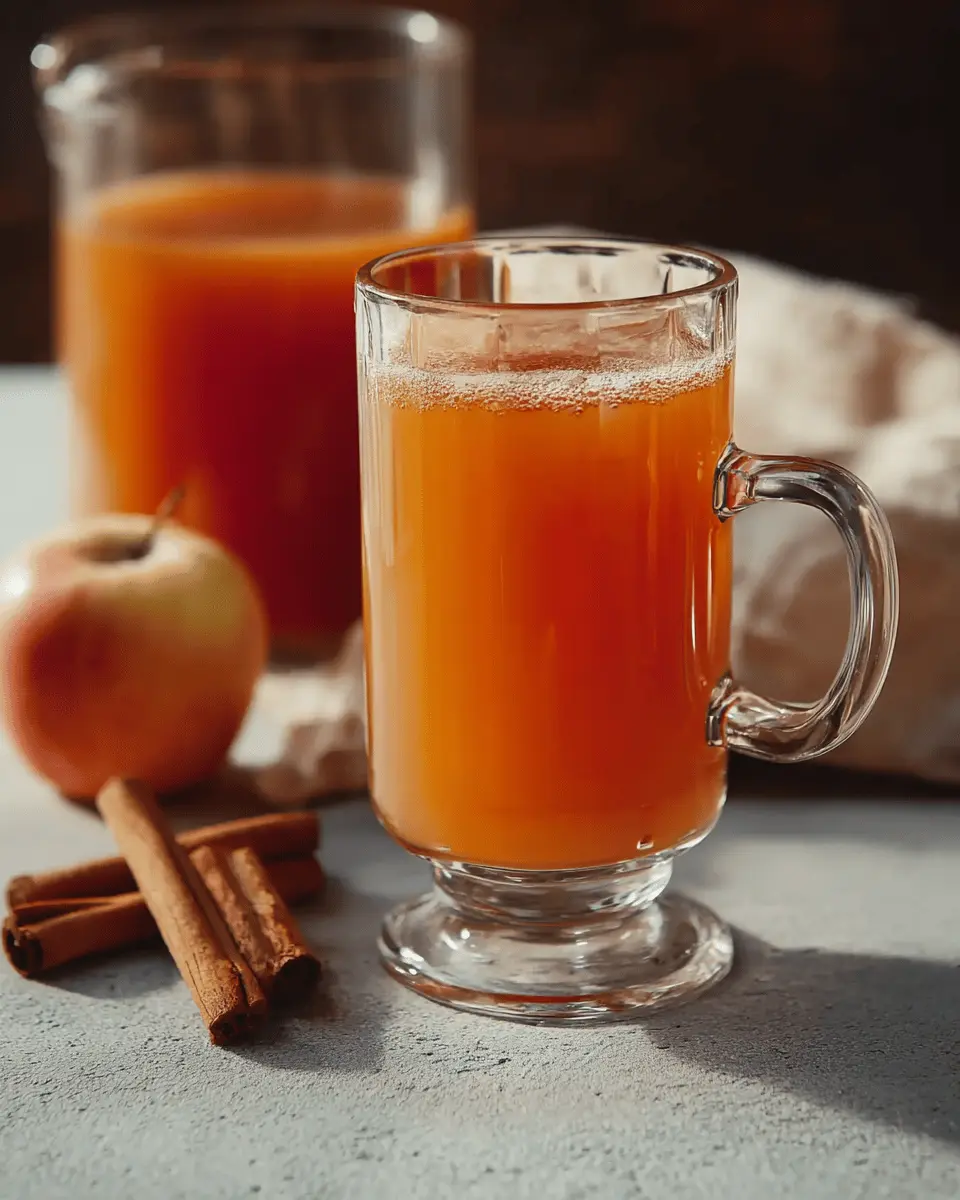
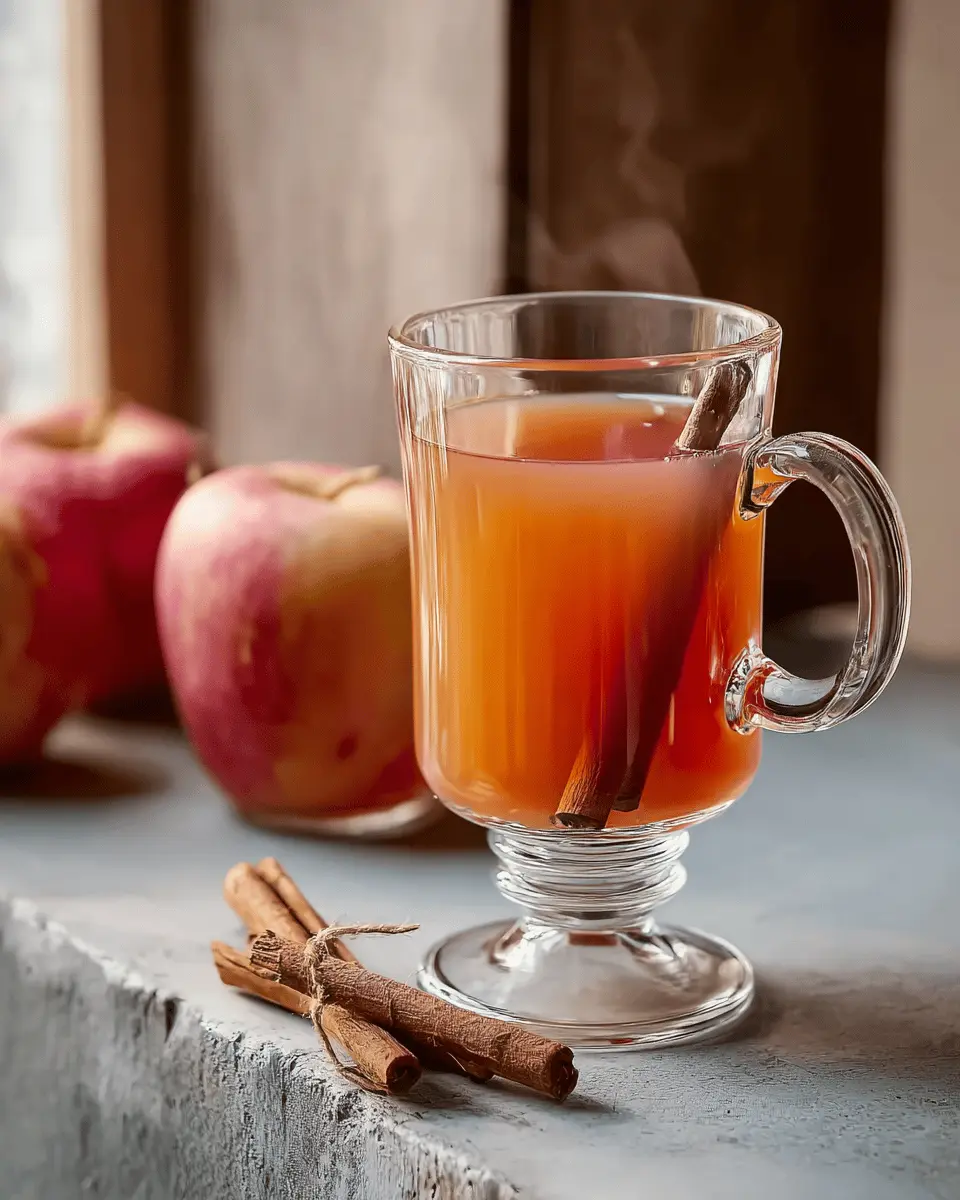
Serving the cider
This is the moment you’ve been waiting for! You can serve your homemade apple cider warm, which is perfect for chilly evenings, or refrigerate it until cold for a refreshing drink on warmer days.
Consider garnishing with a cinnamon stick or apple slice for a lovely presentation. This cider is an excellent choice for gatherings or cozy nights in, making it an ultimate crowd-pleaser. Enjoy sharing this warm beverage with beloved friends while you reminisce about fun apple-picking trips!
Variations of Homemade Apple Cider
Spiced Apple Cider
Elevate your homemade apple cider by introducing additional spices! A blend of cloves, nutmeg, and a hint of ginger can transport your drink to a whole new level of warmth and comfort, making it perfect for chilly evenings. Simply add about ½ teaspoon of each spice to the pot during the simmering stage for an irresistibly aromatic experience.
Fruity Blends
Why stick to just apples? Experiment with different fruits like pears, cranberries, or even oranges. Adding these will create a delightful fruity twist and vibrant flavor profile. For a fun blend, toss in some cut-up dried fruits or a splash of pomegranate juice after straining. You might discover a new favorite that’s worth sharing!
For more creative apple cider ideas, check out this article.
Cooking Tips and Notes for Homemade Apple Cider
Tips for Selecting Apples
When crafting your Homemade Apple Cider, the apple variety you choose can make all the difference. Aim for a blend of sweet and tart apples for the best flavor balance. Varieties like Honeycrisp, Fuji, and Granny Smith work wonderfully together. Fresh, crisp apples are ideal—consider visiting a local orchard for the freshest picks! For more insight on apple varieties, check out this apple guide.
Common Pitfalls to Avoid
To create the perfect cider, avoid overcooking your apples as this can lead to a bitter taste. Also, don't skimp on the sugar or spices; they elevate the flavor profile significantly. Lastly, be patient: let the cider simmer long enough to fully develop those rich, apple-infused notes. Remember, homemade cider is a labor of love!
By following these tips, you’ll create a delightful cider that warms your soul and impresses your friends. Enjoy the process!
Serving suggestions for Homemade Apple Cider
Best occasions to serve
Homemade Apple Cider is perfect for cozy gatherings and festive occasions. Imagine curling up with friends around a crackling fire during a fall evening or hosting a warm holiday brunch. It’s versatile enough to be served at Thanksgiving, Halloween parties, or even just a serene Sunday afternoon. Think of it as your go-to beverage to bring a touch of comfort and warmth into your home.
Pairing suggestions with food
When it comes to food pairings, Homemade Apple Cider complements a variety of savory dishes. Serve it alongside Turkey Bacon or Chicken Ham for a delightful brunch spread. You can also enjoy it with hearty stews or flavorful roasted vegetables; the cider's sweetness balances beautifully with rich flavors. For a fun twist, consider pairing it with cheese platters featuring aged cheddar or creamy brie.
For some great cheese pairing insights, check out resources from The Cheese Lover. Your guests will appreciate the thoughtful pairings, and it’ll elevate the experience!
Time Breakdown for Homemade Apple Cider
When you embark on making your own Homemade Apple Cider, it’s helpful to understand how the time commitment breaks down. Here’s a quick guide:
Preparation Time
You'll need about 15-20 minutes to gather and prepare your ingredients. This includes quartering the apples and measuring your spices.
Cooking Time
The cooking process will take roughly three hours in total — one hour for boiling and two hours for simmering.
Total Time
From start to finish, you’re looking at about three hours and 20 minutes, plus any time you'd like to spend chilling. The delicious aroma coming from your kitchen will be totally worth it!
Consider reading more about the health benefits of homemade cider in this article from Healthline. Enjoy the journey of crafting your own Homemade Apple Cider!
Nutritional Facts for Homemade Apple Cider
Calories per Serving
In just one serving of Homemade Apple Cider, you’re looking at around 120 calories. While cider is a delightful treat, it's essential to enjoy it in moderation, especially if you're watching your calorie intake.
Sugar Content
Each serving contains approximately 24 grams of sugar. Most of this sweetness comes naturally from the apples, but don’t forget the added sugar from the recipe. You can adjust the sugar content to your liking—for a healthier version, consider using less sugar or a natural sweetener.
Health Benefits
Homemade Apple Cider isn't just a delicious beverage; it offers several health perks. Apples are rich in antioxidants, dietary fiber, and vitamin C. Consuming apples can support heart health, aid in digestion, and even help regulate blood sugar levels. Plus, the warmth of cider can be soothing and comforting, especially in cooler weather.
For more information on the health benefits of apples, check out this article from the Harvard Health Blog. Enjoy your cider guilt-free while reaping its nutritional benefits!
FAQs about Homemade Apple Cider
Can I use different types of apples?
Absolutely! Mixing different apple varieties can enhance the flavor of your homemade apple cider. For instance, combining sweet apples like Fuji and Honeycrisp with tart ones like Granny Smith can create a well-balanced cider. Experimenting with heirloom varieties can also add unique taste dimensions, making your cider even more special.
How long can I store homemade cider?
After boiling and straining your cider, it will typically last in the refrigerator for about 1 week. If you want to extend its shelf life, consider freezing it in airtight containers for up to 6 months. Just be sure to leave some space in the containers, as liquids expand when frozen.
Can I make cider without sugar?
Definitely! If you’re looking to create a natural version of homemade apple cider, you can skip the sugar entirely or replace it with natural sweeteners like honey or maple syrup. Keep in mind that this may change the flavor profile, so taste as you go to find the sweetness that suits you!
For more tips on apple varieties, check out resources from The Fruit Guys and other experts in the field of apple cultivation and cider making.
Conclusion on Homemade Apple Cider
Making homemade apple cider is not just a delicious seasonal treat; it’s also an enriching experience. Enjoy the benefits of knowing exactly what goes into your cider, using fresh, natural ingredients. Plus, the warmth it brings on chilly days? Unmatched. So why not gather your friends or family and craft your own delightful batch? For more tips and variations, check out sources like The Spruce Eats or Food Network. Happy sipping!

Homemade Apple Cider: The Best Cozy Fall Drink Recipe
Equipment
- large stockpot
Ingredients
- 10 large apples, quartered
- water, to cover
- ¾ cup white sugar
- 1 tablespoon ground cinnamon
- 1 tablespoon ground allspice
Instructions
- Gather the ingredients.
- Place apples in a large stockpot; cover with water by at least 2 inches. Stir in sugar, cinnamon, and allspice. Bring to a boil over medium-high heat. Boil, uncovered, for 1 hour. Reduce heat to low; cover and simmer for 2 hours.
- Strain apple mixture through a fine-mesh sieve; discard solids. Drain cider again through a cheesecloth-lined sieve.
- Serve warm or refrigerate cider until cold.
- Enjoy!


Leave a Reply