
Introduction to Japanese Katsu Bowls
Why Japanese Katsu Bowls are a Game Changer for Homemade Meals
Have you ever craved something that’s not only delicious but also simple to make at home? Enter Japanese Katsu Bowls! This dish melds crispy breaded meat with fluffy rice, making it a comforting, all-in-one meal that's perfect for busy weeknights or laid-back weekends.
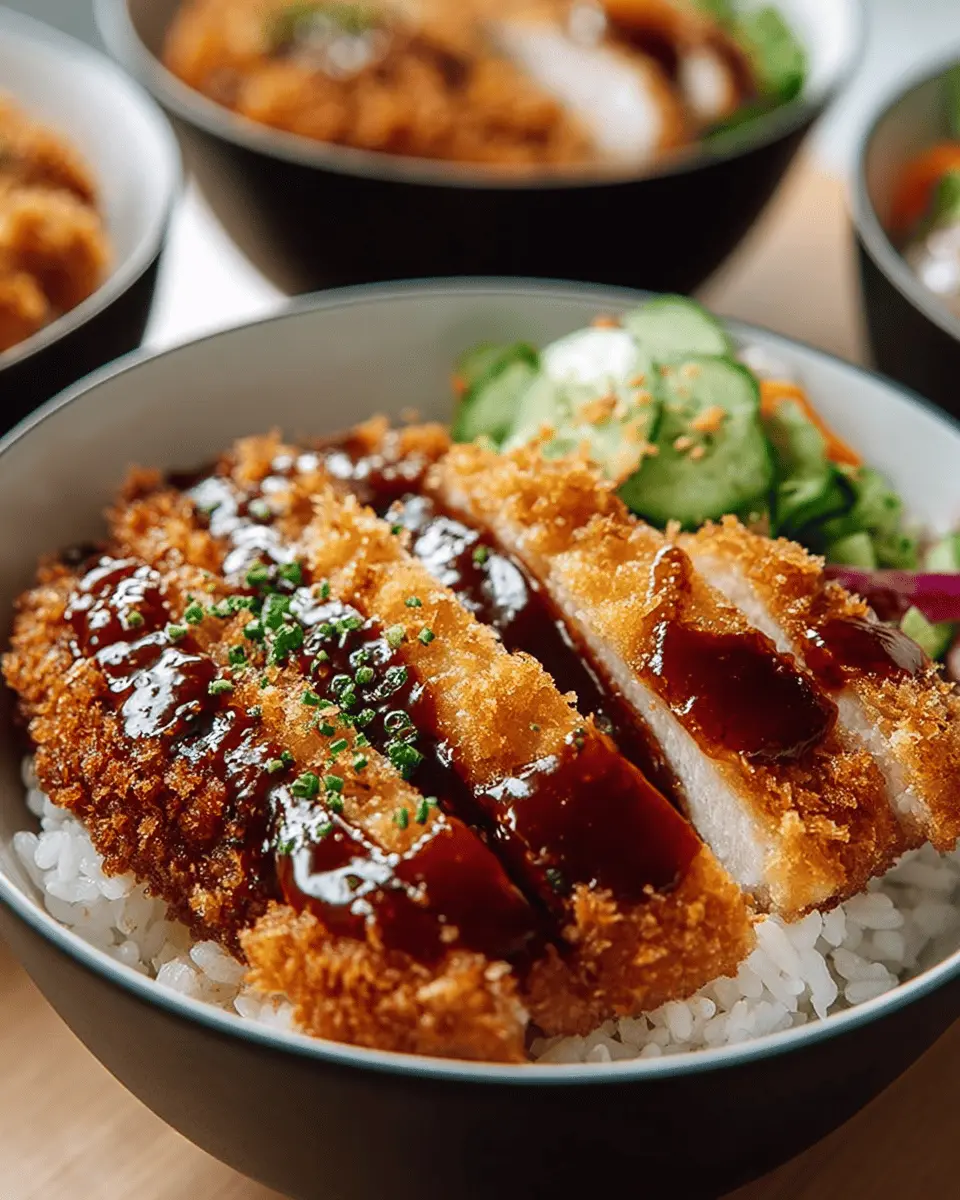
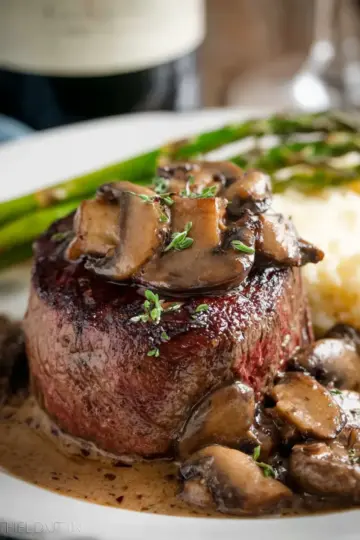
The heart of a Japanese Katsu Bowl is the golden fried cutlet, which can be made with chicken or beef, and is often topped with rich, savory tonkatsu sauce. For those unfamiliar with this delightful condiment, it’s a tangy blend of Worcestershire sauce, soy sauce, and fruits—providing the perfect umami kick to elevate your dish. You might find yourself pouring it generously over everything!
What’s even better? These bowls are highly customizable! You can throw in some fresh vegetables, like cabbage or broccoli, to lighten things up. Plus, they look impressive, making them ideal for casual gatherings with friends. Why order takeout when you can whip up a satisfying bowl in your own kitchen?
Ready to dive into your new favorite recipe? Let's get cooking!
Ingredients for Japanese Katsu Bowls
Essential Ingredients for Katsu
To craft the perfect Japanese Katsu Bowls, you'll need the following essential ingredients:
- Chicken Breasts or Pork Chops: Aim for two boneless cuts to keep it easy and tender.
- All-Purpose Flour: This is key for that initial coating.
- Eggs: Two large ones, beaten — they help the panko stick beautifully.
- Panko Breadcrumbs: These Japanese breadcrumbs are crucial for achieving that delightful crunch!
- Seasonings: A simple mix of salt, black pepper, and garlic powder elevates the flavor.
- Vegetable Oil: Used for frying, this gives your katsu its golden-brown finish.
Optional Ingredients for Added Flavor
Want to take your Japanese Katsu Bowls to the next level? Consider including these optional ingredients:
- Japanese Mayo: This creamy addition adds a rich flavor — trust me, it’s a game-changer!
- Chopped Herbs: Parsley or green onions provide a fresh garnish.
- Shredded Cabbage: A traditional side that adds crunch and great texture.
- Pickled Ginger: A zesty contrast to the richness of katsu that can brighten each bite.
With these ingredients, you’ll be well on your way to a deliciously satisfying meal! Want more on the origin and variations of katsu? Check out NHK World for a deeper dive into Japanese cuisine.
Step-by-Step Preparation of Japanese Katsu Bowls
Prepare the Chicken
To kick things off, start with the chicken. Choose two boneless, skinless chicken breasts — they offer just the right texture for katsu. Using a meat mallet, gently pound the chicken to an even thickness of about ½ inch. This step is crucial as it ensures that your chicken cooks uniformly. Once pounded, season both sides with salt, black pepper, and a pinch of garlic powder to enhance the flavors. Pro tip: Letting the chicken marinate in the seasoning for about 30 minutes can boost the flavor even more!
Set Up the Dredging Station
Now that your chicken is ready, it's time to prepare your dredging station. This part is a game changer for getting that crispy texture. You’ll need three shallow bowls:
- Flour Bowl: 1 cup of all-purpose flour, seasoned with a bit of salt and pepper.
- Egg Bowl: 2 large eggs, beaten until well blended.
- Panko Bowl: 2 cups of panko breadcrumbs for that ultimate crunch.
This organization makes the coating process smooth and efficient, so you'll be able to quickly apply each layer to your chicken.
Coat the Chicken for Crispiness
It’s time to give that chicken a crunchy coat! Start by coating each piece in the flour, shaking off any excess. Next, dip it into the beaten eggs, allowing the egg to cling well. Finally, press the chicken into the panko breadcrumbs, making sure it’s fully covered. This three-step process is key in achieving that signature texture you expect from Japanese Katsu Bowls. Don’t hold back on pressing the panko into the chicken; you want that crust to stick!
Frying the Katsu to Perfection
Heat about ½ cup of vegetable oil in a shallow frying pan over medium heat. You want the oil to reach about 350°F (180°C) for perfect frying. This temperature ensures a golden-golden katsu that’s cooked through without being greasy. Gently lay the coated chicken in the hot oil, frying each piece for about 3-4 minutes per side, or until beautifully golden brown. A quick tip: Cooking in batches can help maintain the oil temperature, leading to even better results! Once done, transfer the katsu to a wire rack to drain excess oil — this keeps them from getting soggy.
Assembling the Bowls
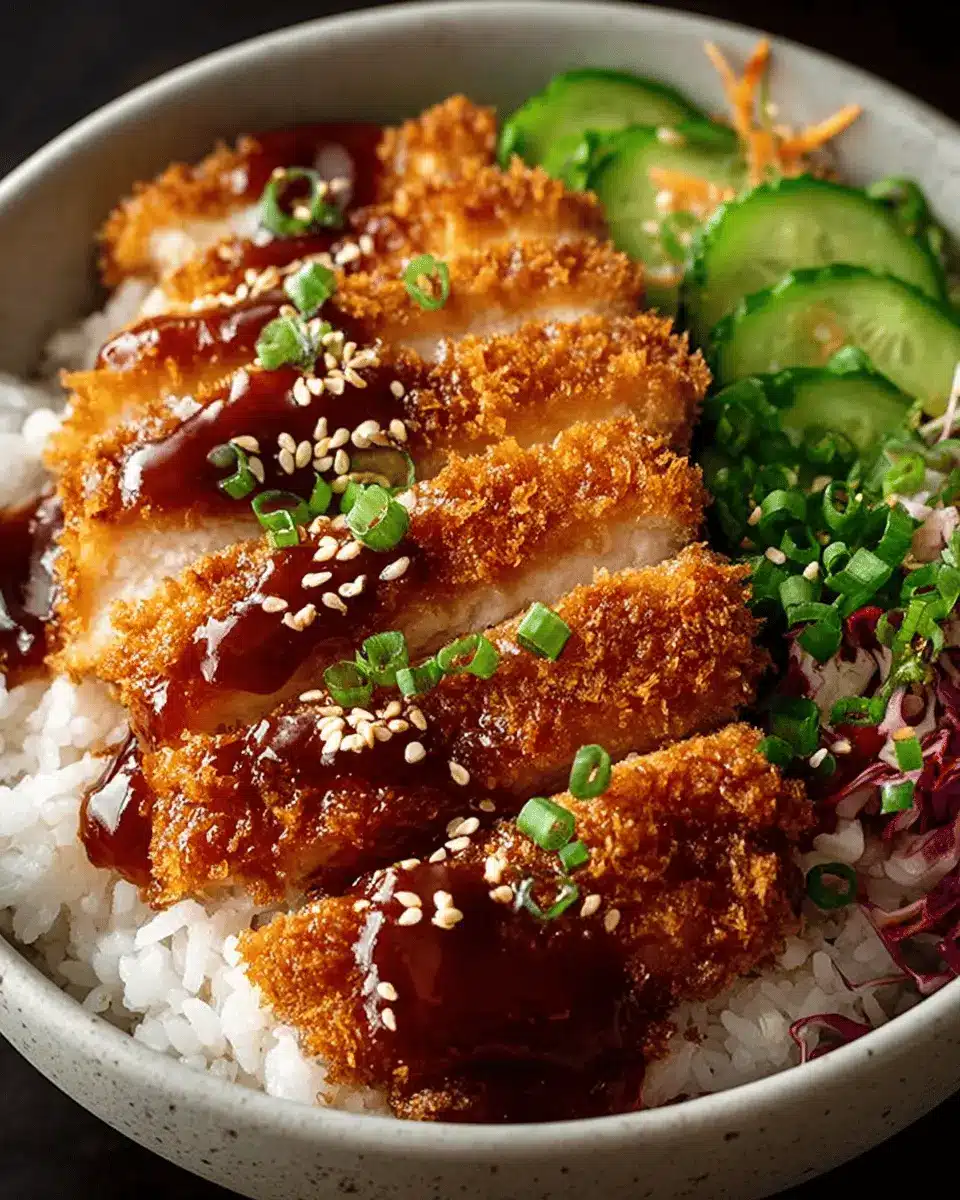
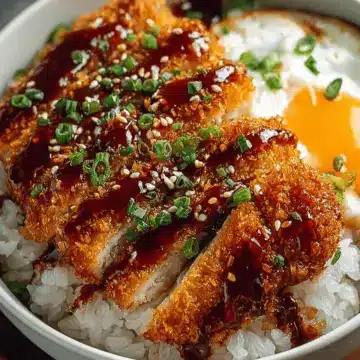
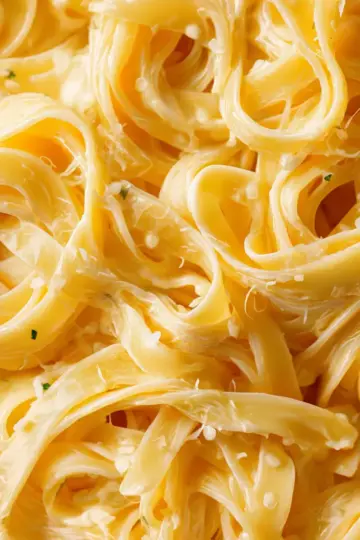
Now comes the fun part—assembling your Japanese Katsu Bowls! Start by dividing 2 cups of cooked white rice among your serving bowls. Slice the crispy katsu into strips and elegantly arrange them on top of the rice. Drizzle with your choice of tonkatsu sauce, and if you want to take it to the next level, add a dollop of optional Japanese mayo. For a finishing touch, sprinkle with chopped parsley or green onions for a pop of color and flavor.
And there you have it: your beautifully arranged Japanese Katsu Bowls are ready to enjoy! Serve them hot for the best experience, and remember, every bite is pure bliss!
Variations on Japanese Katsu Bowls
Katsu Bowls with Different Proteins
Don't feel limited to traditional chicken or beef for your Japanese Katsu Bowls. Try using turkey or chicken ham for a delicious twist! Simply follow the same breading and frying method to achieve that crispy outer layer. For seafood lovers, shrimp katsu is a delectable option—just make sure to adjust the cooking time to avoid overcooking.
Vegetarian Katsu Alternatives
For a hearty vegetarian katsu experience, consider using eggplant, zucchini, or tofu slices. Each option can be breaded and fried just like the meat variants to create a satisfying meal. Pairing with a homemade miso sauce instead of tonkatsu brings a delightful umami flavor to the dish. You can even explore recipes for vegan katsu sauce to enhance the experience; the possibilities are endless!
Cooking Tips and Notes for Japanese Katsu Bowls
Secrets to Keeping Katsu Crispy
To achieve that irresistible crunch in your Japanese Katsu Bowls, consider these tips. First, always use fresh panko breadcrumbs—they create a lighter, airier crust. When frying, ensure your oil is hot enough; if it bubbles around the chicken, you're good to go. Avoid overcrowding the pan, as this can lower the oil temperature and lead to soggy results. Finally, let your fried katsu rest on a wire rack instead of paper towels—it helps maintain that delightful crispiness!
Recommended Tools for Success
Having the right tools can simplify your cooking process. A shallow frying pan is essential for even heat distribution when frying. A meat mallet is perfect for pounding the chicken to a uniform thickness, ensuring even cooking. Lastly, a wire rack is crucial for draining excess oil while keeping your katsu crispy. Consider also using a thermometer to monitor the oil temperature for perfect frying every time. Happy cooking!

Serving Suggestions for Japanese Katsu Bowls
Ideal Complementary Sides
To elevate your Japanese Katsu Bowls, consider pairing them with shredded cabbage and pickled ginger for a refreshing crunch and tang. A side of miso soup adds warmth, while edamame provides delightful texture and protein. For a touch of sweetness, serve miso-glazed carrots or steamed broccoli drizzled with sesame oil.
Creative Serving Ideas to Impress Friends
Serve your Japanese Katsu Bowls family-style on a large platter for a communal vibe. You can layer in colorful vegetables like sliced cucumbers and radishes for vibrancy. To really show off, try offering a tasting of several sauces, such as spicy mayo or citrusy ponzu, alongside the tonkatsu sauce. Want an interactive twist? Let guests build their own bowls for a fun, personalized experience!
Time Breakdown for Japanese Katsu Bowls
Preparation Time
10 minutes
Getting everything ready is quick and straightforward. Just pound the chicken, season it, and set up your dredging station.
Cooking Time
15 minutes
Frying the katsu takes about 6-8 minutes total, so you’ll have crispy goodness in no time.
Total Time
25 minutes
In just 25 minutes, you can enjoy your own homemade Japanese katsu bowls. Perfect for a weeknight meal or a cozy weekend lunch!
Nutritional Facts for Japanese Katsu Bowls
Calories per Serving
A hearty Japanese Katsu Bowl typically contains around 600-700 calories per serving, making it a filling choice after a long day of work or play.
Protein Content
With chicken or pork as the star ingredient, these bowls are packed with protein—about 30 grams per serving. This makes them excellent for muscle recovery and keeping you satiated.
Key Nutrients
Japanese Katsu Bowls are not only tasty but offer essential nutrients like iron from the meat, carbohydrates from the rice, and healthy fats from the frying oil. For those looking to enhance nutritional value, consider adding a side of steamed vegetables or a salad.
For more insights on nutritious ingredients, check out NutritionData or USDA FoodData Central for detailed breakdowns. These resources can provide a deeper understanding of what you’re enjoying in every delicious bite!
FAQ about Japanese Katsu Bowls
How to store leftover katsu?
If you have any leftover katsu, simply place it in an airtight container in the refrigerator. Ideally, enjoy it within 2-3 days for the best taste and texture. When reheating, consider using an oven or air fryer to restore that crispy crust.
Can I make katsu in advance?
Absolutely! You can prepare the katsu up to the frying stage. After coating your chicken or beef, wrap it tightly in plastic wrap or place it in a sealed container, and refrigerate it for up to a day. When you're ready, just fry it fresh. This way, you’ll enjoy that delightful crispiness.
What are the best side dishes for katsu bowls?
To complement your Japanese Katsu Bowls, consider serving:
- Shredded cabbage dressed in a light vinaigrette for crunch.
- Pickled ginger for a refreshing contrast.
- Miso soup or edamame for a hearty touch.
These sides not only enhance your meal but also bring authentic Japanese flavors to your table. For more ideas, check out this guide to Japanese side dishes. Enjoy your cooking journey!
Conclusion on Japanese Katsu Bowls
Recap of Why You’ll Love Making Katsu at Home
Making Japanese Katsu Bowls is a delightful way to bring a taste of Japan into your home. Not only is it a fun cooking adventure, but the crispy katsu paired with fluffy rice and zesty tonkatsu sauce makes every bite a flavor explosion. Enjoy customizing your bowls while impressing friends with your culinary skills! Whether for a casual dinner or a special gathering, this dish never disappoints. Take the plunge and elevate your weeknight meals with this comforting bowl of goodness!
Japanese Katsu Bowls with Tonkatsu Sauce
Equipment
- Shallow frying pan
- Meat Mallet
- Wire rack
Ingredients
Chicken and Coating
- 2 boneless, skinless chicken breasts (or pork chops)
- 1 cup all-purpose flour
- 2 large eggs beaten
- 2 cups panko breadcrumbs
- 1 teaspoon salt
- ½ teaspoon black pepper
- ½ teaspoon garlic powder
- ½ cup vegetable oil (for frying)
Serving Ingredients
- 2 cups cooked white rice
- ¼ cup tonkatsu sauce (store-bought or homemade)
- 2 tablespoon Japanese mayo (optional)
- Chopped parsley or green onions for garnish
Instructions
Prep and Cook Chicken
- Pound the chicken breasts to an even thickness (about ½ inch). Season both sides with salt, pepper, and garlic powder.
- Set up a dredging station with three bowls: one with flour, one with beaten eggs, and one with panko breadcrumbs. Coat each chicken piece in flour, dip into the egg, and then press into panko to fully coat.
- Heat oil in a pan over medium heat. Once hot, fry each piece for 3-4 minutes per side until golden brown and cooked through. Drain on a wire rack.
Assemble and Serve
- Divide the rice between bowls, slice the katsu, and place it on top. Drizzle with tonkatsu sauce and Japanese mayo. Garnish with chopped parsley or green onions.
- Dig in while it’s hot and crispy!

Leave a Reply