
Introduction to No Knead Bread
The Magic of Homemade Bread and Why You Should Try It
There’s something incredibly rewarding about baking your own no knead bread. It transforms simple ingredients into a warm, crusty loaf that fills your kitchen with an irresistible aroma. Imagine pulling a golden-brown loaf out of the oven and enjoying it fresh, with a spread of butter or a drizzle of olive oil. What’s not to love?
The beauty of no knead bread lies in its simplicity. With just a few core ingredients — flour, water, salt, yeast, and a splash of oil — you can create a deliciously rustic loaf without the usual labor of kneading. Instead, this method relies on time and a little patience, allowing the dough to rise and develop flavor and strength on its own.
You don’t need to be a seasoned baker or have fancy equipment. All you require is a bowl, a dough scraper, and a Dutch oven for baking. As you experiment with different variations, you’ll discover that each loaf can be uniquely yours. For a more in-depth look into the science of yeast, read about it here. Are you ready to dive into the delightful world of homemade baking? Let's get started with the recipe!
Ingredients for No Knead Bread
Essential ingredients you’ll need for the perfect loaf
Making no knead bread is wonderfully simple and requires just a few staple ingredients. Let’s break down what you’ll need for that perfect loaf of homemade goodness:
- All-purpose flour: A generous 4 ¾ cups (about 570g) gives your bread the structure it needs. Having a bit extra on hand for dusting can help with shaping.
- Instant yeast: Using 2 ½ teaspoons (around 1 packet or 7g) ensures a fluffy texture. For insights on yeast, check this guide on testing yeast.
- Sea salt: Just 2 teaspoons (12g) enhances flavor and controls fermentation.
- Warm water: About 2 cups (472 ml) of water warmed to 120°F (48°C) activates the yeast perfectly.
- Maple syrup: A touch of 2 teaspoons (13.5g) adds subtle sweetness and aids the yeast.
- Olive oil: Adding 1 teaspoon (4.4g) enhances moisture and creates a tender crust.
These ingredients are likely already in your kitchen, making it easy to whip up this delightful no knead bread anytime! Happy baking!
Preparing No Knead Bread
Making no knead bread is a wonderfully simple process that yields a delicious, crusty loaf with minimal effort. The beauty of this method lies in its ability to produce bakery-quality bread from the comfort of your own kitchen. Let's walk through each step to ensure your bread-making experience is a delightful one.
Combine the dry ingredients
Begin by choosing a very large mixing bowl—this will give your dough plenty of room to rise. In this bowl, whisk together 4 ¾ cups of all-purpose flour, 2 ½ teaspoons of instant yeast, and 2 teaspoons of sea salt until they're thoroughly combined. It’s essential to mix these dry ingredients well to ensure that the yeast is evenly distributed throughout, promoting a consistent rise.
Add wet ingredients for dough formation
Next, create a well in the center of your dry mixture. Pour in 2 cups of very warm water, about 120°F/48°C, along with 2 teaspoons of maple syrup (or your preferred sugar substitute) and 1 teaspoon of olive oil. Stir these ingredients together until they form a shaggy dough. This process should take about one minute—there’s no need to overmix!
Let the dough rise
Now that you have your shaggy dough, it’s time to let it rise! Lightly grease the sides of the bowl, then turn the dough over to coat it in a thin layer of oil. Cover the bowl with greased plastic wrap or a light kitchen towel to keep the warmth in. Allow the dough to rise for about 2 to 3 hours at room temperature. If your kitchen tends to be chilly, try placing the bowl in the oven with just the light on. This gentle warmth creates the perfect environment for your dough to double in size.
Shape the dough and prepare for baking
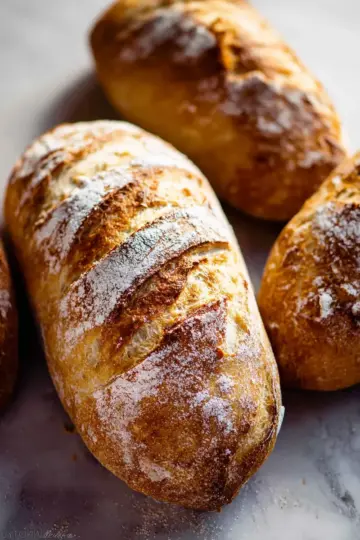
Once the dough has risen, you’ll notice the surface will have developed bubbles—this is a sign of a healthy fermentation process. Lightly flour a clean surface, and gently pour the dough onto it. Sprinkle a little more flour on top, then use a dough scraper, knife, or spatula to fold the dough over itself about 6 to 12 times. You're aiming for a slightly tighter shape.
Transfer the dough to a piece of parchment paper and shape it into a round loaf. This step doesn't have to be exact; don’t stress about it too much!
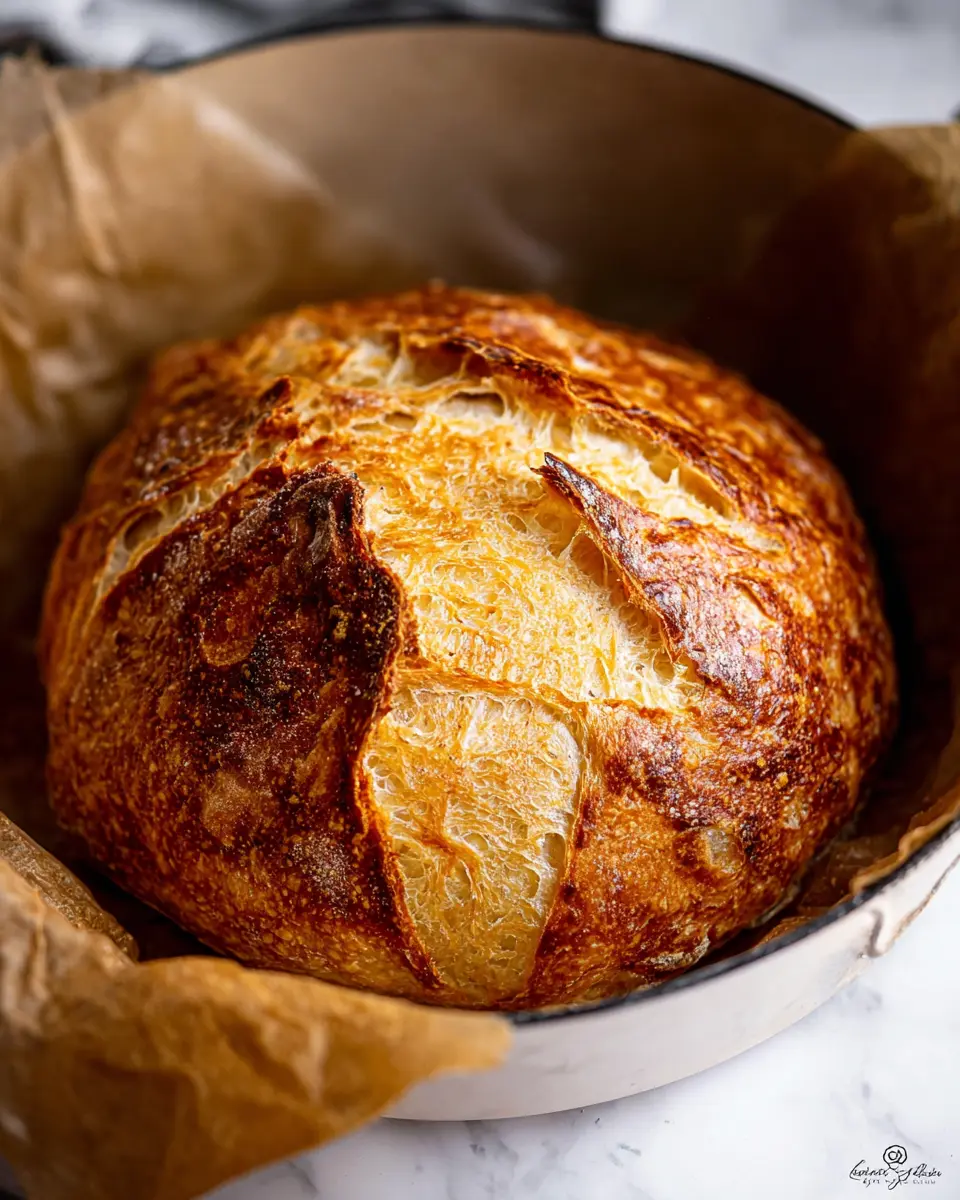
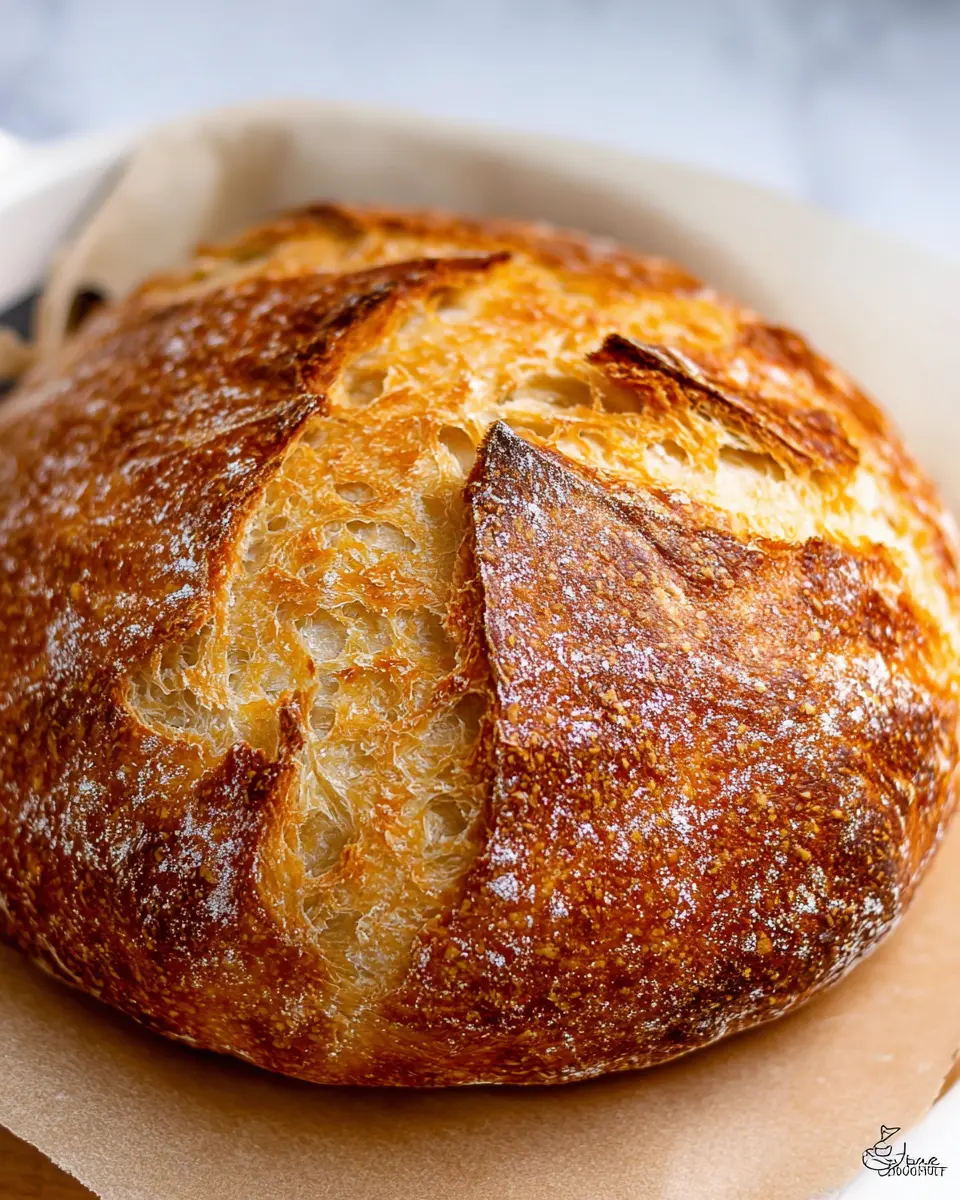
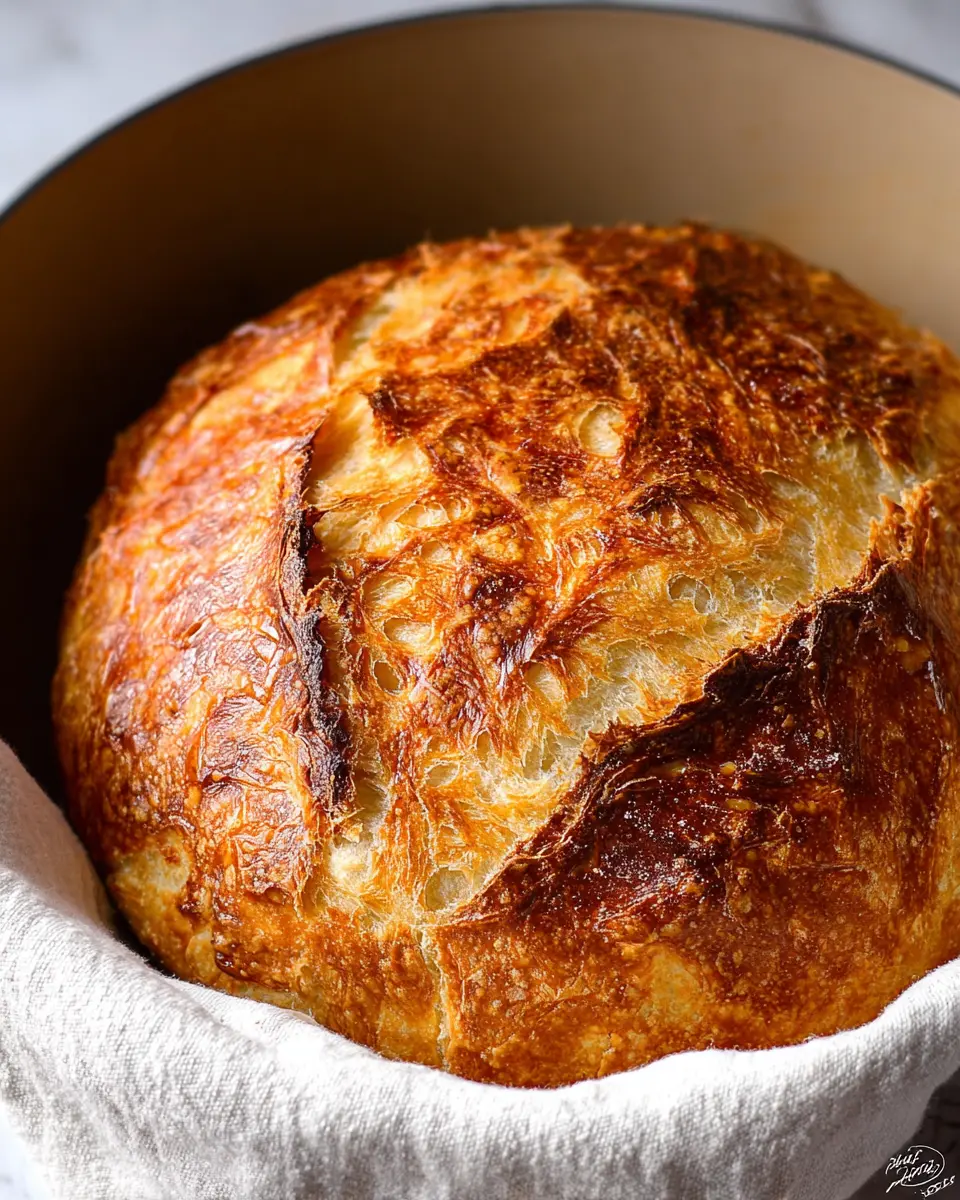
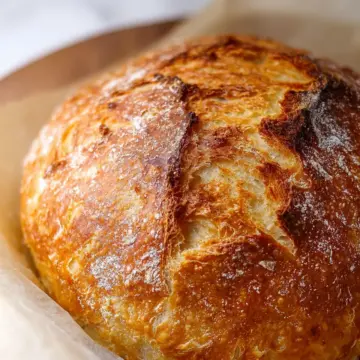
Bake the no knead bread to perfection
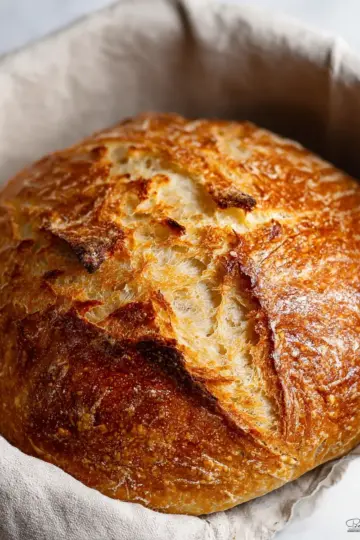
Before you preheat your oven, place your Dutch oven inside; this helps prevent cracking due to sudden temperature changes. Heat your oven to 450°F/230°C for about 30-40 minutes. Once preheated, carefully remove the Dutch oven with oven mitts, lift the lid, and transfer your dough (on the parchment paper) inside. After covering it again, pop it into the oven and bake for 45 minutes.
After this time, remove the lid and allow it to bake for an additional 15 to 20 minutes, or until you reach your desired level of crustiness—golden brown is a popular choice!
Once it's baked, transfer your loaf to a wire cooling rack. For the full impact of enjoying freshly baked no knead bread, let it cool for at least 30 minutes before slicing into it. The result? A perfectly crusty loaf that’s waiting to be enjoyed!
This step-by-step guide should set you on the right path to mastering the art of no knead bread. If you have any questions, feel free to explore resources like this yeast guide to ensure your ingredients are fresh and ready for action! Happy baking!
Variations on No Knead Bread
No knead bread is wonderfully versatile, allowing you to explore different flavor profiles effortlessly. Let’s dive into two delightful variations that can elevate your baking game!
Herb-infused No Knead Bread
Imagine the aroma of fresh herbs wafting through your kitchen! For an herb-infused no knead bread, simply add a couple of tablespoons of your favorite chopped fresh herbs—like rosemary, thyme, or basil—to the dry ingredients. This adds a fragrant twist, making each slice perfect for sandwiches or as a side to soups.
Whole Wheat No Knead Bread
If you’re looking to add some whole grains to your diet, whole wheat no knead bread is a fantastic option. Replace up to half of the all-purpose flour with whole wheat flour for a nuttier taste and added fiber. This slight change gives you a hearty loaf that’s just as easy to prepare and delightful to enjoy.
Each variation offers a unique take on the classic recipe, making it a great base for experimentation! Happy baking!
Cooking Tips and Notes for No Knead Bread
Tips for Achieving a Crusty Exterior
For that beautiful, crusty exterior you crave in no knead bread, consider preheating your Dutch oven well before baking. The steam created inside the covered pot helps form that lovely crust. Additionally, you can opt for a mix of high-protein bread flour and all-purpose flour for extra texture. A sprinkle of water on the dough before covering it with the lid can add to the steam’s effectiveness!
Common Pitfalls to Avoid
When making no knead bread, don’t rush the rising process! An insufficient rise will lead to denser bread. Likewise, be careful not to over-handle the dough while shaping it, or you might lose the air bubbles that give your bread that perfect lift. Lastly, always check your oven’s temperature; an incorrect reading can alter your baking time. For more information on yeast types and baking consistently, visit The Kitchn.
Serving suggestions for No Knead Bread
Pairing ideas for homemade bread
There’s something truly magical about no knead bread fresh out of the oven. Pair it with:
- A rich butternut squash soup for a cozy dinner.
- Turkey bacon and avocado for a hearty breakfast sandwich.
- A fresh tomato and basil bruschetta topping it off with a drizzle of balsamic glaze.
Each of these combinations enhances the wonderful crust and tender crumb of your homemade loaf.
Creative ways to enjoy your loaf
Once you’ve mastered your no knead bread, don’t stop at just plain slices! Consider:
- Toasting slices and adding your favorite spreads like almond butter or homemade jam.
- Turning it into a delectable bread pudding for dessert.
- Using it as a base for mini sandwiches piled high with chicken ham and veggies.
With so many delightful ways to savor your bread, it’s sure to become a staple in your kitchen! For more culinary ideas, check out Food & Wine for inspiring recipes.
Time breakdown for No Knead Bread
Creating the perfect no knead bread is all about patience and timing! Here's a quick overview of the time you'll spend on each step.
Preparation time
Approximately 10 minutes to mix your ingredients and form the dough.
Rising time
Let the dough rise for about 2 to 3 hours until it doubles in size. Check for bubbly goodness on the surface!
Baking time
You'll need about 45 minutes for the initial bake, and an additional 15 to 20 minutes for that perfect crust.
Total time
In total, plan for around 3 to 4 hours from start to finish, including rising and baking. Remember, this is hands-off time, so you can relax while the magic happens!
For tips on perfecting your no knead bread, feel free to explore this comprehensive yeast guide to ensure your yeast is top-notch.
Nutritional Facts for No Knead Bread
Understanding the nutritional profile of your no knead bread can enhance your baking experience and help you make informed meal choices. Here’s a quick overview of what you can expect in each serving:
Calories
Each slice contains about 143 kcal, making it a relatively light option for your meals.
Carbohydrates
With 30 grams of carbohydrates, this bread provides a great source of energy. It's perfect for fueling your day!
Protein
You’ll get around 5 grams of protein per slice. This is important for muscle repair and overall health.
Sodium
At 333 mg, it's good to keep this in mind if you're watching your sodium intake. You might consider reducing salt if needed.
Fiber
Each slice boasts 5 grams of fiber, promoting digestive health and keeping you feeling full longer.
This no knead bread is not only delicious but also fairly balanced nutritionally, making it a delightful addition to your meals or snacks. If you want to dive deeper into the world of nutritious ingredients, consider checking out sources like Healthline for more insights.
FAQs about No Knead Bread
How long can I store no knead bread?
No knead bread is best enjoyed fresh, but you can store it for up to 4 days at room temperature in a paper bag or a bread box. Avoid plastic bags, as they trap moisture and can make the crust soggy. If you want your bread to last longer, consider slicing it and wrapping it well before refrigeration.
Can I freeze no knead bread?
Absolutely! Freezing is a great way to extend the life of your no knead bread. Wrap it tightly in plastic wrap and then place it in a freezer-safe bag. It can last for about 3 months in the freezer. To enjoy, just thaw it at room temperature or pop it in a warm oven for a few minutes to refresh the crust.
What should I do if my dough doesn’t rise?
If your dough doesn’t rise, it could be that the yeast is inactive. Make sure you're using instant yeast that's within its expiration date. If it’s cold in your kitchen, consider creating a warmer environment by placing the bowl in a turned-off oven with just the light on. A little patience goes a long way!
Conclusion on No Knead Bread
Embrace the joy of homemade no knead bread! With just a handful of ingredients and minimal effort, you can create a crusty, beautiful loaf that’s perfect for any occasion. So why not take the plunge? Your kitchen—and your taste buds—will thank you for it!
A Final Nudge to Embrace Homemade Bread
As you embark on your journey to baking no knead bread, remember that the true magic lies in the process. Not only will you be rewarded with delicious bread, but the act of kneading can be therapeutic! Share it with friends or enjoy some quiet moments savoring the fruits of your labor.
For further inspiration and tips on elevating your baking game, check out resources like King Arthur Baking and The Bread Lab. Happy baking!
No Knead Bread
Equipment
- Dutch Oven
Ingredients
- 4 ¾ cups all purpose flour plus some extra for flouring
- 2 ½ teaspoons instant yeast about 1 packet
- 2 teaspoons sea salt
- 2 cups very warm water about 120°F/48°C
- 2 teaspoons maple syrup or agave or granulated sugar
- 1 teaspoon olive oil or any oil
Instructions
- In a very large bowl, whisk the dry ingredients together until thoroughly combined. Create a well in the centre and add the warm water, maple syrup and the oil. Stir the water into the dry ingredients to form a dough. You want to stir until it’s all incorporated and the dough looks shaggy but mixed together, about 1 minute.
- Lightly grease the sides of the bowl, and turn the dough over in it to grease the dough. Cover with greased plastic wrap, an alternative wrap or light kitchen towel and let it rise on your counter for 2 to 3 hours. If your kitchen is cold, place it in your oven with the oven light turned ON and the oven OFF for a warm, draft free area for it to rise. The dough will double in size so be sure to use a bowl tall enough to manage this rise.
- In the last 30-40 minutes of rising, place your Dutch oven in the oven and preheat at 450℉/230°C. You want to add your Dutch before preheating so it preheats with the oven (this will ensure it doesn’t crack).
- After two hours, the dough should have bubbles on the top. Flour a surface with at least 1 tablespoon flour spread out, then pour the risen dough onto it. Sprinkle another ½ tablespoon of flour onto the top of the dough and flour your dough scraper/knife/large spatula.
- Using your dough scraper or large knife or spatula, fold the dough on top of itself. Do this by pulling the outer edges up and onto the centre. Rotate the dough and do it a few more times, about 6 to 12 times. You want the dough to feel a bit tighter and to start forming a shape. Feel free to lightly sprinkle more flour during this process. It should take you less than a minute.
- Scoop the dough and place onto a piece of parchment paper. Using your hands, scoop/shape it into a circle.
- When the oven is preheated, remove the dutch oven carefully with oven mitts. Take the lid off and place the dough (on the parchment paper) into the Dutch oven. Place lid back on and place it all back into the oven.
- Bake for 45 minutes. After that time, open the oven, carefully remove the lid and continue to bake for an additional 15 to 20 minutes until the crust is at your desired level. If you're using a gas oven/convection oven, only do it for 5 to 10 minutes so the bottom and tips don't burn.
- Remove from the oven, and set down. Lift up the edges of the parchment to transfer the bread to a wire cooling rack. If you want to test it for doneness, you can turn it over and lightly tap on the bottom. It should sound hollow.
- Completely cool, then slice, serve and enjoy! If you can't wait, cool it for at least 30 minutes!


Leave a Reply