
Introduction to Old Fashioned Red Velvet Cake
What is Red Velvet Cake?
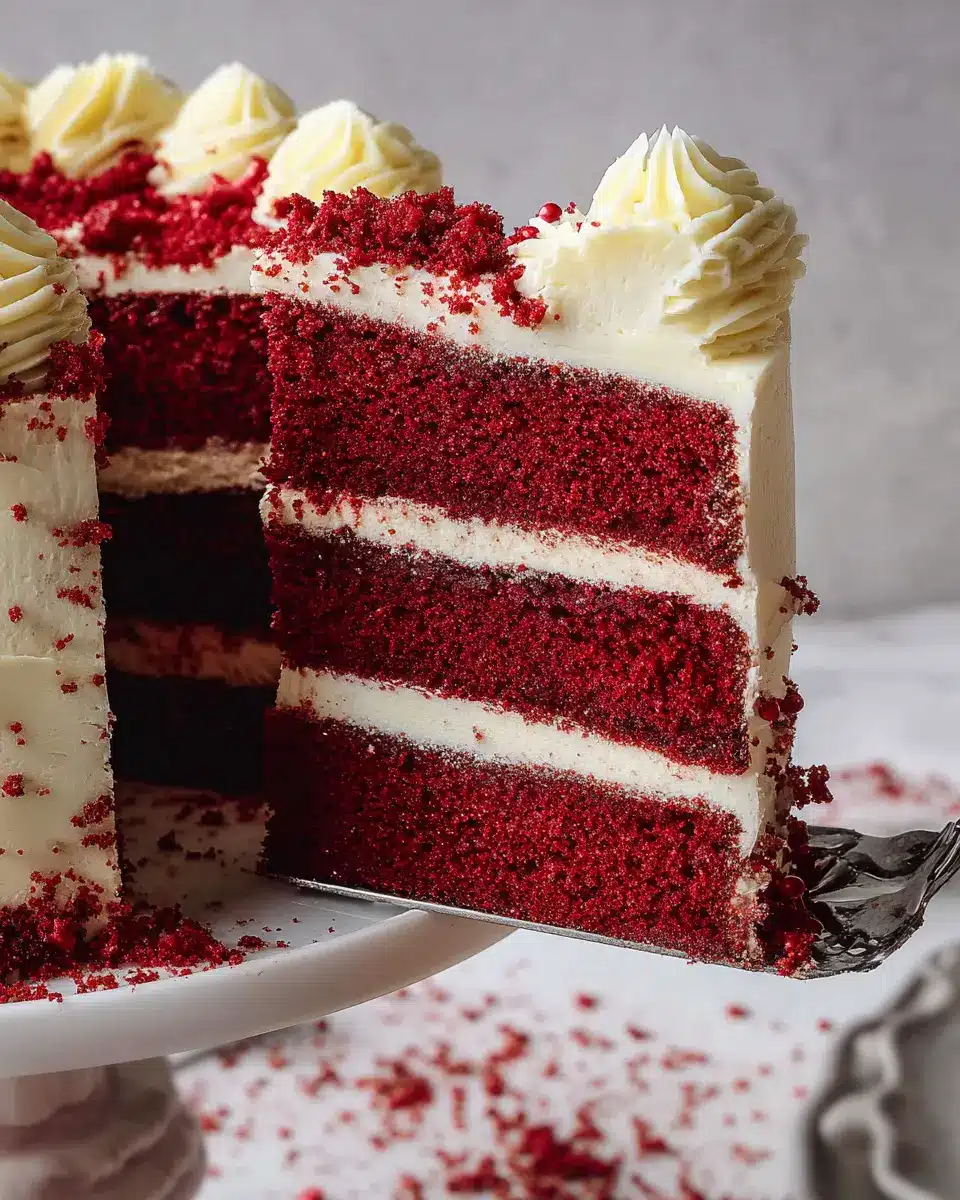
Red Velvet Cake is an iconic dessert that’s celebrated for its striking red color and velvety texture. This cake typically features a subtle cocoa flavor paired with tangy buttermilk, making it a beautifully unique treat. Often topped with a fluffy cream cheese or old-fashioned frosting, it's become a favorite for special occasions, especially around Valentine's Day and birthdays.
The History Behind the Cake
The origins of red velvet cake can be traced back to the Victorian era, where recipes began to emerge in luxury cookbooks. Its deep crimson hue wasn’t always achieved with food coloring; some early versions got their color from reactions between cocoa powder and acidic ingredients like buttermilk or vinegar. The cake gained widespread popularity in the 1920s in the Southern United States, and during World War II, it not only captured hearts but also ensured that cooks shared their recipes widely, leading to moves like the famous Red Velvet Cake from the Little Red Book by the Waldorf-Astoria.
Whether you’re new to baking or a seasoned pro, this old fashioned red velvet cake recipe is sure to impress, combining history with deliciousness. Let's dive into the recipe so you can create a piece of this delightful history right in your home!
Ingredients for Old Fashioned Red Velvet Cake
Creating the perfect old fashioned red velvet cake involves gathering some key ingredients that blend together to produce a moist, flavorful treat. Let’s dive into what you’ll need for both the cake and the frosting.
Ingredients for the Cake
- ½ cup unsalted butter, at room temperature
- 1 ½ cups sugar
- 2 large eggs, at room temperature
- 1 teaspoon vanilla extract
- 1 tablespoon cocoa powder
- 2 ¼ cups all-purpose flour
- 1 teaspoon baking soda
- 1 teaspoon salt
- 1 cup buttermilk, at room temperature
- 2 oz liquid red food coloring
- 1 teaspoon white vinegar
This combination of ingredients results in a light, airy cake that showcases that classic red hue.
Ingredients for the Frosting
- 3 tablespoons cornstarch
- 1 ½ cups water
- 1 ½ cups unsalted butter, at room temperature
- 1 ½ cups sugar
- 2 teaspoons vanilla extract
With these components, you’ll whip up a rich frosting that perfectly complements the old fashioned red velvet cake. For detailed instructions on how to make your cake and frosting, make sure to check out the full recipe!
For quality baking supplies, consider checking Amazon or your local kitchen store for the freshest ingredients. Enjoy baking!
Preparing Old Fashioned Red Velvet Cake
Baking an old fashioned red velvet cake is a delightful journey that combines classic flavors with a hint of nostalgia. Let’s dive into the steps to create this beautiful dessert, ensuring every bite is as scrumptious as the last!
Step 1: Preheat the oven
First things first, preheat your oven to 325°F (163°C). This ensures your cake bakes evenly from the moment you slide it in. While you’re at it, lightly grease three 6-inch round cake pans with cooking spray and line the bottoms with parchment paper circles. This step helps in avoiding any sticking mishaps later!
Step 2: Cream the butter and sugar
In the bowl of a stand mixer fitted with a paddle attachment, drop in ½ cup (1 stick) of unsalted butter that's been softened to room temperature. Add 1 ½ cups of sugar and cream them together until the mixture is light and fluffy, which should take about 3-5 minutes. This process incorporates air into the butter, creating a lighter cake. Feeling a little curious about why we cream? It’s all about texture – light and airy makes for a delicious cake!
Step 3: Combine wet and dry ingredients
Next, slowly add in 2 large eggs, one by one, along with 1 teaspoon of vanilla extract. Mix well after each addition. Now, combine your dry ingredients: 2 ¼ cups of all-purpose flour, 1 teaspoon of baking soda, 1 teaspoon of salt, and 1 Tablespoon of cocoa powder. In a separate bowl, mix 1 cup of buttermilk, 2 oz of liquid red food color, and 1 teaspoon of white vinegar. Alternate adding the dry mixture and wet mixture into the creamed butter, starting and ending with the flour. Mix until just combined, being careful not to overmix.
Step 4: Bake the layers
Divide the batter evenly into your prepared cake pans. Bake them for about 25-30 minutes, or until a toothpick inserted in the center comes out clean. This is always a rewarding moment! The sweet aroma wafting from your oven will certainly make your mouth water.
Step 5: Make the frosting
While your cake layers cool, let’s whip up the old fashioned frosting. In a saucepan, combine 3 Tablespoons of cornstarch with 1 ½ cups of water. Cook over low heat until it thickens, then set it aside to cool. In a mixer, cream 1 ½ cups of unsalted butter with 1 ½ cups of sugar until fluffy, adding 2 teaspoons of vanilla extract. Once the cornstarch mixture is cooled, gradually add it to the butter mixture, beating until smooth.
Step 6: Assemble the cake
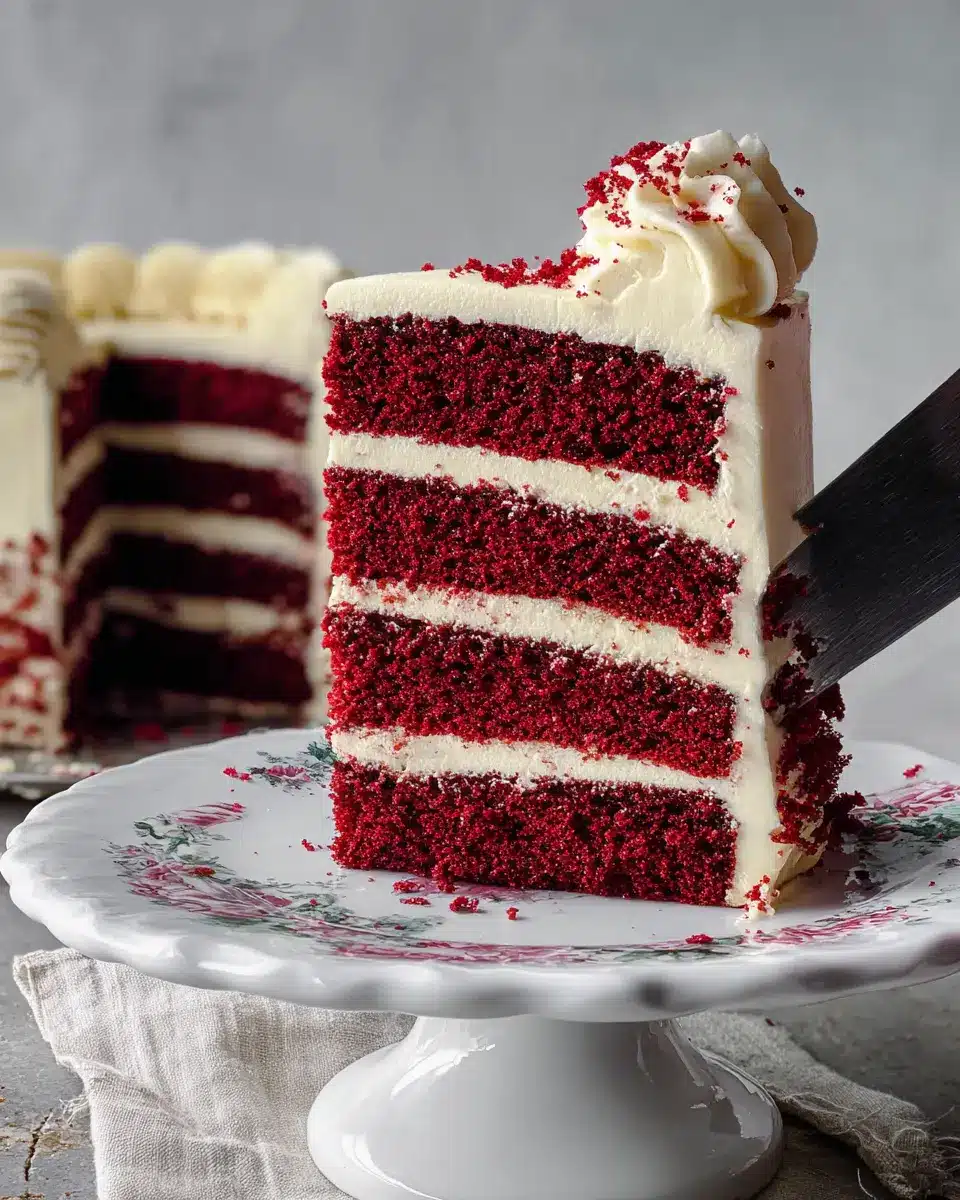
Once your cake layers are fully cooled, use a serrated knife to level the tops if needed. Slice each layer horizontally to create six even layers. Now, the fun part: stacking! Place the first layer on a cake stand and spread about ½ cup of frosting on top, then repeat for each layer, finishing with the top cut-side down. After crumb-coating the cake, refrigerate for 20-30 minutes before adding your final layer of frosting.
Decorate your cake, and voilà! You've crafted a stunning old fashioned red velvet cake that’s ready to be savored. Share it with friends or enjoy a slice yourself; either way, it’s bound to delight!
Variations on Old Fashioned Red Velvet Cake
Red Velvet Cake with Cream Cheese Frosting
If you're a fan of the classic old fashioned red velvet cake, consider pairing it with a rich cream cheese frosting for a delightful twist. Simply swap the traditional frosting recipe for a smooth blend of cream cheese, butter, powdered sugar, and a splash of vanilla extract. This adds a tangy depth that beautifully complements the cake's sweetness. You can even top it off with crushed pecans or walnuts for an extra crunch!
Gluten-Free Red Velvet Cake
For those with dietary restrictions, a gluten-free version of the old fashioned red velvet cake can be just as delicious! Substitute all-purpose flour with a high-quality gluten-free flour blend to maintain the right texture. Make sure to check your cocoa powder and food coloring for gluten-free labels. With the right substitutions, you won’t miss out on any of the flavor or the iconic red appearance. Happy baking!
Baking Tips for Old Fashioned Red Velvet Cake
Baking the perfect Old Fashioned Red Velvet Cake can feel daunting, but here are some tips to ensure your success:
-
Room Temperature Ingredients: Make sure your butter, eggs, and buttermilk are at room temperature. This helps create a smoother batter and ensures even mixing.
-
Use High-Quality Cocoa: Opt for a good quality cocoa powder. The flavor enhances the cake significantly, creating that rich backdrop for the vibrant red color.
-
Do Not Overmix: When combining your wet and dry ingredients, mix just until combined. Overmixing can lead to a dense cake, whereas we want that light, fluffy texture.
-
Proper Cooling: Be patient while cooling your cakes. Allow them to cool in the pans for 10 minutes before transferring them to wire racks to cool completely. This prevents them from breaking apart.
Experiment with these tips, and you'll be on your way to whipping up a delightful old fashioned red velvet cake that will impress friends and family alike! For more baking insights, check out this helpful article on baking techniques.
Serving Suggestions for Old Fashioned Red Velvet Cake
When is a good time to enjoy Old Fashioned Red Velvet Cake? Almost any occasion! Here are a few delightful serving suggestions:
-
Classic Presentation: Serve slices alongside a scoop of homemade vanilla ice cream for that nostalgia factor. The creamy texture perfectly complements the cake's rich flavor.
-
Tea Party Treat: Pair your cake slices with a pot of Earl Grey or chamomile tea. The lightness of the tea contrasts beautifully with the cake's sweetness, making for a sophisticated afternoon treat.
-
Celebrate with Friends: Whether it’s a birthday or just a Sunday brunch, add berries like strawberries or blueberries for a vibrant pop of color and freshness.
For more serving ideas and inspiration, consider exploring modern dessert pairings that can elevate your cake experience!
Tips for Perfect Old Fashioned Red Velvet Cake
Achieving the perfect old fashioned red velvet cake is a delightful journey! Here are some essential tips to ensure your cake comes out moist and flavorful every time:
-
Use Room Temperature Ingredients: Make sure your butter, eggs, and buttermilk are at room temperature. This helps them blend more easily, yielding a smoother batter.
-
Don’t Overmix: When combining the dry and wet ingredients, mix just until combined to prevent a dense cake. A few lumps are okay!
-
Level Your Layers: After baking, level your cake layers for even stacking. This will not only make your cake look professional but also ensure each slice has the perfect ratio of layers.
-
Chill the Frosting: For easier application, chill your frosting briefly before spreading. It will hold its shape better and prevent the layers from sliding.
For more baking secrets, check out this article on the art of cake making!
Time Details for Old Fashioned Red Velvet Cake
Preparation Time
Gathering your ingredients and getting everything ready will take about 20 minutes. Taking the time to measure and prep ensures your old fashioned red velvet cake is a success!
Baking Time
Once your batter is in the oven, it will bake for approximately 25 to 30 minutes. This is when that delightful aroma fills your kitchen!
Total Time
From start to finish, you're looking at a cozy 1 hour and 10 minutes. This includes preparation, baking, and cooling time, making it perfect for an afternoon baking session or a weekend treat!
Creating this classic dessert is a wonderful way to engage with friends and family, and trust us, the result is well worth every minute spent! If you want more tips on baking and decorating cakes, check out some of my other posts for extra inspiration.
Nutritional Information for Old Fashioned Red Velvet Cake
When indulging in a slice of old fashioned red velvet cake, it's insightful to know what you're savoring. Here’s a snapshot of its nutritional content:
Calories
A typical slice contains around 400 calories, offering a rich treat that’s hard to resist.
Protein
You can enjoy about 3-4 grams of protein per slice, coming from the eggs and buttermilk, which can help to balance out the sweetness.
Sodium
Each slice has approximately 250 milligrams of sodium, largely due to the ingredients like baking soda and salt. For a special treat, this is quite reasonable!
Understanding the nutritional aspects can help you enjoy this classic dessert in moderation. For more detailed insights into managing your dietary needs, you might check resources like Healthline or NutritionData. Happy baking!
FAQs about Old Fashioned Red Velvet Cake
Why is my red velvet cake not red?
If your old fashioned red velvet cake has turned out more brown than red, a couple of factors could be at play. The key culprit is often the type of cocoa powder used; Dutch-processed cocoa can affect color intensity. Make sure to use natural cocoa powder for the best result. Additionally, ensure you're adding the right amount of liquid red food color—2 ounces is typically recommended for vibrant color.
Can I make this cake ahead of time?
Absolutely! You can bake your red velvet cake layers a day ahead and store them wrapped in plastic wrap at room temperature, or in the fridge if you prefer. Frosting can also be made in advance; just keep it sealed and in the refrigerator until you’re ready to use it.
What are the best storage practices for cake?
To maintain freshness, store your old fashioned red velvet cake in an airtight container at room temperature for up to three days. For longer storage, consider refrigerating it, or freezing the layers wrapped in plastic and then foil for up to three months. When serving, allow it to come to room temperature for the best texture and flavor.
Conclusion on Old Fashioned Red Velvet Cake
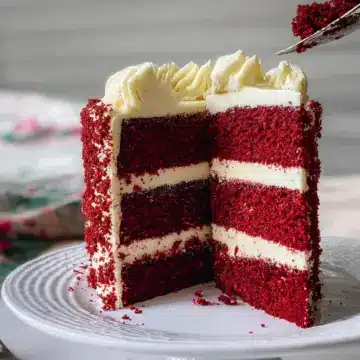
In conclusion, this old fashioned red velvet cake is not just a dessert—it's a delightful experience! Rich, velvety layers paired with the unique frosting create a flavor profile that’s hard to resist. So, gather your ingredients and create a slice of nostalgia today!
Old Fashioned Red Velvet Cake
Equipment
- Stand Mixer
- paddle attachment
- Whisk attachment
- Cake pans
- Parchment paper
- Saucepan
- Baking sheet
- Piping bag
Ingredients
For the Red Velvet Cake
- ½ cup unsalted butter at room temperature
- 1 ½ cups sugar
- 2 large eggs at room temperature
- 1 teaspoon vanilla extract
- 1 Tablespoon cocoa powder
- 2 ¼ cups all-purpose flour
- 1 teaspoon baking soda
- 1 teaspoon salt
- 1 cup buttermilk at room temperature
- 2 oz liquid red food color
- 1 teaspoon white vinegar
For the Old Fashioned Frosting
- 3 Tablespoons cornstarch
- 1 ½ cups water
- 1 ½ cups unsalted butter at room temperature
- 1 ½ cups sugar
- 2 teaspoons vanilla extract
Instructions
Red Velvet Cake
- Preheat oven to 325°F. Lightly grease three 6” round cake pans with cooking spray and line the bottoms with parchment paper circles.
- In the bowl of a stand mixer fitted with a paddle attachment, cream the butter and the sugar until fluffy and light in color, about 3-5 minutes.
- Slowly add the eggs one at a time and vanilla, combining well after each addition. Mix in the cocoa then scrape the bowl well with a rubber spatula. Mix on high for an additional 30 seconds until the mixture is smooth.
- Combine the flour, baking soda, and salt then combine the buttermilk, red food coloring, and vinegar. Alternate adding the flour and buttermilk mixtures, starting and ending with the flour. Mix until just combined after each addition and scrape down the bowl a few times during the process.
- Divide the batter evenly between the three cake pans. Bake for 25-30 minutes, or until the cake springs back to the touch or a toothpick comes out clean.
- Cool the cakes until they are cool enough to handle then remove them from the pans.
Old Fashioned Frosting
- In a small saucepan, combine the water and cornstarch and cook over low heat until the mixture thickens and starts to boil. Strain the slurry mixture, press plastic wrap directly onto the top, and set aside to cool to room temperature.
- In the bowl of a stand mixer fitted with a paddle attachment, cream the butter and the sugar until fluffy and light in color, about 5 minutes. Add the vanilla and mix.
- Switch to the whisk attachment. Once the cornstarch slurry has cooled to room temperature, add a little at a time to the mixing bowl, while running on medium speed. After all the slurry has been added, turn the mixer on high speed and whip until smooth.
Assembly
- Once the cakes are cool, slice the top off of each cake layer to make them level then slice each layer in half horizontally, to create 6 even layers.
- Break up the cake tops into small pieces and place them on a baking sheet. Bake at 300°F for about 5 minutes, until they start to dry out slightly. Allow the cake pieces to cool then rub the pieces between your fingers to create coarse crumbs. Set aside.
- Place the first cake layer, cut side up on a cake board or cake stand. Add about ½ cup of frosting and spread it out to the edges. Place your next cake layer on top, gently press down, and repeat the same process for the remaining layers. On the last layer, place the cake layer cut-side down.
- Crumb-coat the cake entire cake with a thin layer of icing and refrigerate for about 20-30 minutes. Apply a final thicker layer of frosting all over the top and sides of the cake and smooth it with an offset spatula.
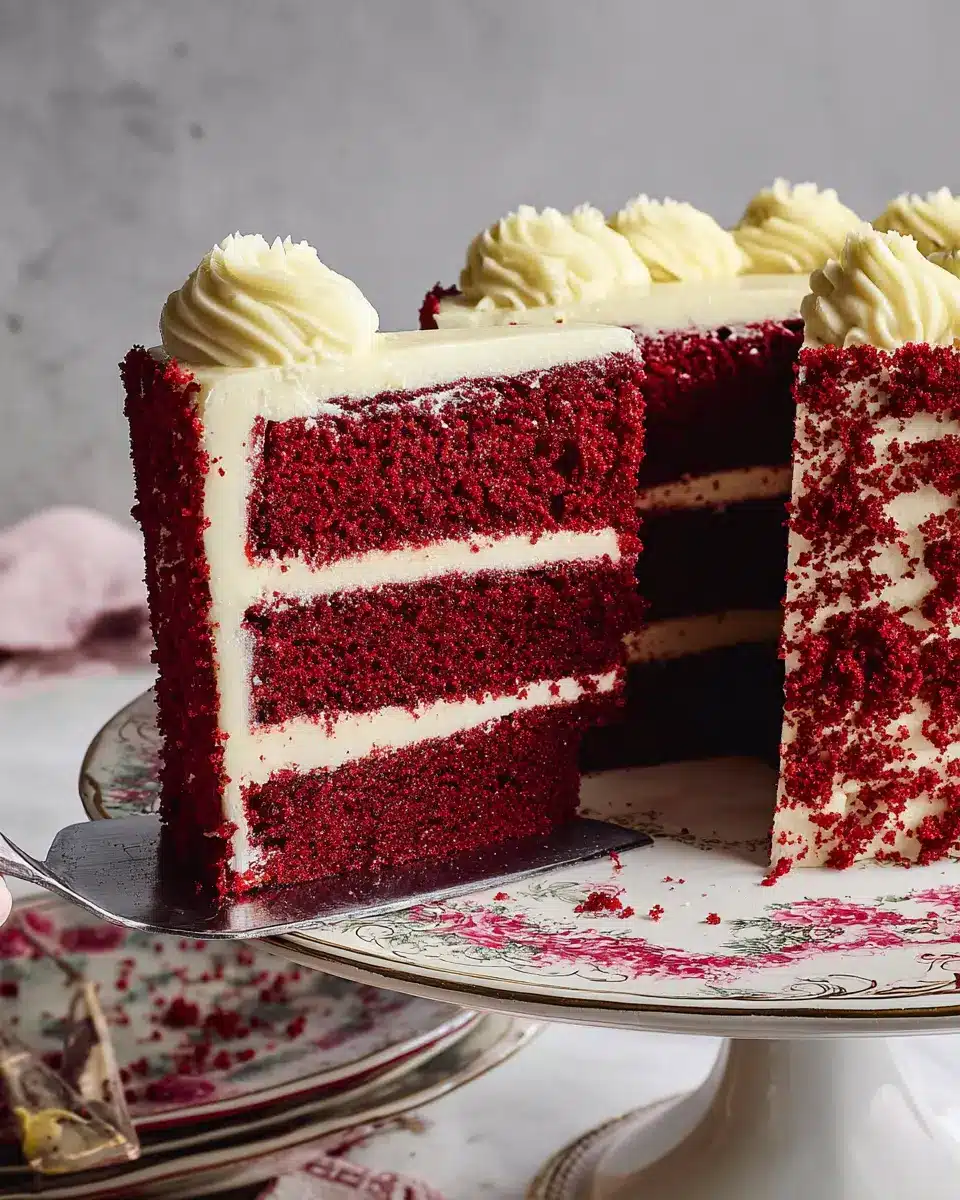
- Turn the spatula horizontally and using the top rounded part, lightly drag it along the sides of the cake starting at the bottom and slowly working up to the top, to create a pattern on the sides of the cake. Press some of the red velvet cake crumbs up the sides of the cake.
- Fit a piping bag with a star tip and fill it with any remaining icing. Pipe rosettes on the top of the cake and finish with a sprinkle of more red velvet cake crumbs. Slice and enjoy!
Leave a Reply