
Introduction to No-Bake Desserts
No-bake desserts are a game changer, especially for young professionals juggling busy schedules. Imagine this: after a hectic day at work, you want a delightful treat that doesn’t require cranking up the oven or spending hours in the kitchen. Enter the no-bake dessert—simple, quick, and 100% satisfying!
Why No-Bake Desserts Are Perfect for Young Professionals
The beauty of no-bake desserts lies in their convenience. You can whip up something delicious in minimal time, allowing you to enjoy life’s sweeter moments without the fuss. Whether it's a spontaneous gathering with friends or a cozy night in, these desserts fit right into your lifestyle.
Think about the vanilla pudding cake you'll make using basic ingredients like cherry pie filling and whipped topping. It’s an easy three-step process that promises indulgence with little effort. Did you know that no-bake desserts often use ingredients you may already have at home? This not only saves you money but also reduces food waste.
For a little inspiration, check out this insightful guide on popular no-bake options that make entertaining a breeze. So, why not dive into the world of no-bake desserts and impress your friends and family? You deserve it!
Ingredients for No-Bake Dessert
Creating a delicious no-bake dessert is easier than you think! Here’s what you’ll need to whip up this satisfying treat.
Essential Ingredients
- 1 (14 ounce) purchased angel food cake, cut into 1-inch pieces: This cake serves as the delightful base, providing a light and airy texture.
- 1 (21 ounce) can cherry pie filling, divided: A fruity topping that adds color and sweetness.
- 1 (3.4 ounce) package instant vanilla pudding mix (like Jell-O®): This is key for a creamy filling that complements the cake.
- 1 ½ cups whole milk or half-and-half: It helps to bring the pudding to the right consistency.
- 1 cup sour cream: This ingredient adds a tangy richness that balances the sweetness.
- 1 (8 ounce) container frozen whipped topping, thawed: Essential for that fluffy top layer!
- Sliced almonds (optional): For a crunchy garnish, adding that extra touch.
These ingredients combine to create a visually appealing and delicious dessert that is perfect for gatherings or a sweet treat at home. Happy baking!
Local Offers
Oops! We cannot find any ingredients on sale near you. Do we have the correct zip code?
For more recipe ideas, check out Taste of Home or AllRecipes!
Preparing No-Bake Dessert
No-bake desserts are a fantastic way to whip up something sweet without turning on the oven. Whether you're having friends over or just need a delightful treat after a long day, this dessert is a crowd-pleaser! With layers of fluffy angel food cake, creamy pudding, and cherry pie filling, it’s as simple as it is delicious. Let’s walk through the steps together!
Gather Your Ingredients
The first step to creating your no-bake dessert is to gather everything you need. Having everything in one spot not only saves time but also streamlines the process. For this recipe, you’ll need:
- 1 (14-ounce) angel food cake, cut into 1-inch pieces
- 1 (21-ounce) can cherry pie filling, divided
- 1 (3.4-ounce) package vanilla instant pudding mix
- 1 ½ cups whole milk or half-and-half
- 1 cup sour cream
- 1 (8-ounce) container frozen whipped topping, thawed
- Sliced almonds (optional for garnish)
Now that we have our ingredients ready, let’s jump into the next step!
Layer the Angel Food Cake
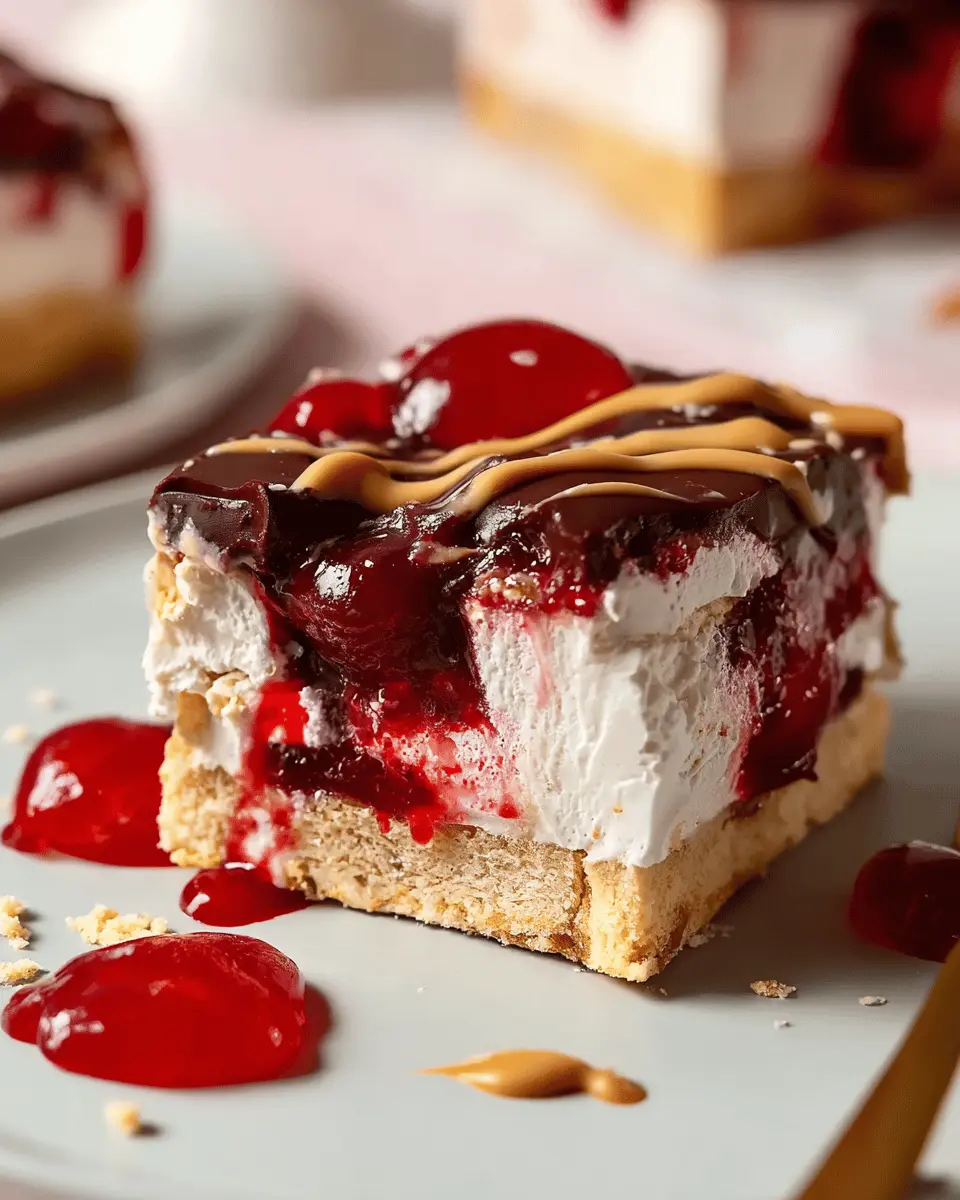
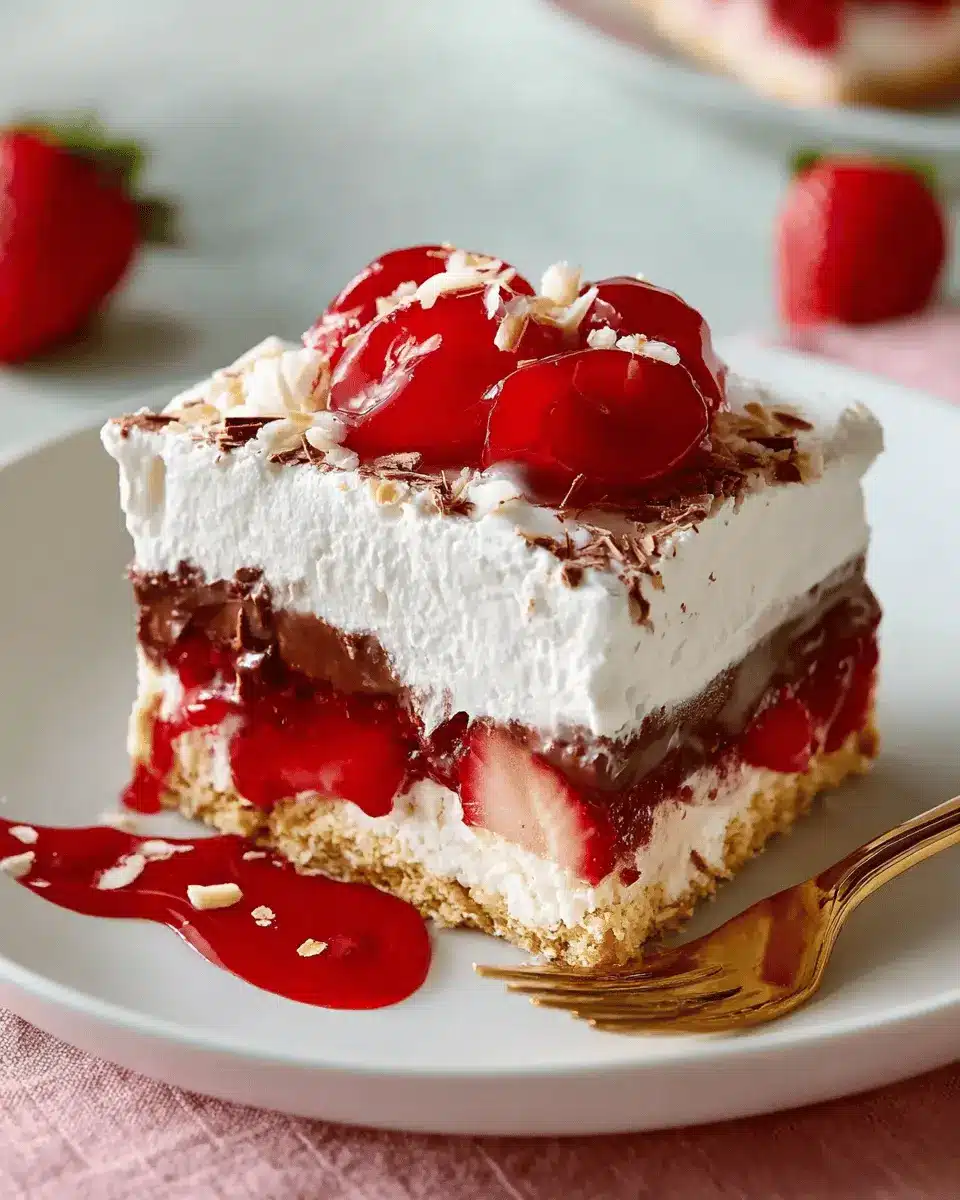
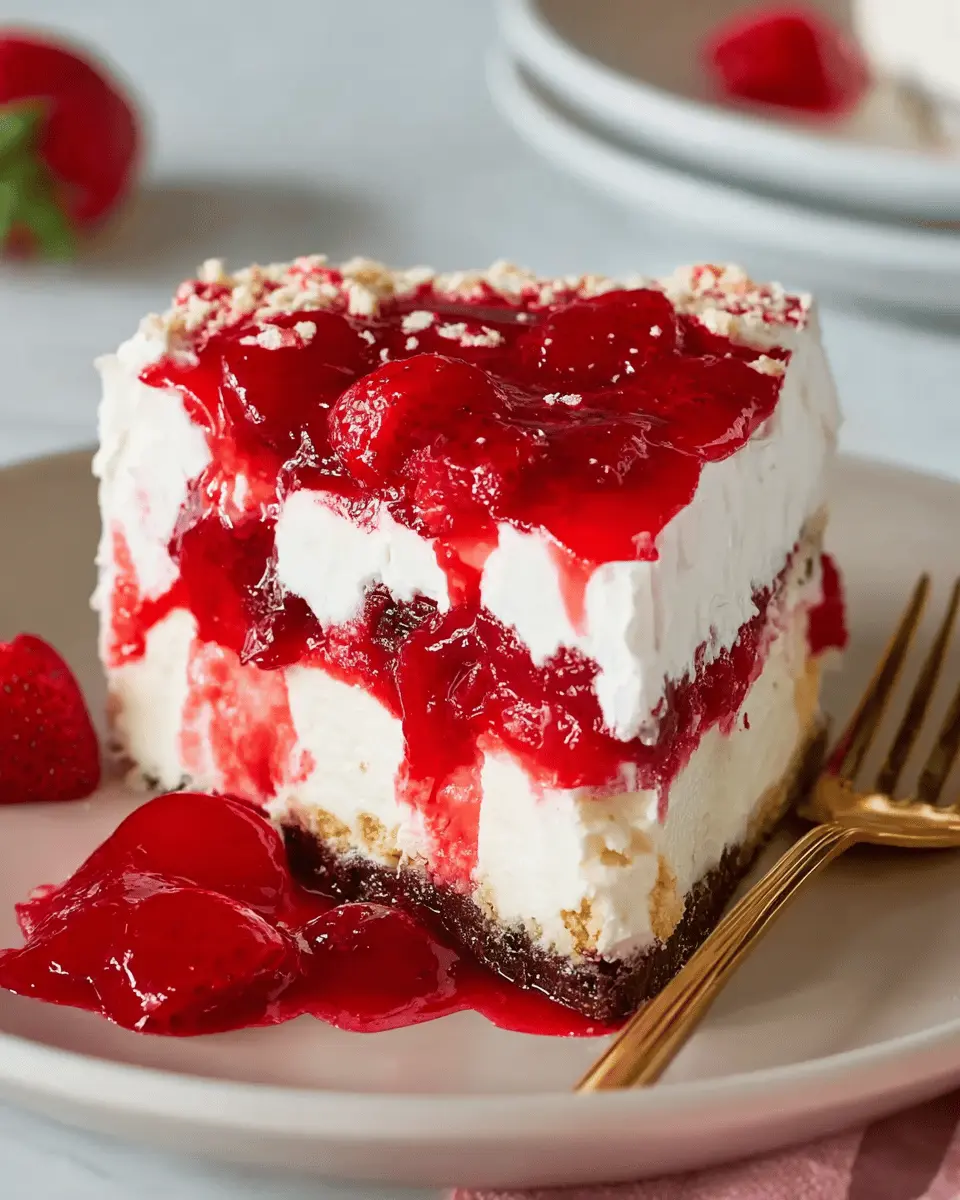
Grab your favorite baking dish (an 8x8 or 9x9 works perfectly), and place half of the angel food cake pieces evenly at the bottom. This forms a lovely base for our dessert. Next, spread 1 cup of cherry pie filling over the cake pieces. This fruity layer adds not just flavor but also a vibrant color that makes the dessert visually appealing. Finish this layer by adding the remaining angel food cake pieces on top, ensuring they are evenly distributed.
Whisk the Pudding Mix
In a separate large bowl, combine the vanilla pudding mix with 1 ½ cups of whole milk (or half-and-half) and the cup of sour cream. Use a whisk to blend everything together until the mixture is slightly thickened and smooth, usually about one minute. This creamy concoction brings the dessert together—and trust me, it’s irresistible!
Assemble the Dessert
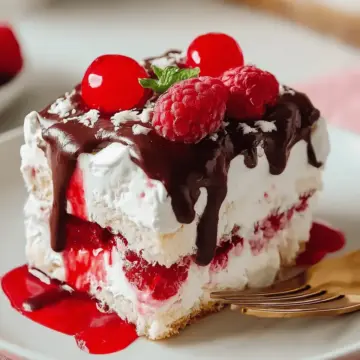
Pour the prepared pudding mixture over the layered angel food cake in your baking dish, spreading it evenly. Then comes the fun part: topping the pudding with the thawed whipped topping. Once spread smoothly, grab the remaining cherry pie filling and dollop it across the whipped topping. For an artsy touch, use a toothpick to gently swirl the pie filling into the topping, creating a pretty marbled effect.
Refrigerate and Serve
Now that your no-bake dessert is assembled, it's time for the crucial step: refrigeration. Allow your dessert to chill in the fridge, uncovered, for at least 8 hours or up to 12 hours. This waiting game not only enhances the flavors but provides that perfect consistency. When ready to serve, you can optionally sprinkle some sliced almonds on top for an added crunch.
Et voilà! You have a delightful no-bake dessert that is sure to impress your friends and family. Dive in and enjoy! For other dessert ideas, check out this resource to inspire your next culinary creation.
Variations on No-Bake Dessert
No-bake desserts are a fantastic way to indulge your sweet tooth without the hassle of turning on the oven. Let’s explore a couple of delicious variations that you can whip up with ease!
Berry Delight No-Bake Treat
For a fruity twist, swap in fresh berries like strawberries, blueberries, or raspberries. Layer them with the angel food cake and a creamy vanilla pudding mixture. You get a refreshing berry delight that’s perfect for summer gatherings! And don't forget to drizzle a bit of honey or agave nectar for added sweetness.
Chocolate Indulgence No-Bake Dessert
Craving something chocolatey? Replace the vanilla pudding with chocolate pudding mix and fold in some chocolate chips into your whipped topping. This chocolate indulgence is just what you need to satisfy those cravings. Garnish it with chocolate shavings or crushed nuts for texture.
Embrace these variations and let your creativity flourish in the kitchen! For more ideas on no-bake treats, check out BakingwithJosh or SweetTreatsGalore. Whether you choose fruity or chocolaty, your dessert is bound to impress your friends and family!
Cooking Tips and Notes for No-Bake Dessert
Creating a no-bake dessert can be a game-changer for any gathering. Here are some friendly tips to elevate your sweet creation:
- Chill Your Ingredients: Start with cold milk and whipped topping for a smoother texture. This step makes it even easier to whip to the desired consistency.
- Layer Strategically: Ensure that each layer is evenly spread. It helps the flavors meld beautifully and gives a professional look.
- Flavor Variations: Don't hesitate to experiment! Try different fruit fillings like blueberry or mixed berries for a delightful twist.
For more inspiration, check out this article on dessert variations to spark your creativity!
Serving Suggestions for No-Bake Dessert
When it comes to serving your no-bake dessert, simplicity is key! Start by spooning generous portions into individual bowls for an effortlessly elegant touch. Consider a sprinkle of sliced almonds on top for a lovely crunch that pairs beautifully with the soft textures of the dessert. Want to enhance the fruity flavor? Add fresh cherries or a drizzle of cherry syrup for a pop of color and taste.
For an extra flair, serve with a side of whipped cream or a scoop of vanilla ice cream. This way, you can elevate your dessert experience to a whole new level! Enjoying it under twinkling fairy lights with friends? Perfect!
For more dessert ideas and tips, check out Taste of Home and Food Network for inspiration!
Time Breakdown for No-Bake Dessert
Preparation Time
Getting this delicious no-bake dessert ready is a breeze! You’ll spend about 20 minutes preparing the layers and mixing the ingredients. Set aside some time to enjoy the process—it's a perfect reason to play your favorite tunes while creating something delightful.
Refrigeration Time
The hardest part is the waiting. This dessert requires at least 8 hours in the refrigerator to set properly. If you can resist the urge, letting it chill for a full 12 hours will enhance the flavors even more. Remember, patience is a virtue in dessert-making!
Total Time
In total, you’re looking at about 8 hours and 20 minutes from start to finish. While most of that time is just the dessert chilling, you’ll find that the short prep time is totally worth it for such a tasty treat!
For further reading on no-bake desserts, check out this insightful guide on making quick and easy desserts from scratch.
Nutritional Facts for No-Bake Dessert
When indulging in this delightful no-bake dessert, it’s wise to keep its nutritional values in mind. Here’s a quick breakdown:
Calories
This no-bake treat has approximately 300 calories per serving, making it a satisfying yet light option for dessert lovers.
Protein
Each serving contains about 4 grams of protein, thanks to the sour cream and whipped topping, providing a little boost to your sweet experience.
Sugar Content
With around 20 grams of sugar per serving, this dessert strikes a balance between sweetness and indulgence without going overboard.
For more detailed nutritional insights, you might find resources like the USDA Food Composition Database helpful! Keeping track of your intake while enjoying your favorite treats can make all the difference. Happy indulging!
FAQs about No-Bake Desserts
Can I make no-bake desserts ahead of time?
Absolutely! One of the best features of no-bake desserts is their flexibility. You can prepare your dessert the day before serving, making it a great choice for parties or gatherings. Just be sure to refrigerate it for at least 8 hours to allow the flavors to meld beautifully.
How do I store leftover no-bake dessert?
If you have any leftovers (which is a big "if" with delicious desserts), cover them tightly with plastic wrap or transfer them to an airtight container. Store your no-bake dessert in the refrigerator, where it should stay fresh for about 3–4 days. Just remember that the texture might change slightly over time.
Can I substitute ingredients in no-bake desserts?
Yes, substitutions can work wonders! If you're out of sour cream, for instance, Greek yogurt can be a nutritious alternative. You can also use dairy-free options for milk and whipped topping. Be sure to check your ingredient ratios to maintain the texture and flavor balance. For more tips on ingredient swaps, you can explore resources like The Kitchn.
Conclusion on No-Bake Desserts
No-bake desserts like our delicious cherry angel food cake are a lifesaver for busy professionals. They require minimal effort yet deliver impressive flavors. Whether it’s for a gathering or a sweet treat at home, these desserts are sure to delight. Ready to whip one up? Enjoy exploring more no-bake options!
No Bake Dessert Delight: Indulge in Creamy Turkey Bacon Treats
Equipment
- baking dish
- large bowl
- Whisk
Ingredients
- 1 14 ounce angel food cake, cut into 1-inch pieces
- 1 21 ounce can cherry pie filling, divided
- 1 3.4 ounce package vanilla instant pudding mix and pie filling such as Jell-O®
- 1.5 cups whole milk or half-and-half
- 1 cup sour cream
- 1 8 ounce container frozen whipped topping, thawed
- sliced almonds optional
Instructions
- Gather all ingredients.
- Place half of angel food cake pieces in the bottom of a deep 8-x-8-inch or 9x9-inch baking dish in an even layer. Spread 1 cup cherry pie filling over top of cake. Top with remaining cake pieces in an even layer.
- Whisk together vanilla pudding mix, whole milk, and sour cream in a large bowl until slightly thickened and smooth, about 1 minute.
- Pour pudding mix over top of cake and spread evenly.
- Spread thawed whipped topping over pudding layer. Dot with remaining 1 cup cherry pie filling. Using a toothpick or spoon, swoop and swirl pie filling into the whipped topping. Refrigerate, uncovered, for at least 8 hours or up to 12 hours. Garnish with sliced almonds.

Leave a Reply