
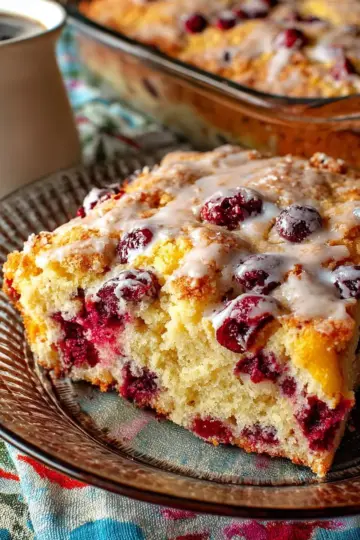
Introduction to My Favorite Apple Pie Recipe
There's something undeniably comforting about a slice of homemade apple pie. Not only does the aroma fill your kitchen with warmth, but the taste is a nostalgic delight that reminds many of family gatherings and cozy nights in. My Favorite Apple Pie Recipe brings together the perfect balance of sweet and tart apples flavored with warm spices, all encased in a flaky, buttery crust. What could be better?
Why Homemade Apple Pie is a Must-Try
One of the best aspects of making your own apple pie is the ability to customize every element. You can choose your favorite apple varieties—Granny Smith for tartness, Honeycrisp for sweetness, or even a mix for depth of flavor. Plus, preparing it yourself offers the satisfaction that comes from creating a delicious dessert from scratch.
Did you know that baking your pie from home allows you to control the ingredients? This means you can avoid unnecessary preservatives found in store-bought options, ensuring your dessert is as healthy (or indulgent) as you prefer. There’s something incredibly rewarding about serving a pie that you've crafted with love, making it a memorable centerpiece for any occasion. If you’re ready to impress your friends or simply treat yourself, this is the recipe to try!
Ingredients for My Favorite Apple Pie
Essential Ingredients for the Crust
The foundation of any great apple pie is the crust, and making it from scratch is truly worth the effort. For my favorite apple pie, I recommend using either a Homemade Pie Crust or an All Butter Pie Crust. Both will yield a buttery, flaky texture that perfectly complements the sweet filling. You will need the following key components:
- 2 and ½ cups (320g) all-purpose flour
- 1 teaspoon salt
- 1 tablespoon granulated sugar
- 1 cup (225g) unsalted chilled butter, cut into cubes
- Ice water, as needed
This combination ensures a tender yet sturdy crust that can hold a generous amount of spiced apple filling.
Key Ingredients for the Filling
Now, let's talk about the star of the show—the filling! My favorite apple pie recipe features a harmonious blend of flavors that highlight the natural sweetness of the apples. Here’s what you’ll need:
- 10 cups (1250g) of peeled and cored apple slices (about 8 large apples, Granny Smith and Honeycrisp work beautifully)
- ½ cup (100g) granulated sugar or packed brown sugar for a deeper flavor
- ¼ cup (31g) all-purpose flour to help thicken the juices as they cook
- 1 tablespoon (15ml) fresh lemon juice to brighten the flavors
- Spices: 1 and ½ teaspoons ground cinnamon, ¼ teaspoon ground allspice, and ¼ teaspoon ground nutmeg
With these ingredients, you’ll create a filling that's bursting with flavor and warmth—a true comfort food classic! For more tips on sourcing the best apples for your pie, check out Sally's Baking Addiction for expert advice!
Step-by-step Preparation of My Favorite Apple Pie
Making My Favorite Apple Pie is a delightful experience that fills your home with the warm aroma of baking apples and spices. Let’s walk through the step-by-step preparation together, ensuring that your pie turns out perfectly every time!
Prepare the pie crust
First things first! You’ll need to prepare your pie crust. You can choose either a homemade pie crust or an all-butter version. Both are designed to create a perfect flaky texture, so it's up to your preferences! After mixing your ingredients, remember to refrigerate the dough for at least two hours. This is crucial for achieving that light, tender crust.
Roll out the chilled pie dough
Once your dough is chilled, it’s time to roll it out! On a lightly floured surface, take one disc of dough and roll it to about 12 inches in diameter. Don’t forget to rotate the dough a quarter turn every few rolls to ensure an even thickness. Once you’ve accomplished this, gently place the rolled dough into your 9-inch pie dish. Tuck it in nicely, making sure it’s smooth and free from air bubbles. Pop the pie shell back into the fridge while you prepare your filling.
Make the apple filling
For the filling, slice about eight large apples into ¼-inch slices. In a large bowl, combine the apple slices with sugar, flour, lemon juice, and spices like cinnamon, allspice, and nutmeg. Stir everything together until the apples are thoroughly coated in the mixture. The acid from the lemon juice helps prevent browning, while the sugar and spices add flavor.
Pre-cook the filling (optional)
Here's a little chef secret: you can pre-cook the apple filling, and I highly recommend it! Pour the mixture into a large skillet and cook over medium heat. Stir gently until the apples just begin to soften—about 5 minutes. This step enhances the flavors and ensures that your filling is juicy yet not watery.
Spoon the filling into the crust
Once your filling has cooled slightly or is still warm from cooking, carefully spoon it into your prepared crust. Don’t worry if it looks like a lot of apples—you want them densely packed so your pie is bursting with deliciousness!
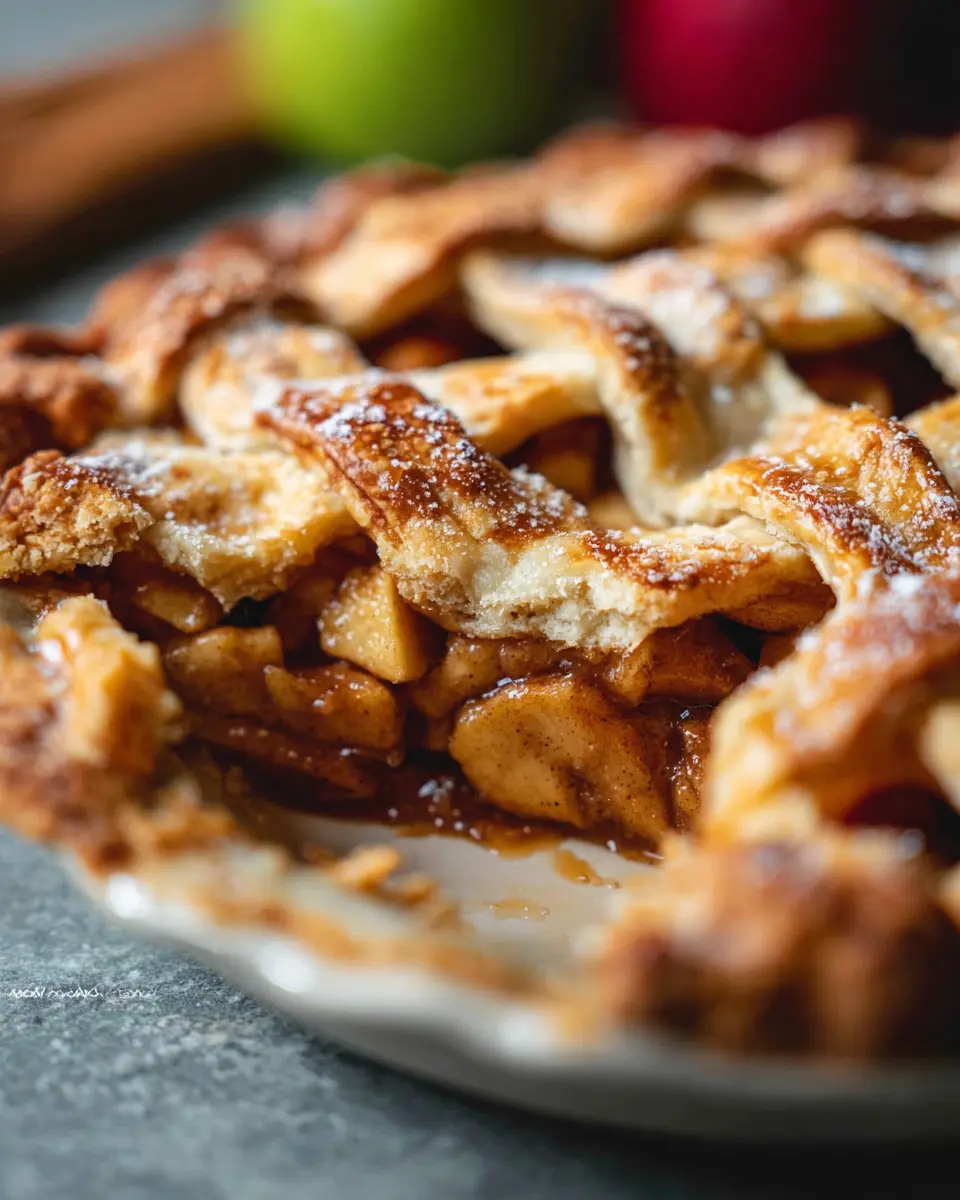
Assemble the top crust
Now it’s time to add the top crust! Roll out the second disc of dough into another 12-inch circle. For a classic lattice design, cut the dough into strips about one inch wide. Weave these strips over the filling, folding some back while placing others on top. This step not only looks beautiful but allows the filling to bubble up through the crust, creating a visually appealing pie.
Brush and sprinkle the crust
To give your pie an irresistible golden finish, brush the top crust with a mixture of beaten egg and milk. For an extra touch of sweetness, sprinkle some coarse sugar on top.
Bake the pie
Preheat your oven to 400°F (204°C). Place your pie in the oven and bake for 25 minutes. Then, lower the temperature to 375°F (190°C) and continue baking for an additional 35–45 minutes. If the edges start browning too quickly, use a pie crust shield or tent some foil over the edges.
Cool before serving
Once your pie is beautifully golden and bubbling, remove it from the oven and let it cool on a wire rack. Cooling is key here! Letting your apple pie rest for about three hours allows the filling to set, making slicing easier and preventing a soupy mess.
By following these steps, you'll create a pie that’s not only delicious but also a showstopper at any gathering. Enjoy the sweet rewards of your hard work!
Variations on My Favorite Apple Pie
Looking to elevate your apple pie game? Here are a couple of delightful variations inspired by my classic recipe.
Apple Pie with Caramel Drizzle
For a decadent twist on my favorite apple pie recipe, try adding a luscious caramel drizzle on top once the pie has cooled. Simply melt caramel candies or use store-bought caramel sauce to create a sweet topping that beautifully complements the tartness of the apples. This tiny extra step not only enhances the flavor but also adds an impressive look to your pie!
Nutty Apple Pie with Walnuts or Pecans
If you’re a nut lover, consider incorporating walnuts or pecans into your filling. Chop about 1 cup of your favorite nuts and mix them with the apple slices before filling the pie crust. The nuts add an irresistible crunch and depth of flavor, making it an indulgent take on the classic. Trust me, your guests will be raving about this nutty variation!
Experimenting with these variations can make your homemade pie even more memorable. Happy baking!
Cooking Tips and Notes for My Favorite Apple Pie
Tips for a flaky crust
To achieve the perfect flaky crust for My Favorite Apple Pie Recipe, always use chilled ingredients, especially butter, to keep the dough’s fat from melting before baking. Consider using a combination of all-purpose flour and a bit of pastry flour for added tenderness. When mixing, be gentle—overworking the dough can lead to toughness. For an intriguing flavor, sprinkle a touch of salt in the dough.
Recommendations for apple types
When it comes to apple varieties, aim for a mix of tart and sweet to create a balanced filling. I recommend using Granny Smith for their tartness and Honeycrisp for their sweetness. If you want to experiment, try adding a few Braeburn or Golden Delicious apples for variety. Each brings a unique flavor profile to your pie! For a thorough guide on apple selection, visit this expert resource.
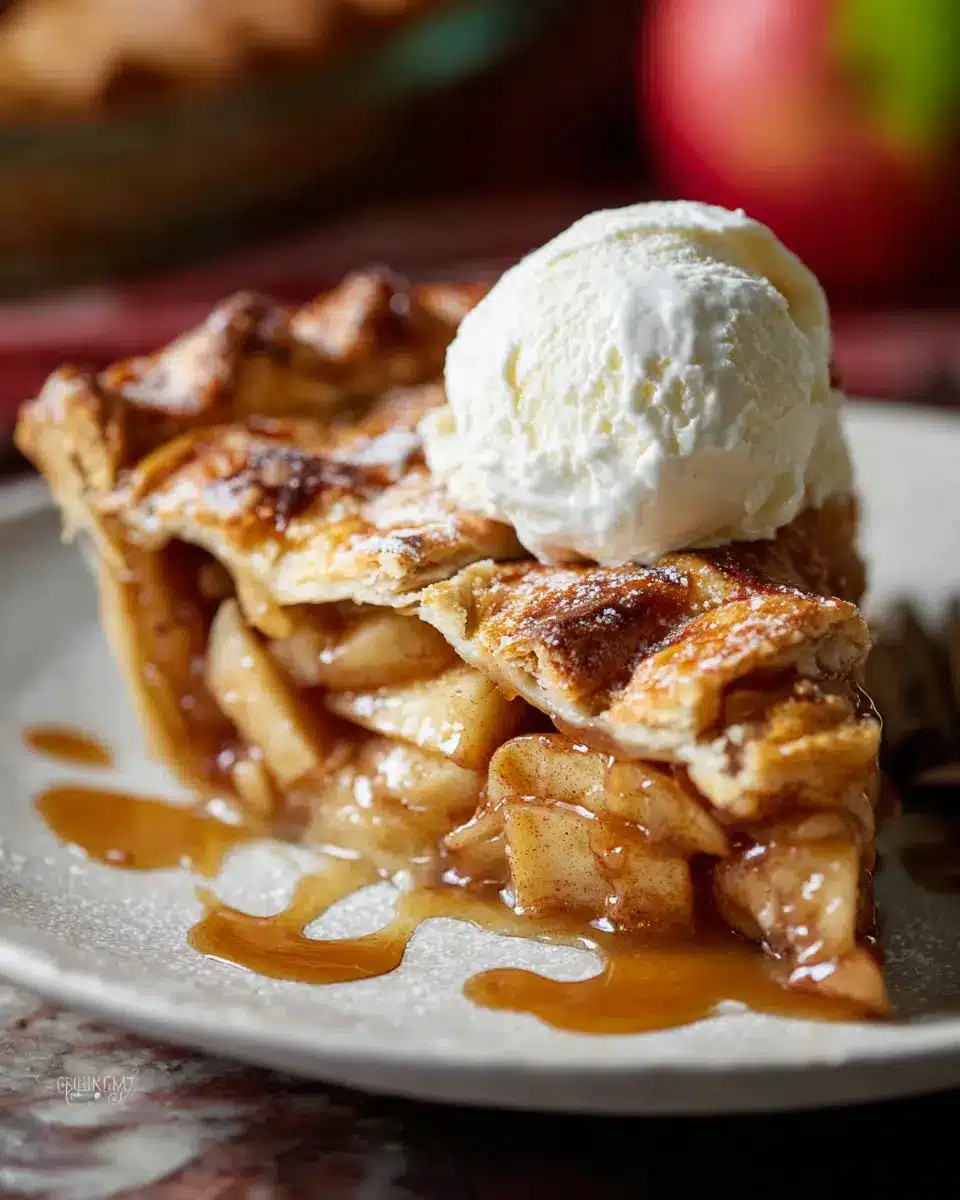
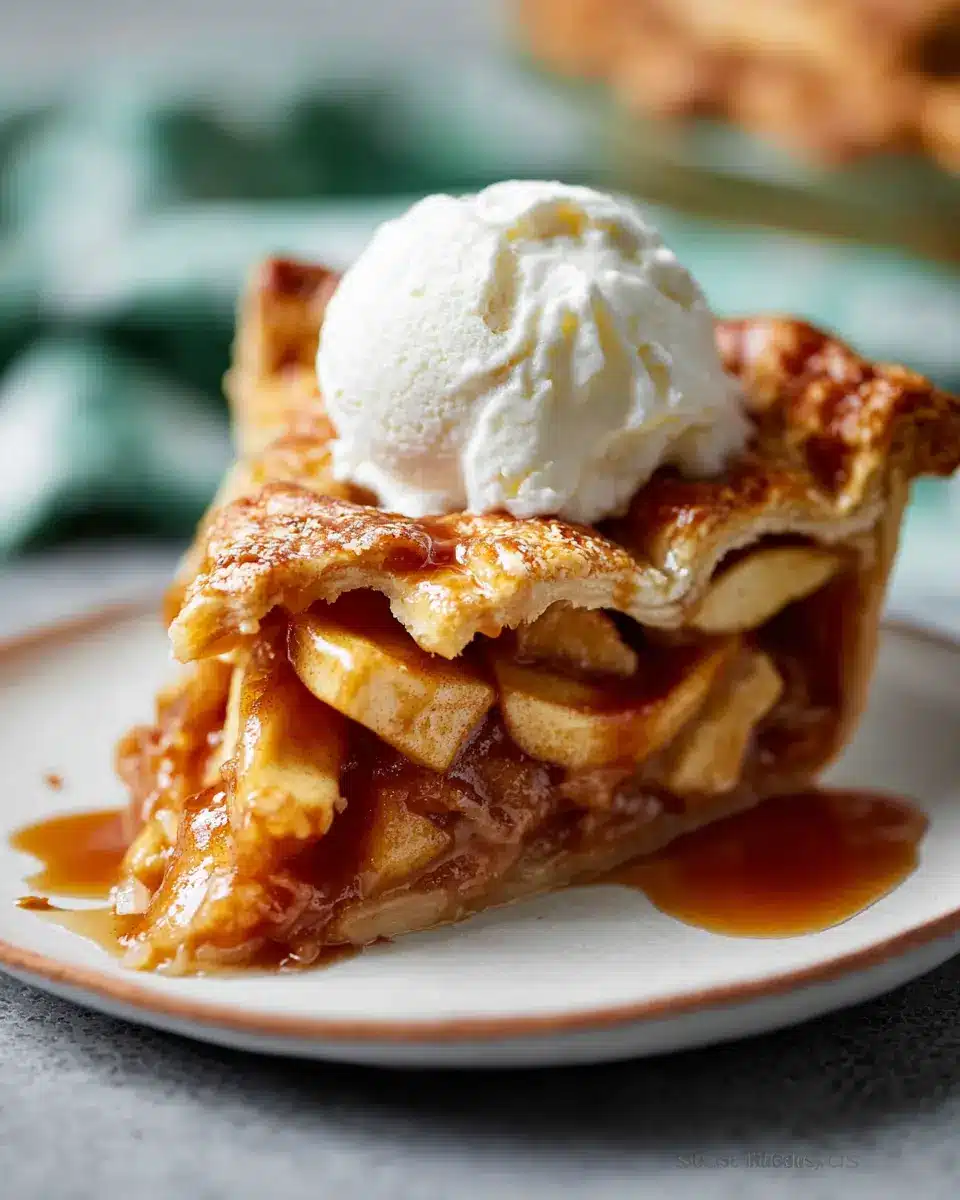
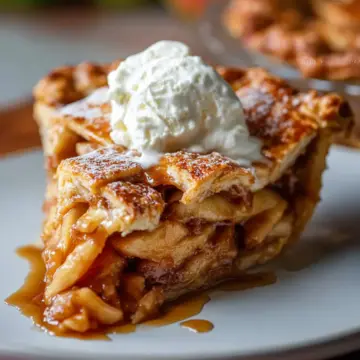
Serving Suggestions for My Favorite Apple Pie
Best Ice Cream Pairings
Nothing complements My Favorite Apple Pie quite like a scoop of ice cream! Here are a few delightful choices:
- Vanilla: A classic option that enhances the warm flavors of the pie.
- Cinnamon: For an extra spice kick, embracing the pie’s inherent spices.
- Salted Caramel: The sweetness and saltiness create a rich, indulgent experience.
Creative Serving Ideas
For a fun twist on serving My Favorite Apple Pie, consider these ideas:
- Mini Pies: Use a muffin tin to create individual-sized apple pies, perfect for a party!
- Apple Pie Sundae: Crumble pie over vanilla ice cream, drizzled with caramel for a modern take.
- Cinnamon Whipped Cream: Add a dollop of homemade whipped cream infused with cinnamon for an extra layer of flavor.
These serving suggestions will make your apple pie the star of any gathering!
Time Breakdown for My Favorite Apple Pie
Preparation time
Get your kitchen warmed up! The prep time for My Favorite Apple Pie Recipe is about 30–45 minutes. This includes making the crust, slicing those delicious apples, and mixing the filling. It’s a great way to unwind after a long day.
Baking time
Your pie will need approximately 60–70 minutes in the oven. That’s just enough time to fill your home with the delightful scent of cinnamon and baked apples—perfect for cozying up with a good book!
Total time
From start to finish, you’re looking at around 2 to 2.5 hours, including cooling time. Patience is key; letting your pie cool for at least 3 hours ensures that each slice holds its shape and is absolutely scrumptious! For more tips on creating the perfect pie, check out resources like King Arthur Baking.
Nutritional Facts for My Favorite Apple Pie
When indulging in my favorite apple pie recipe, it's good to know what you're treating yourself to. Here’s a quick breakdown of the nutritional facts per slice to help you enjoy every bite guilt-free.
Calories per slice
Each slice of this delicious pie contains approximately 200-250 calories. Perfect for satisfying your sweet tooth without breaking the calorie bank!
Sugar content
With around 10-12 grams of sugar per slice, you’ll get the sweetness you crave. Consider using natural alternatives like maple syrup or coconut sugar to keep things a bit healthier.
Fiber content
Thanks to the apples, this pie packs in 2-3 grams of fiber per slice. Fiber is essential for digestion, and it's a great reason to enjoy this classic dessert in moderation!
With homemade goodness and these nutritional facts, you can confidently serve up my favorite apple pie recipe for gatherings or cozy nights in. Want more detailed nutritional insights? Check out resources like Nutrition.gov for further reading!
FAQs about My Favorite Apple Pie
Can I make pie crust ahead of time?
Absolutely! You can prepare the pie crust for My Favorite Apple Pie Recipe in advance. Simply wrap the dough tightly in plastic wrap and store it in the refrigerator for up to 5 days or freeze it for up to 3 months. When you're ready to bake, just thaw it overnight in the refrigerator before rolling it out. This not only saves you time but also enhances the flavor and flakiness of your crust!
How do I know when my pie is done?
Knowing when your pie is perfectly baked is key to achieving that golden, flaky crust and bubbly filling. Look for a golden-brown topping, and the filling should be bubbling through the lattice. For precision, an internal temperature of around 200°F (93°C) indicates a well-cooked pie. You’ll want to cool it for at least three hours before slicing to enjoy a perfectly set filling.
What’s the best way to store leftover pie?
If you have leftovers (which is a rarity with this delicious pie!), cover and store it at room temperature for up to one day. For longer storage, keep it in the refrigerator for up to 5 days. You can also freeze the pie for up to 3 months; just make sure to let it come to room temperature before serving for the best texture!
Conclusion on My Favorite Apple Pie
In summary, my favorite apple pie recipe brings together the delightful flavors of cinnamon-spiced apples with a flaky crust, making it a perfect dessert for any occasion. With simple ingredients and easy steps, you can create a pie that will impress family and friends alike. Enjoy every slice!
My Favorite Apple Pie Recipe
Equipment
- Large Skillet or Dutch Oven
- Rolling Pin
- 9-inch pie dish
- Pastry Wheel or Pizza Cutter
- Kitchen Shears
- Pastry Brush
- Cooling Rack
Ingredients
Crust
- 2 Homemade Pie Crust or All Butter Pie Crust Both recipes make 2 crusts.
Filling
- 10 cups apple slices about 8 large peeled and cored apples
- ½ cup granulated sugar or packed brown sugar
- ¼ cup all-purpose flour spooned & leveled
- 1 Tablespoon lemon juice
- 1.5 teaspoons ground cinnamon
- ¼ teaspoon ground allspice
- ¼ teaspoon ground nutmeg
- 1 large egg beaten with 1 Tablespoon milk for egg wash
- coarse sugar for sprinkling on crust (optional)
Instructions
Preparation
- Prepare either pie crust recipe through step 5. The pie dough needs to be refrigerated for at least 2 hours before using.
- On a floured work surface, roll out one of the discs of chilled dough to a 12-inch diameter. Place the dough into a 9-inch pie dish.
- In a large bowl, stir the apple slices, sugar, flour, lemon juice, cinnamon, allspice, and nutmeg together until thoroughly combined.
- Cook apple filling in a large skillet over medium heat until apples begin to soften, about 5 minutes. Remove from heat and let cool slightly.
- Preheat oven to 400°F (204°C). Spoon the filling into the crust.
- Prepare the top crust by rolling the second disc of dough and cutting strips to weave over the filling.
- Lightly brush the top of the pie crust with the egg wash and sprinkle with coarse sugar, if desired.
- Bake the pie for 25 minutes, then reduce temperature to 375°F (190°C) and continue baking for an additional 35-45 minutes until golden brown.
- After baking, cool on a rack for at least 3 hours before slicing.


Leave a Reply