
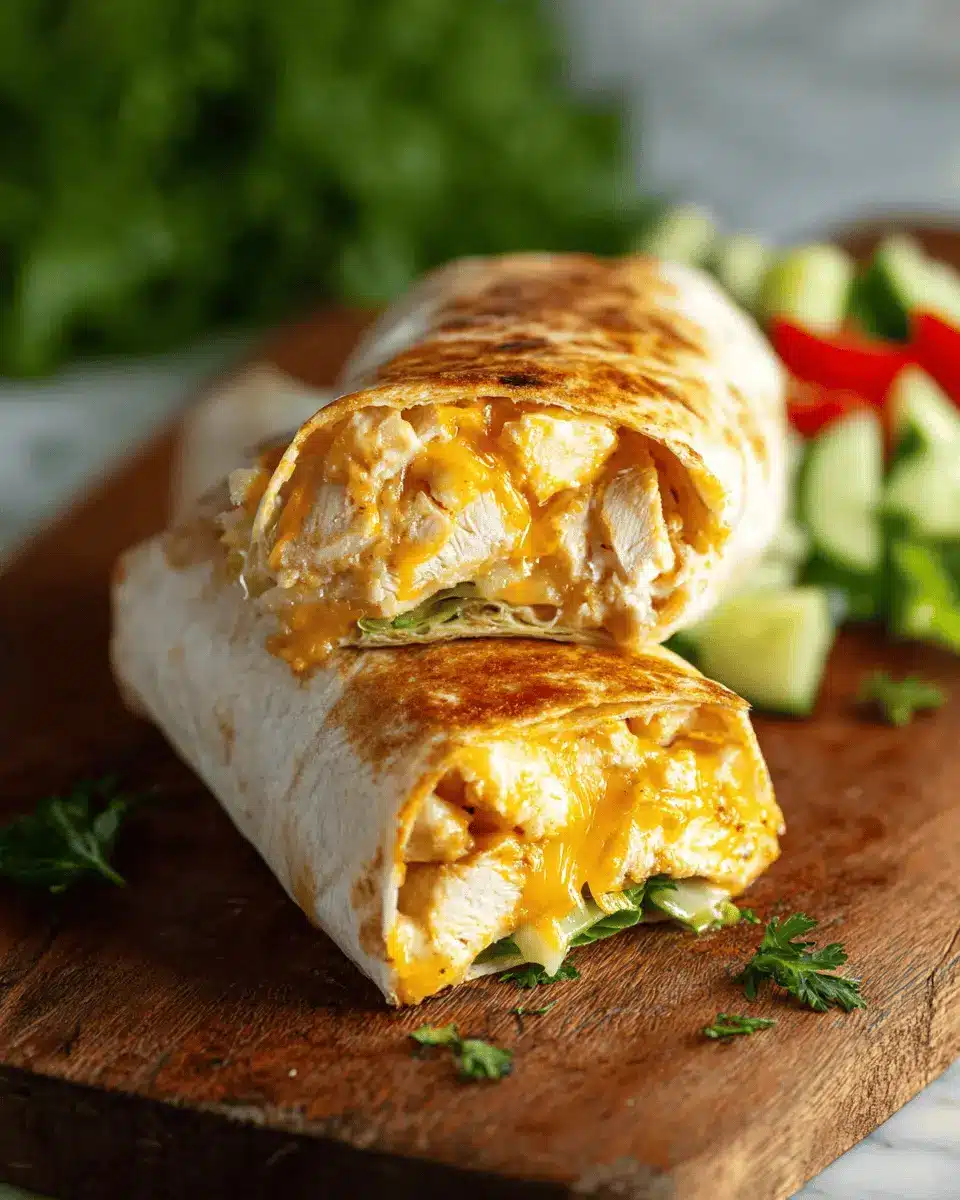
Introduction to Cheesy Garlic Chicken Wraps
When it comes to whipping up a quick and satisfying meal, cheesy garlic chicken wraps are a fantastic choice! These versatile wraps blend creamy garlic chicken with melty cheese, all encased in a warm tortilla—perfect for busy weeknights or easy meal prep. With just a few simple ingredients and minimal prep, you can create a dish that’s not only delicious but also a crowd-pleaser. Who wouldn’t love a warm, gooey wrap after a long day?
These wraps offer a delightful combination of flavors and textures. The savory chicken—be it from a rotisserie for convenience or grilled at home—pairs beautifully with zesty garlic and creamy spreads. You can even swap in your favorite low-carb tortillas if you’re watching your carbs. Plus, they’re easily customizable; throw in some extra veggies or spice them up with your favorite hot sauce!
For those who enjoy hands-on cooking, this recipe presents an opportunity to connect with those you’re serving. Whether it's a family dinner or a cozy night in with friends, these wraps will not be just a meal but an experience. Check out the full recipe and step into flavor town!
Ingredients for Cheesy Garlic Chicken Wraps
Creating your very own Cheesy Garlic Chicken Wraps is not just a treat for your taste buds but also an opportunity to whip up something satisfying in no time. Here’s what you’ll need to get started:
- 2 large tortillas: Choose between regular or low-carb/high-protein options for flexibility.
- 7 oz cooked chicken: About 200 grams, chopped. Rotisserie chicken is a fantastic time-saver!
- 2 garlic cloves: Minced or grated, depending on how garlicky you like it.
- 2 tablespoons light mayonnaise: This gives your wraps a creamy texture.
- 1 tablespoon light Greek yogurt: Adds a tangy twist and keeps it lighter.
- 2 teaspoons hot sauce: A dash of Frank’s or your favorite brand to spice things up.
- ¼ teaspoon salt: A pinch to enhance all those lovely flavors.
- 3 oz grated cheese: About 90 grams. A cheddar blend works wonders here.
- 1 green onion: Chopped, for that fresh crunch.
- Olive oil spray: Just enough to crisp up the wraps in the pan.
With these simple ingredients, you'll have a flavor-packed meal that’s perfect for any occasion! For a deeper dive into the health benefits of each component, check out useful resources like Healthline. Happy cooking!
Preparing Cheesy Garlic Chicken Wraps
If you're looking for a meal that's both delicious and easy to whip up on a busy weeknight, these cheesy garlic chicken wraps are the perfect solution. Let’s break down the preparation process step-by-step, so you can impress your taste buds and your friends!
Gather your ingredients
Before diving in, it helps to have all your ingredients at the ready. Here’s what you’ll need:
- 2 large tortillas (regular or low-carb/high-protein)
- 7 oz (about 200 grams) cooked chicken, chopped (rotisserie chicken works great)
- 2 garlic cloves, minced or grated (you can adjust this to your taste!)
- 2 tablespoons light mayonnaise
- 1 tablespoon light Greek yogurt or plain yogurt
- 2 teaspoons hot sauce (like Frank’s for an extra kick)
- ¼ teaspoon salt
- 3 oz (about 90 grams) grated cheese (a cheddar blend is delicious)
- 1 green onion, chopped
- Olive oil spray
Having everything in one place will streamline your cooking process.
Combine the chicken filling
Now it’s time to create the tasty filling for your wraps! In a medium bowl, mix together the chopped chicken, minced garlic, mayonnaise, yogurt, hot sauce, and salt. This combination not only keeps your filling moist but also adds layers of flavor—making your cheesy garlic chicken wraps truly irresistible. If you have any leftover chicken in the fridge, this is a great use for it!
Assemble the wraps
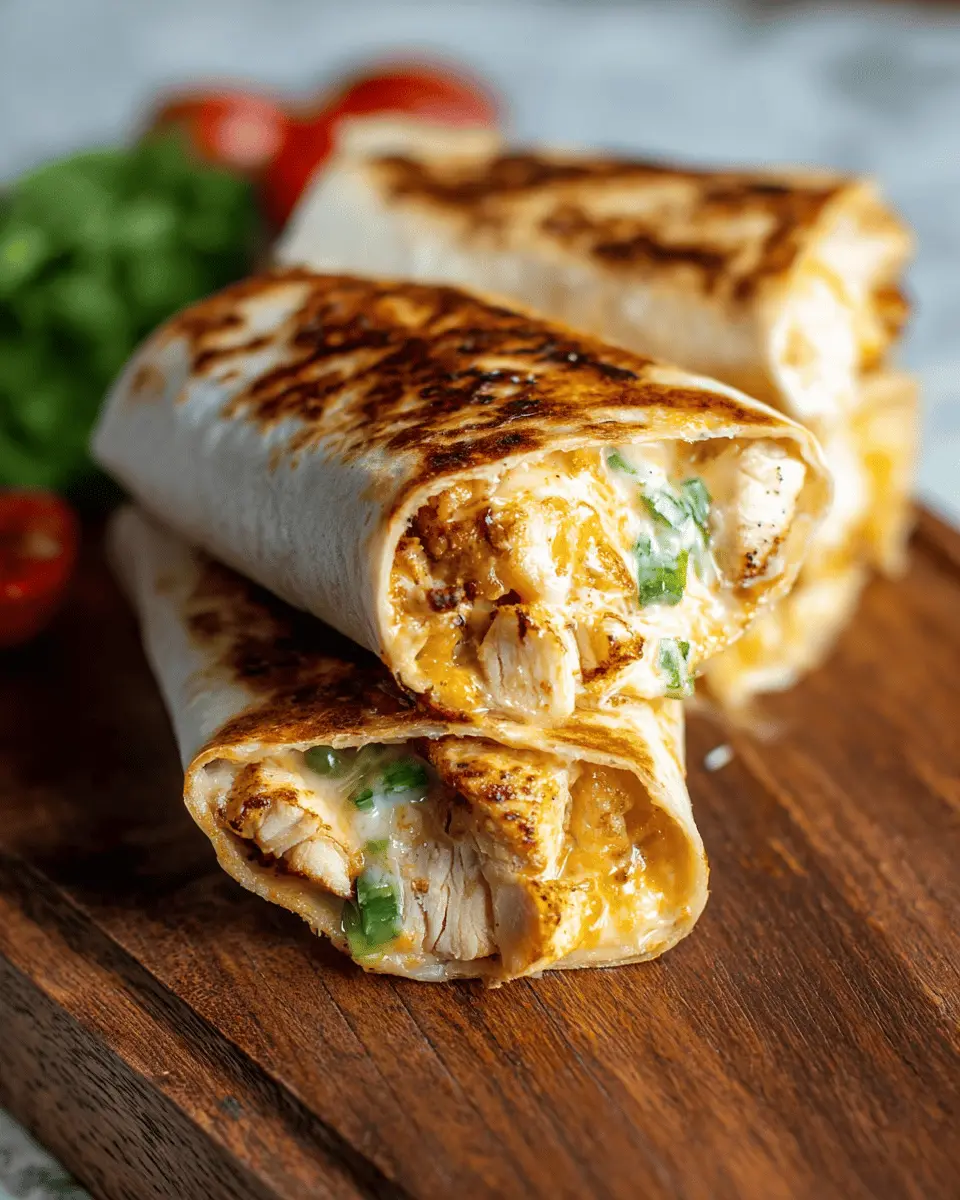
Lay out your tortilla and get to assembling! On the lower third of the tortilla, sprinkle about 2 tablespoons of grated cheese, then add around ⅔ cup of the chicken mixture. Finish it off with another tablespoon of cheese and a sprinkle of chopped green onion for that fresh pop of flavor. Ready for the tricky part? Fold in the sides of the tortilla and roll it up tightly from the bottom. Trust me, a tight roll keeps everything nice and snug.
Cook the wraps to crispy perfection
Heat a non-stick pan over medium-high heat and spray it lightly with olive oil. Place your wraps seam-side down in the pan. Cook them for about 3-4 minutes on each side until they’re crispy and golden brown. Just a tip: covering the pan with a lid helps melt the cheese and warms the filling faster, creating that gooey cheesy goodness we all crave.
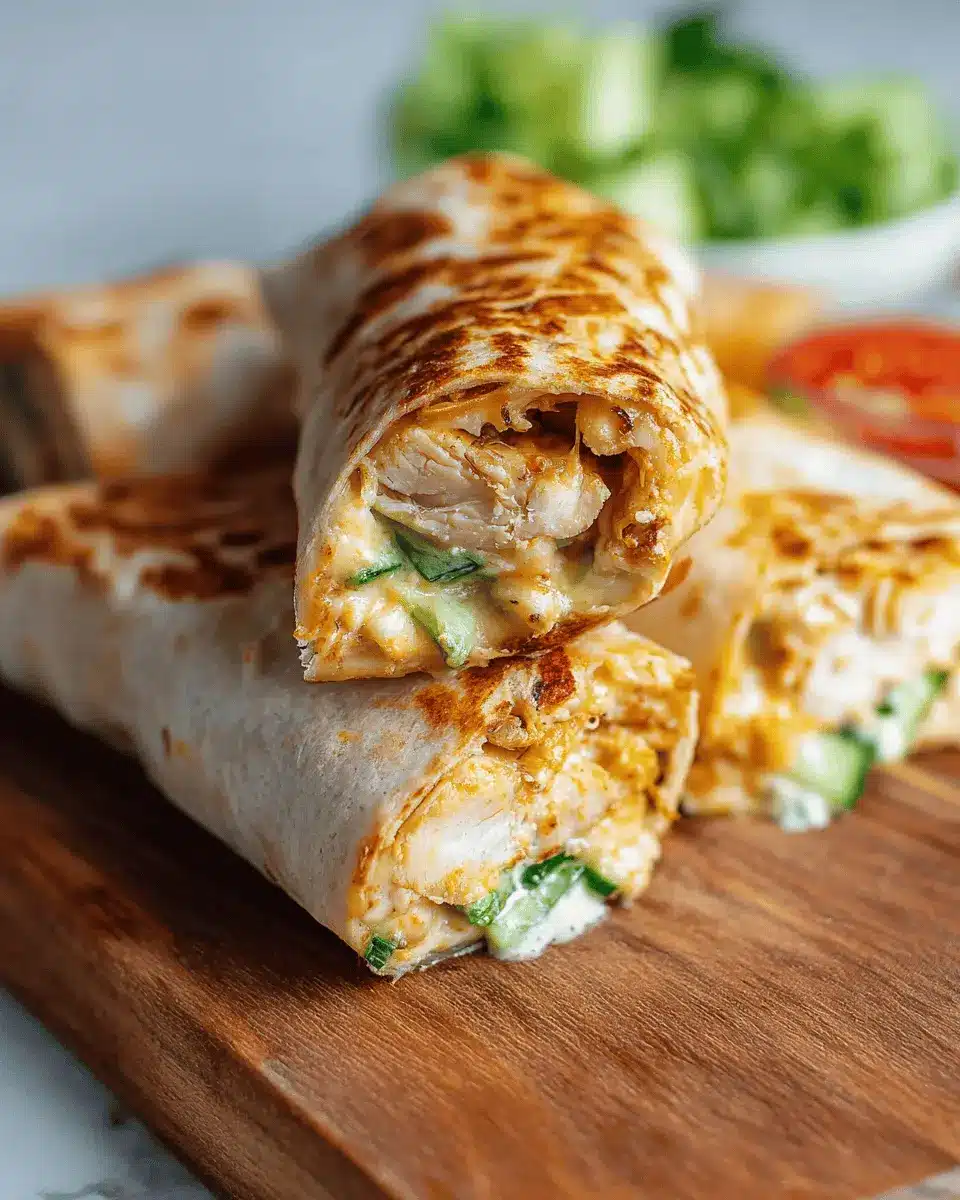
Serve and enjoy!
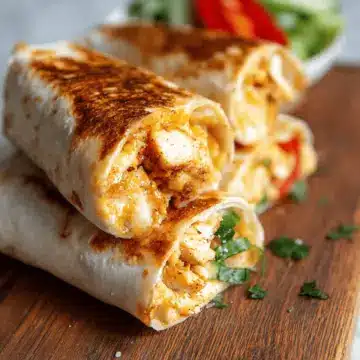
Once your wraps are golden and crispy, slice them in half and serve hot. These cheesy garlic chicken wraps are fantastic on their own, but you can elevate your meal by serving them with a crunchy salad or roasted veggies. Feel free to throw in some pickles or a side of salsa for extra dipping fun. And if you're in the mood for chips on the side, who could say no?
You’re all set to indulge in a delicious meal that’s as fun to prepare as it is to savor! Enjoy your creamy, cheesy wraps and don’t hesitate to get creative with your sides. Happy cooking!
Variations on Cheesy Garlic Chicken Wraps
Spicy Cheesy Garlic Chicken Wraps
For those who crave a kick, try spicy cheesy garlic chicken wraps. Simply add diced jalapeños or a sprinkle of cayenne to the chicken mixture. The heat pairs beautifully with the creaminess of the cheese, elevating your wrap to a new level of deliciousness. Don't forget to swap out the hot sauce with your favorite spicier blend for an extra fiery twist.
Vegetarian Cheesy Garlic Wraps
Not a meat lover? No problem! Craft vegetarian cheesy garlic wraps by ditching the chicken and using grilled vegetables like bell peppers, zucchini, or mushrooms. For protein, add black beans or chickpeas, and keep the garlic and cheese to ensure that savory flavor shines through. These variations allow everyone to enjoy the heartiness of cheesy goodness without compromising on taste!
Cooking tips and notes for Cheesy Garlic Chicken Wraps
Meal prep and storage tips
Getting a head start on your cheesy garlic chicken wraps can save you time during a busy week. Prepare the chicken filling up to 3 days in advance and store it in an airtight container in the fridge. Once you’re ready to indulge, simply wrap and cook! If you happen to have leftovers, cooked wraps can be kept in the fridge for up to 2 days. For the best quality, reheat them in a skillet or air fryer to restore that delightful crispiness.
Cooking methods: pan-frying vs. air fryer
When it comes to cooking your cheesy garlic chicken wraps, both pan-frying and air frying are excellent methods. Pan-frying creates a beautifully crispy exterior and a cheesy, melty interior. However, if you prefer a quicker option with less oil, the air fryer is a fantastic choice. Simply set the air fryer to 375°F (190°C) and cook for about 6–8 minutes. Regardless of your method, enjoy the delicious results! For more cooking tips, check out America's Test Kitchen for in-depth guidance.
Serving suggestions for Cheesy Garlic Chicken Wraps
When enjoying your cheesy garlic chicken wraps, consider pairing them with some vibrant sides to enhance your meal experience.
Perfect sides to accompany the wraps
- Crunchy Salad: A fresh, crunchy salad brings a nice contrast to the warm, cheesy filling. Think mixed greens, cherry tomatoes, and a zesty vinaigrette.
- Roasted Veggies: Seasonal roasted vegetables like bell peppers, zucchini, or Brussels sprouts add a hearty touch to your plate.
- Tortilla Chips: For a satisfying crunch, serve with tortilla chips. Try a fresh salsa or guacamole for added flavor.
Additional dipping sauces
Elevate your wraps with these delicious dips:
- Sour Cream: Its creaminess balances the garlic and spice.
- Ranch Dressing: A classic choice, ranch complements the cheesy elements beautifully.
- Spicy Mayo: Mix mayo with a dash of sriracha for a kick.
These simple sides and dips can take your cheesy garlic chicken wraps from delightful to extraordinary!
Time Breakdown for Cheesy Garlic Chicken Wraps
Preparation time
Getting your ingredients ready takes about 10 minutes. This is the perfect time to slice, chop, and mix your fabulous filling!
Cooking time
Cooking these cheesy garlic chicken wraps is a breeze. It should take around 8 minutes on the stovetop—3 to 4 minutes per side for that crispy, golden perfection.
Total time
In total, you’re looking at about 18 minutes from start to finish. Quick and delicious—what more could you want?
Preparing a meal has never been this easy! Whether you're feeding yourself or impressing a friend, these wraps fit perfectly into a busy schedule. For tips on how to customize or variations, check out this source or this one for even more ideas. Happy cooking!
Nutritional Facts for Cheesy Garlic Chicken Wraps
Understanding the nutritional aspects of your Cheesy Garlic Chicken Wraps can empower you to make healthier choices without sacrificing flavor. Here’s a quick breakdown:
- Calories: Each wrap packs about 476 calories, making it a hearty choice for lunch or dinner.
- Protein: With 38 grams of protein, these wraps are not only satisfying but also great for building muscle.
- Sodium: At 1,090 mg of sodium, it’s important to pair this dish with lower-sodium sides for a balanced meal.
For more detailed nutrition insights or to explore healthier alternatives, consider checking resources like the USDA Food Composition Databases or the Harvard T.H. Chan School of Public Health for additional guidance on nutrition!
FAQs about Cheesy Garlic Chicken Wraps
Can I use leftover chicken for this recipe?
Absolutely! Leftover chicken works perfectly in these cheesy garlic chicken wraps. Whether it's rotisserie chicken, grilled, or baked that you have on hand, shredding or chopping it up will blend seamlessly with the other ingredients. It's a great way to minimize food waste and enjoy a quick meal.
What can I substitute for the cheese?
If you're looking for a cheese substitute for the cheesy garlic chicken wraps, options vary based on dietary needs. Try using nutritional yeast for a cheesy flavor without dairy, or replace it with dairy-free cheese alternatives. If you're not dairy-free, consider a creamy goat cheese or a soft cheese like feta for added flavor variation.
How do I store and reheat the wraps?
To store these delicious cheesy garlic chicken wraps, keep them in an airtight container in the fridge for up to two days. When you're ready to enjoy them again, reheat them in a skillet or air fryer to maintain that crispy outer layer. Microwaving is quick but may not retain the texture as well. For tips on meal prep, check out resources like Healthline for efficient storage techniques.
Conclusion on Cheesy Garlic Chicken Wraps
In summary, cheesy garlic chicken wraps are a delightful and versatile meal option that’s perfect for busy weeknights. Whether enjoyed on their own or paired with a side salad, they deliver comfort and flavor in every bite. Don't forget to make extra filling for spontaneous snacking!
Cheesy Garlic Chicken Wraps
Equipment
- non-stick pan
Ingredients
- 2 large tortillas regular or low-carb/high-protein
- 7 oz cooked chicken about 200 grams, chopped (rotisserie is great)
- 2 cloves garlic minced or grated (adjust to taste)
- 2 tablespoons light mayonnaise
- 1 tablespoon light Greek yogurt or plain yogurt
- 2 teaspoons hot sauce like Frank’s
- ¼ teaspoon salt
- 3 oz grated cheese about 90 grams (I used a cheddar blend)
- 1 green onion chopped
- Olive oil spray
Instructions
- In a bowl, mix chopped chicken, garlic, mayonnaise, yogurt, hot sauce, and salt.
- Lay out your wrap. On the lower third of the tortilla, sprinkle about 2 tablespoons of cheese, then top with about ⅔ cup of the chicken mixture. Add another tablespoon of cheese and a sprinkle of green onion.
- Fold in the sides of the tortilla, then roll it up tightly from the bottom.
- Heat a non-stick pan over medium-high. Spray with olive oil.
- Place wraps seam-side down. Cook for 3–4 minutes per side until crispy and golden. Cover with a lid to help heat the inside.
- Slice in half and serve!
Leave a Reply