
Introduction to Dirt Pudding Cups
Why Dirt Pudding Cups are a Fun Dessert
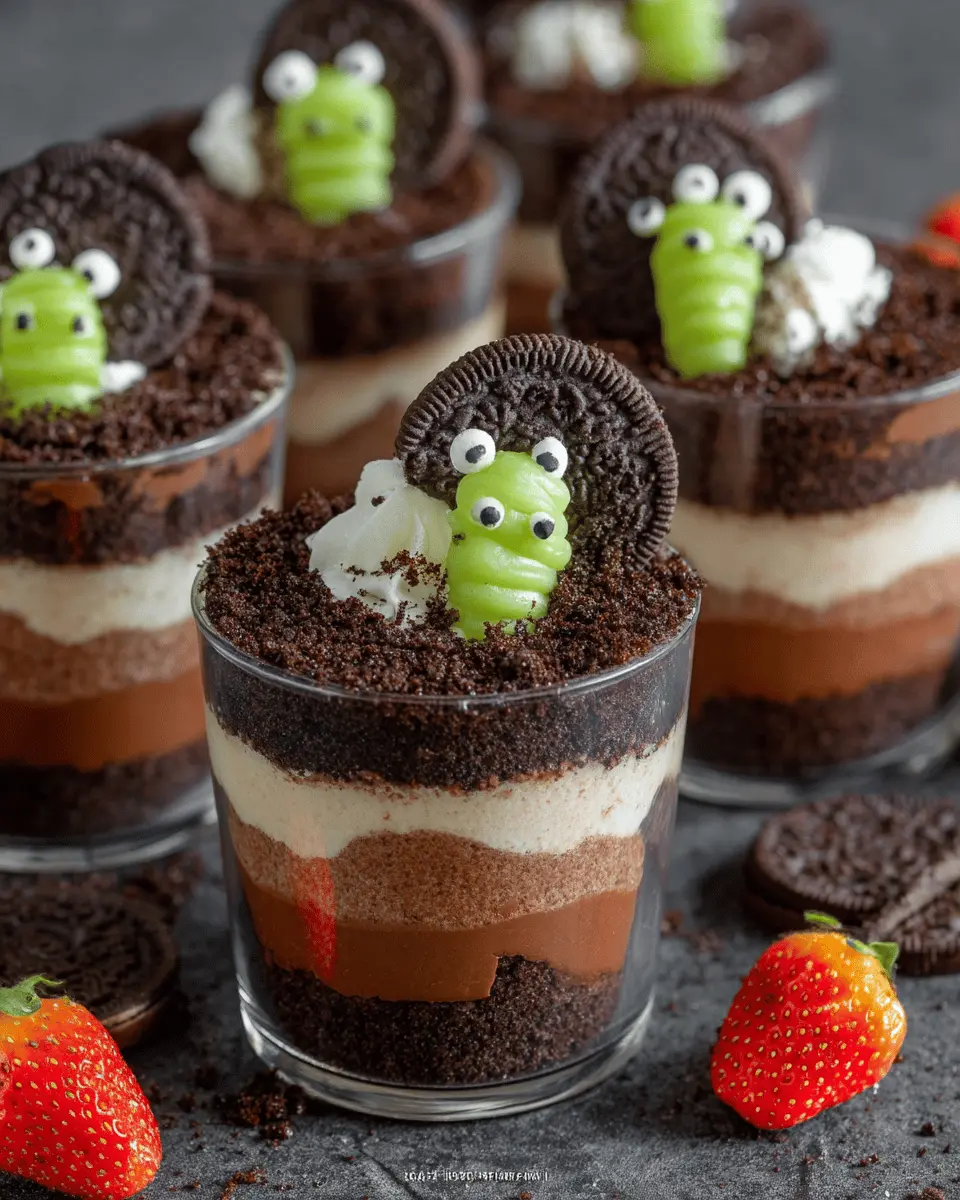
If you're looking for a nostalgic dessert that brings smiles to both kids and adults, dirt pudding cups are your answer! This whimsical treat layers creamy chocolate pudding with crushed Oreo cookies, mimicking the look of rich, delicious dirt, while creative toppings like gummy worms and monster cookies take it to a whole new level.
But what makes dirt pudding cups particularly fun? For starters, they’re customizable! You can throw in your favorite candies or seasonal toppings, making them perfect for any occasion, be it Halloween, birthday parties, or just a cozy night in. Imagine hearing friends exclaim, "Wow, this dessert looks amazing!” while they dive in to experience the delight of this playful treat.
According to a study by the Dessert Foundation, desserts that incorporate interactive elements—like mixing your own toppings—can enhance the overall eating experience. It's a win-win; you get to enjoy a delicious dessert while also tapping into your inner child! So grab those ingredients and prepare to impress your guests with dirt pudding cups that are as fun to make as they are to eat!
Ingredients for Dirt Pudding Cups
If you're looking to whip up a fun and delicious treat that reminds you of childhood, Dirt Pudding Cups are an excellent choice! Here’s what you’ll need to get started:
- Oreo Cookies: You'll need two packages (approx. 14.3 oz each). These will serve as the "dirt" base for your pudding cups, providing that delightful cookie crunch.
- Instant Chocolate Pudding Mix: Grab a 3.9 oz package. This is the key component that gives your dessert its rich chocolate flavor.
- Cold Milk: For mixing with the pudding mix, you'll use 2 cups of cold milk for that perfect creamy consistency.
- Cool Whip: You’ll need 8 oz of thawed Cool Whip (one container) to make your pudding light and fluffy.
- Chocolate Sprinkles: A ½ cup will enhance the "dirt" look on top—it's a fun addition!
- Toppings: Think creative! Use Halloween cookies, gummy worms, M&M's, or candy corn to elevate your Dirt Pudding Cups to the next level.
These ingredients are fun to work with and perfect for any occasion—especially Halloween! Check out more tasty decoration ideas here to expand your creativity!
Step-by-Step Preparation of Dirt Pudding Cups
Crush the Oreo Cookies
To kick off your journey to delightful dirt pudding cups, grab those Oreo cookies and let’s get crushing! You can either use a food processor for a quick job or resort to the classic method: tossing the cookies into a sturdy plastic bag and giving them a good whack with a rolling pin. The goal here is to create a fine crumb that resembles dirt — the foundation of your delicious masterpiece! Take your time with this step, as the texture will play a crucial role in the final presentation and flavor.
Prepare the Chocolate Pudding
Once you have your crushed cookies ready, it’s time to whip up the chocolate pudding. In a large mixing bowl, combine the 3.9 oz package of instant chocolate pudding mix with 2 cups of cold milk. Using a whisk, mix them together until everything is smooth and well-combined. It’s important not to rush this part—allow the mixture to sit in the fridge for 5-10 minutes. This chilling phase helps it thicken nicely, which will elevate the overall texture of your dirt pudding cups.
Fold in the Cool Whip
Now that your pudding has set up a bit, it’s time to bring some lightness into the mix by folding in the Cool Whip. Use a spatula to gently combine the 8 oz of thawed Cool Whip with your chocolate pudding. This step introduces a fluffy quality that balances the richness of the chocolate. Remember, we want to maintain the airiness, so fold carefully, as over-mixing can deflate your beautiful creation.
Assemble the Dirt Pudding Cups
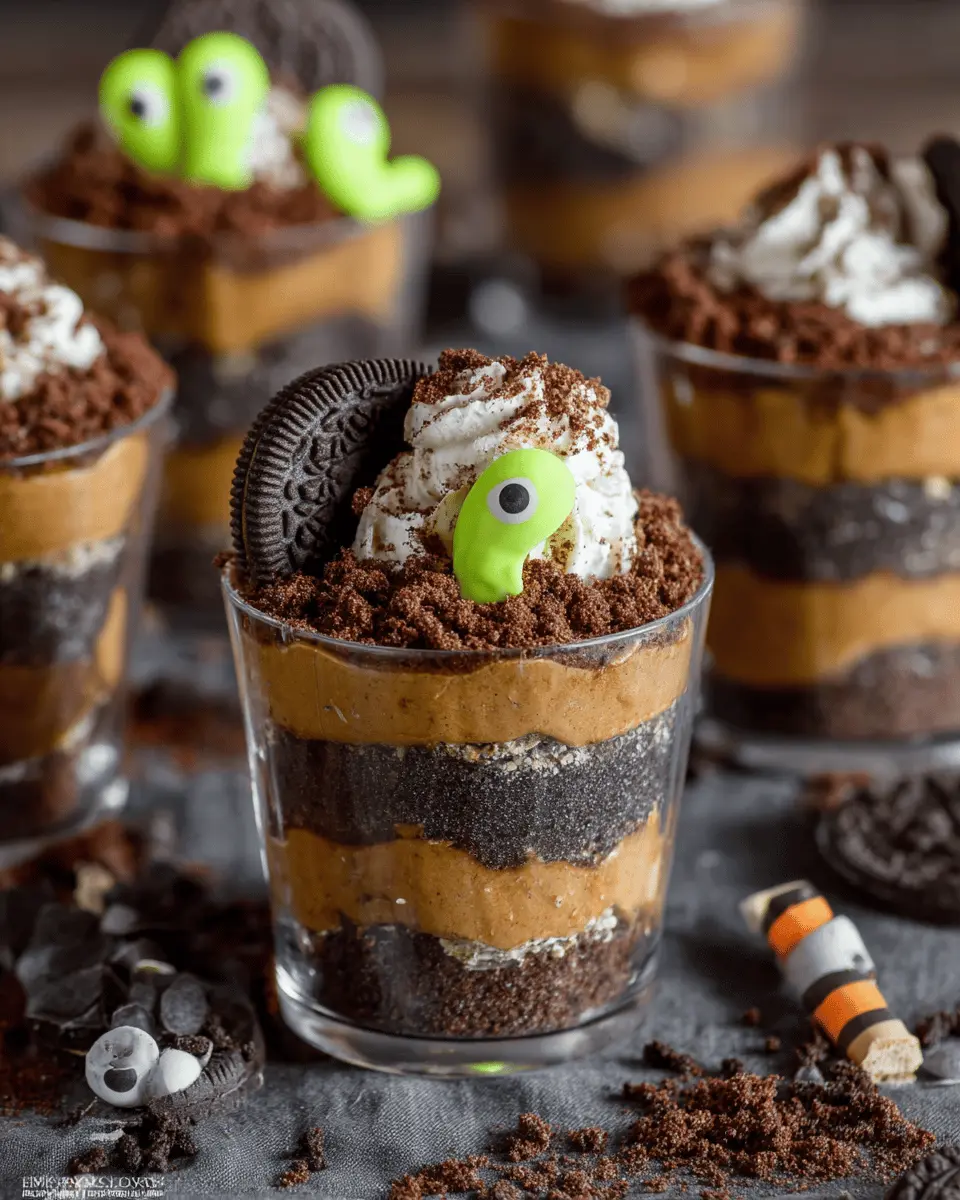
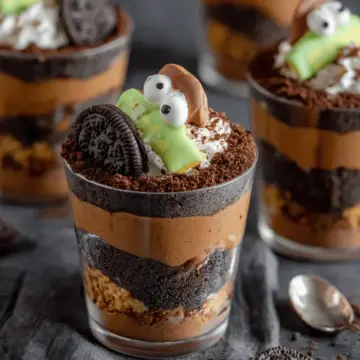
Here comes the fun part: assembling your dirt pudding cups! Begin by spooning a generous layer of your crushed Oreo cookies into the bottom of each cup. Follow this with a layer of your creamy pudding mixture. Repeat the layers—more Oreos, then more pudding—until you reach the top of the cups. The contrast of layers is not just visually appealing; it enhances the eating experience as each bite offers a delightful mix of textures!
Add Toppings and Chill
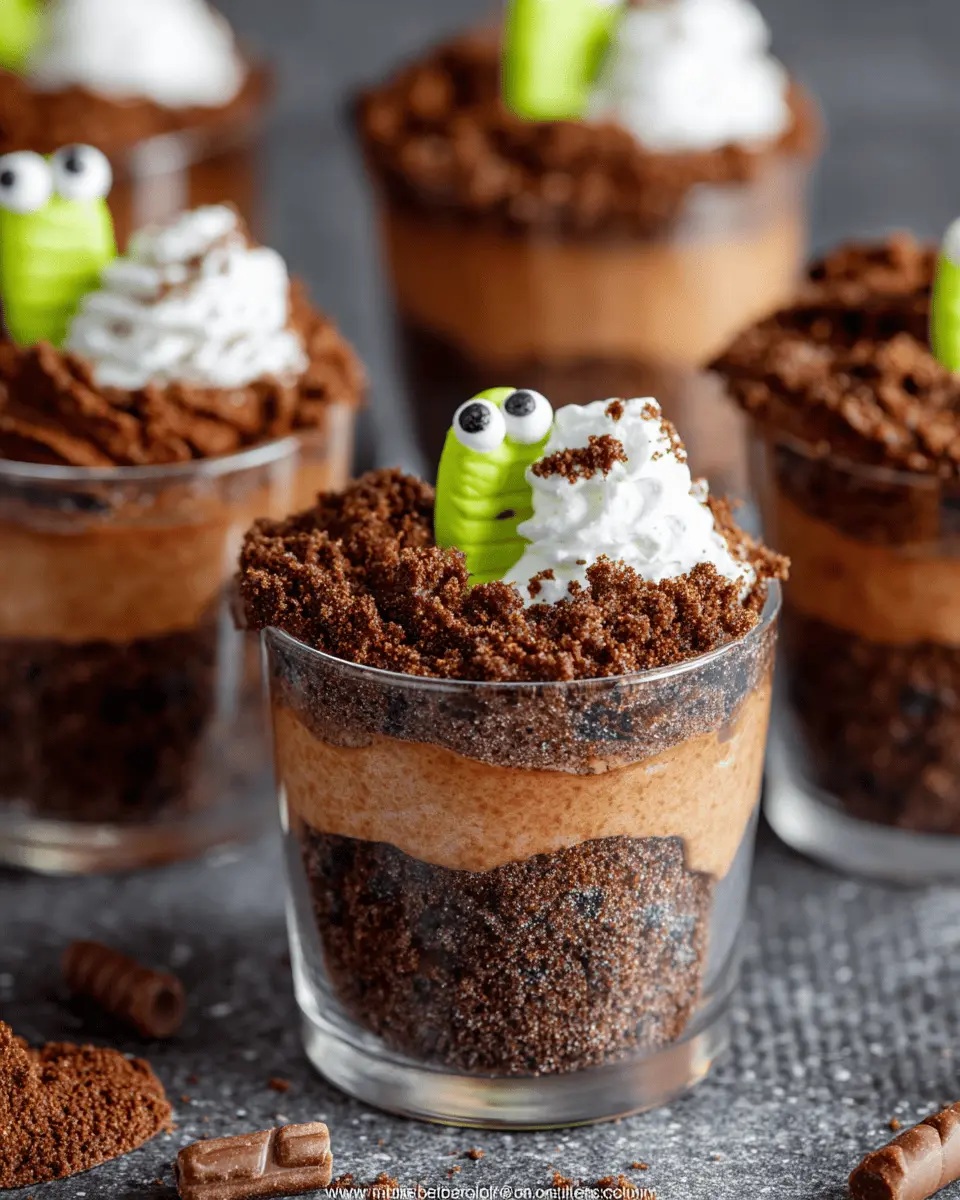
Finish off your exquisite dirt pudding cups by sprinkling chocolate sprinkles on top to mimic dirt—fun and delicious! Feel free to get creative with toppings; press in some monster cookies or scatter gummy worms for that classic spooky touch. For the best taste, chill your masterpieces in the refrigerator for at least an hour before serving. This allows the flavors to meld wonderfully together.
Now, you’re ready to wow your friends at your next gathering with these delightful treats! Enjoy the process and remember: the most important ingredient is always a sprinkle of fun.
Variations on Dirt Pudding Cups
Seasonal Variations for Halloween
Dirt pudding cups are the perfect canvas for Halloween creativity! Transform your dessert by topping each cup with spooky elements like mini chocolate tombstones or ghost-shaped marshmallows. Instead of regular gummy worms, opt for gummy spiders for a creepier vibe. To make it even more festive, try using Halloween-themed candy corn or edible glitter. You can find great ideas on Food Network's Halloween section for fun twists to impress your guests!
Creative Flavor Swaps
Why stick to classic chocolate when you can explore adventurous flavors for your dirt pudding cups? Consider using vanilla or butterscotch pudding for a delightful twist. You can even mix in peanut butter or Nutella for a rich, nutty taste. Feeling adventurous? Try adding crushed ginger cookies for an unexpected flavor explosion. The possibilities are endless, so don’t hesitate to let your imagination run wild!
Cooking Tips and Notes for Dirt Pudding Cups
Creating delightful dirt pudding cups is easier than you might think! Here are some helpful tips to elevate your dessert game:
Perfecting the Oreos
- For an extra fine crush, blend your Oreo cookies in a food processor. If using a bag, ensure it’s sealed tightly to avoid spills!
Pudding Consistency
- Make sure to whisk the instant chocolate pudding mix with cold milk until smooth. Refrigerate for that velvety texture. The pudding should be thick enough to hold its shape in the cups.
Creative Toppings
- Get creative! Besides gummy worms and sprinkles, try adding different candy or even crumbled cookies. Personal touches can really make these dirt pudding cups your own.
Make-Ahead Option
- You can prepare these cups a day in advance! Just store them in the fridge for a quick dessert when you're short on time.
For more tips, check out this guide on creative dessert ideas from Food Network. Happy cooking!
Serving Suggestions for Dirt Pudding Cups
Dirt pudding cups are versatile and can be dressed up for any occasion. Here are some fun serving suggestions to elevate your dessert experience:
-
Themed Toppings: For Halloween, sprinkle ghost-shaped candies or use gummy worms to give a spooky twist. For spring gatherings, think vibrant flowers or edible glitter to resemble magical fairy gardens.
-
Creative Cups: Serve your dirt pudding cups in mason jars or terracotta pots for a playful presentation. Just make sure to line them with a small layer of parchment paper if using pots to prevent any mess.
-
Layering Fun: Consider adding colorful layers of fruit or whipped cream between the pudding and cookie layers for added flavor and texture.
Remember, these dirt pudding cups are as much fun to personalize as they are delicious! For more dessert inspiration, check out Delish or Food Network for ideas on toppings and serving styles.
Time Breakdown for Dirt Pudding Cups
Preparation time
Getting started is easy! You’ll spend about 15 minutes preparing your Dirt Pudding Cups. This includes crushing Oreo cookies, mixing the pudding, and folding in the Cool Whip. It’s a quick and enjoyable process that lets you feel like a kid again.
Chilling time
Next, you’ll want to let those layered delights chill in the fridge for at least 1 hour. This resting time is crucial as it helps the pudding set, ensuring a delightful texture when it's time to dig in.
Total time
In total, you’re looking at about 1 hour and 15 minutes from prep to serving. It’s a small investment of time for such a fun and delicious treat! Enjoy crafting these Dirt Pudding Cups, perfect for parties or a sweet dessert night in.
For more tips on dessert recipes, check out resources from culinary sites like Serious Eats or Taste of Home.
Nutritional Facts for Dirt Pudding Cups
Calories Per Serving
Each of these delightful dirt pudding cups packs approximately 250-300 calories per serving, making them a fun yet indulgent dessert option. Perfect for parties or just a treat after a long week!
Sugar Content
Be prepared for a sweet experience; each cup contains about 20-25 grams of sugar. This sugar mainly comes from the Cool Whip and Oreo cookies, so you might want to enjoy these in moderation if you’re keeping an eye on your sugar intake.
Dietary Considerations
While these dirt pudding cups are undeniably delicious, they are not suitable for those with dairy allergies or gluten sensitivities due to the cream and cookies used. Consider using alternative ingredients like gluten-free cookies or a dairy-free whipped topping for a tasty and inclusive treat. To learn more about dietary adjustments for desserts, check out resources from the Academy of Nutrition and Dietetics.
Embarking on this sweet journey? You won't be disappointed!
FAQs about Dirt Pudding Cups
Can I make these ahead of time?
Absolutely! Dirt pudding cups are perfect for prepping in advance. You can assemble them a day or two before your event; just store them in the refrigerator to keep everything fresh. This makes them a fantastic option for parties, as you can focus on enjoying your guests instead of rushing around at the last minute.
What are some alternative toppings?
The classic gummy worms and chocolate sprinkles are fun, but don’t hesitate to get creative! Try using crushed candy bars, sprinkles in different colors, or even edible glitter to make your dirt pudding cups stand out. Seasonal toppings like candy corn for fall or pastel candies for spring can also add a unique twist.
How can I make this a healthier version?
For a healthier take on these delicious treats, consider using a reduced-fat cream cheese instead of Cool Whip and opting for sugar-free pudding mix. You can also substitute crushed nuts or granola for Oreos to increase the nutritional value. Feeling adventurous? Consider adding fresh fruit like raspberries or sliced bananas for natural sweetness.
Remember, there’s no wrong way to enjoy dirt pudding cups!
Conclusion on Dirt Pudding Cups
In conclusion, dirt pudding cups are a delightful treat that can bring out your inner child while satisfying your sweet tooth. They are perfect for gatherings or cozy nights in. Get creative with toppings, and enjoy the process! Trust us, this dessert is sure to become a household favorite.
Dirt Pudding Cups
Equipment
- Food Processor
- Mixing Bowl
- Rolling Pin
- cups
Ingredients
Chocolate Pudding Mixture
- 2 packages Oreo cookies (approx. 14.3oz each)
- 3.9 oz instant chocolate pudding mix
- 2 cups cold milk
- 8 oz Cool Whip, thawed 1 container
- ½ cup chocolate sprinkles
- toppings (Halloween cookies, gummy worms, M&M's, candy corn, etc.)
Instructions
Preparation
- Crush the Oreo cookies in a food processor or by placing them in a plastic bag and crushing them with a rolling pin until they are finely ground.
- In a large mixing bowl, whisk together the instant chocolate pudding mix and cold milk until smooth. Refrigerate for 5-10 minutes.
- Fold in the Cool Whip to the pudding mixture until well combined.
- To assemble the Dirt Pudding Cups, spoon a layer of the crushed Oreo cookies into the bottom of each cup, followed by a layer of the pudding mixture.
- Spoon another layer of Oreo cookies and another layer of the pudding mixture.
- Top each cup with a generous sprinkle of the chocolate sprinkles to create a 'dirt' layer.
- To make the monster cookies, press two candy eyes onto each cookie, using a small amount of frosting (or melted chocolate if you have, to hold them in place). Here you can use any toppings and candies you prefer.
- Gently press the monster cookies and a few additional gummy worms into the top of the pudding cups, so that they are partially buried in the 'dirt.'
- Refrigerate the Dirt Pudding Cups for at least 1 hour before serving to allow the pudding to set.
Leave a Reply