
Introduction to Graveyard Pudding Cookie Cups
When it comes to desserts, there’s something delightfully whimsical about those that embrace the spirit of the season. Graveyard pudding cookie cups are the perfect example, effortlessly combining spooky charm with mouthwatering flavors. Whether you’re hosting a Halloween gathering or just feeling festive, these dessert cups stand out, bringing a playful twist to your table.
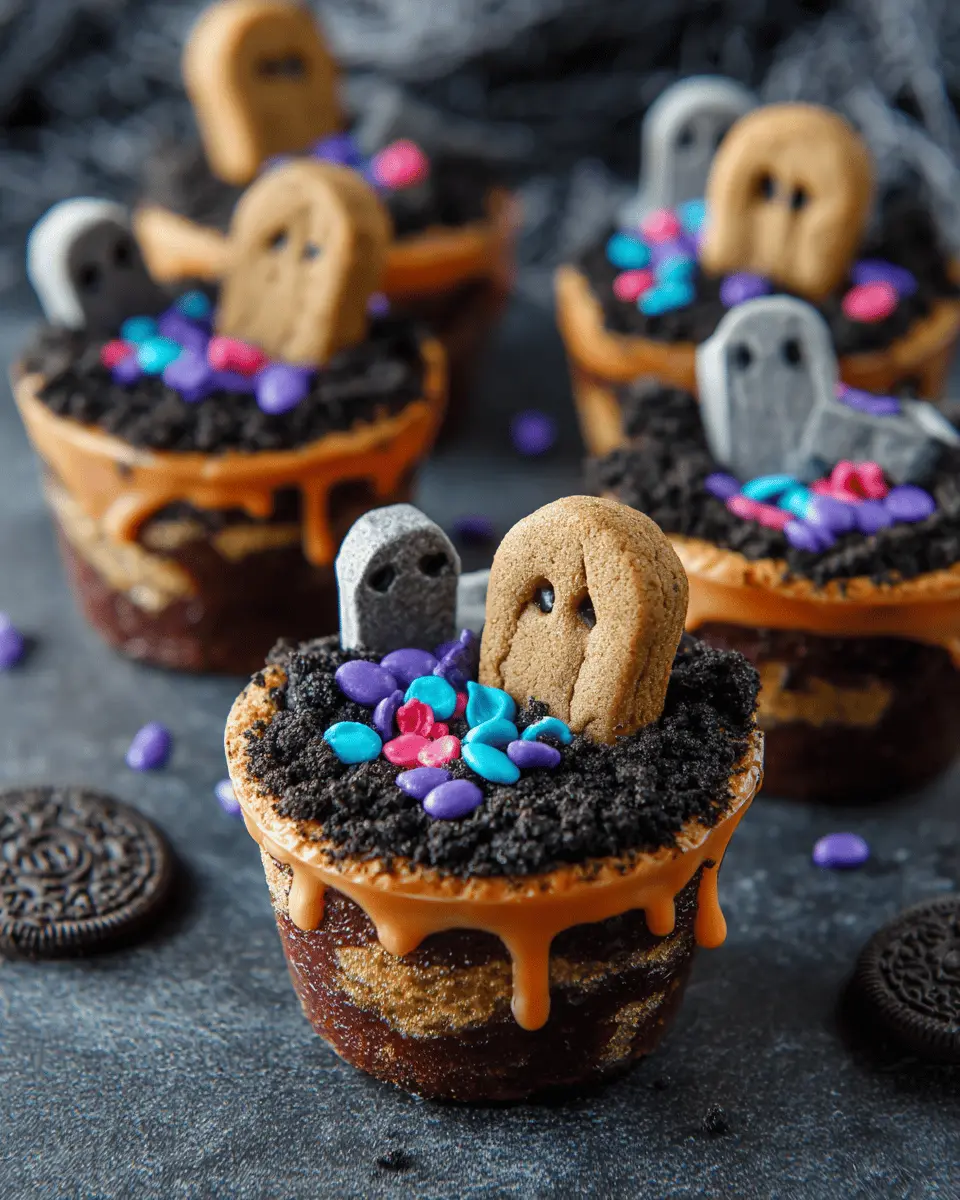
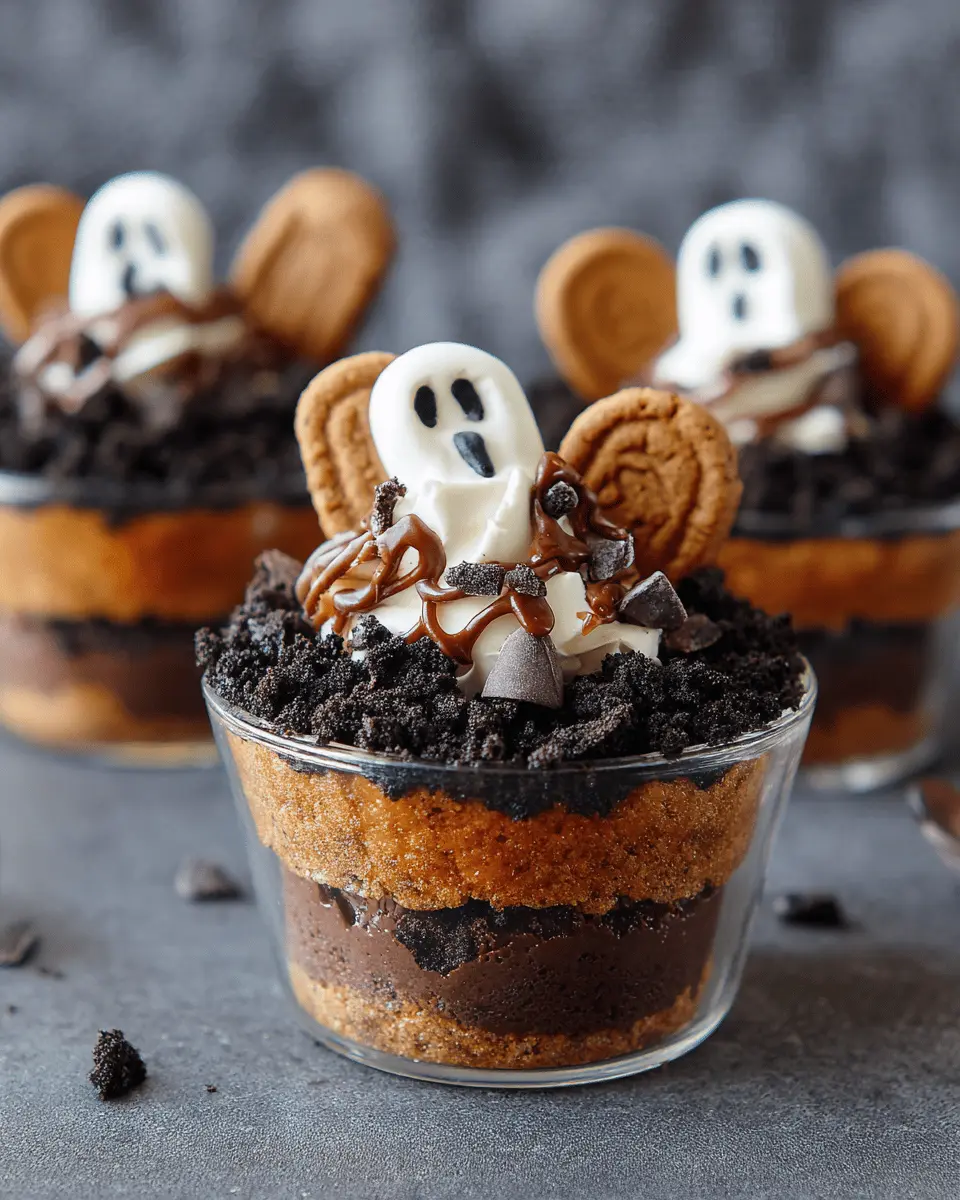
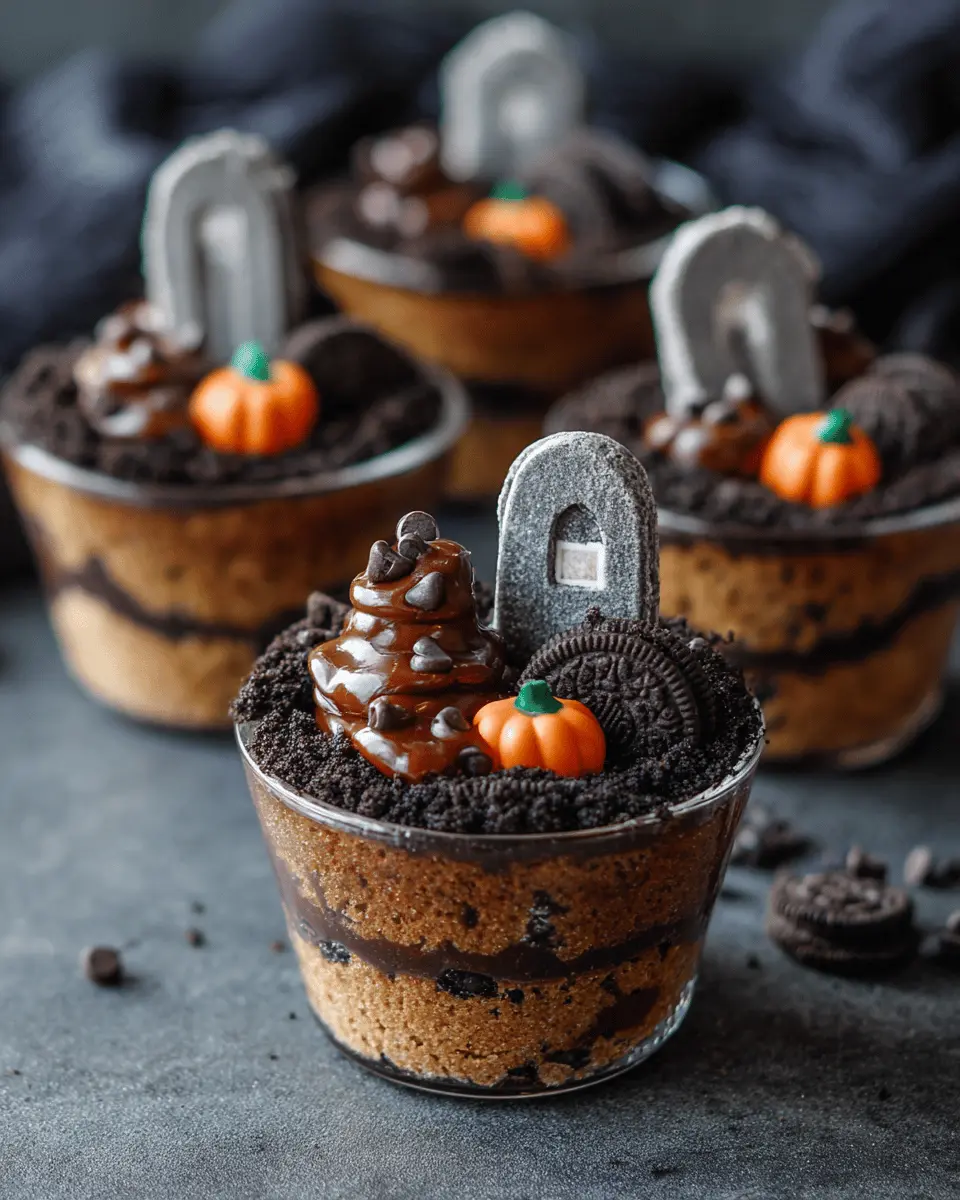
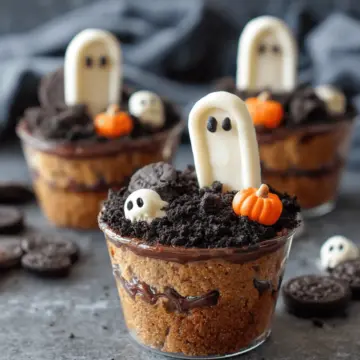
Imagine digging into a layer of creamy chocolate pudding, enveloped in smooth Cool Whip, and topped with crunchy Oreo crumbs. The creative flair doesn’t stop there—each cup features an edible tombstone crafted from Milano cookies, complete with “RIP” inscriptions to set the tone. It’s the kind of treat that not only pleases the palate but also sparks conversations among friends and family.
According to the National Confectioners Association, themed treats like these can elevate celebrations, adding joy and delight to gatherings. So why not become the culinary magician of your friend group? With just a few ingredients and a hint of creativity, you can craft these graveyard pudding cookie cups to enchant your guests. Let’s conjure up some fun and dive into this simple yet bewitching recipe!
Ingredients for Graveyard Pudding Cookie Cups
When you’re ready to get your spooky vibe on with these graveyard pudding cookie cups, here’s what you’ll need to create your deliciously creepy dessert. This recipe is perfect for Halloween or any spooky gathering, and it’s sure to impress your friends with both its flavor and presentation.
Essential Ingredients
- Chocolate Instant Pudding Mix: 5.1 oz
- Milk: 3 cups (for that creamy texture)
- Cool Whip: 8 oz (this will add a light, fluffy layer)
- Oreo Cookies: 24 (the base that brings the flavor)
- Milano Double Chocolate Cookies: 6 (your tombstones!)
- Black Frosting or Black Edible Marker: for decorating
- Candy Pumpkins: 6 (to add that seasonal flair)
- Googley Eyes: to creep things up a notch
- Gummy Worms: for those fun, squiggly touches
These ingredients blend together to create a delightful dessert that’s not just eye-catching but also delicious. Want to learn more about the origins of some of these treats? Check out Hershey's for some fun facts about classic candies! Ready to mix up some spooktacular fun? Let’s move on to the instructions!
Step-by-step Preparation for Graveyard Pudding Cookie Cups
Creating the delightful graveyard pudding cookie cups is not only a fun activity but also an excellent way to impress your friends at your next gathering. By breaking down the preparation into manageable steps, you’ll find that making these spooky treats is as enjoyable as eating them!
Prepare the tombstones
First, let’s create the tombstones that will add character to our graveyard pudding cookie cups. Grab your Milano cookies and use black frosting or an edible marker to write "RIP" on each one. This little detail transforms a simple cookie into a spooky tombstone. Set these aside to dry; they'll be the perfect finishing touch to your dessert!
Mix the pudding
Next, it’s time to whip up the pudding. In a stand mixer, combine the chocolate instant pudding mix with 3 cups of milk. Set your mixer to medium speed and blend for about two minutes until the mixture thickens. After that, gently fold in the 8 ounces of Cool Whip until everything is well integrated. Now, you have a smooth, creamy pudding that will layer beautifully in your cups. For more tips on creating the perfect pudding texture, check out this helpful guide on pudding consistency.
Crush the Oreos
Now let’s get a little crunchy! Take 24 Oreo cookies and crush them into fine crumbs. A food processor works wonders for this step, but you can also use a ziplock bag and a rolling pin if you prefer a hands-on approach. These crumbs will mimic the texture of soil in your graveyard, adding both flavor and a touch of authenticity to your cups.
Layer the ingredients in cups
It's layering time! Grab six clear 9 oz. plastic cups for an eye-catching presentation. Begin by sprinkling about 3-4 tablespoons of the Oreo crumbs into the bottom of each cup. This will be our foundation. Then, press a few googly eyes around the edges, letting them peek out between the crumbs—this adds a playful surprise! Spoon a layer of pudding on top of the crumbs, followed by another layer of crushed Oreos, then more pudding. Finish the layers by sprinkling more crumbs to almost reach the cup's lip.
Final touches
Finally, it’s time to make your graveyard pudding cookie cups look extra festive! Firmly insert one of your decorated Milano tombstones into the center of each cup. For an added touch, gently press a candy pumpkin next to each tombstone. If you desire an extra spooky flair, embellish with gummy worms, letting them coil around the edges. These final touches will have your guests exclaiming with delight when they see the spook-tacular dessert you’ve prepared!
With these steps, you're on your way to creating a memorable treat that’s both delicious and visually appealing. Happy cooking!
Variations on Graveyard Pudding Cookie Cups
Vegan Version
Transforming graveyard pudding cookie cups into a vegan delight is super simple! Swap the chocolate pudding mix for a vegan alternative and use almond or soy milk instead of dairy. Replace Cool Whip with coconut whipped cream—it adds a delightful tropical twist! For the cookie base, opt for vegan-friendly cookies like chocolate sandwich cookies. With these adjustments, you can enjoy a guilt-free and cruelty-free treat!
Gluten-Free Version
Want to make these treats gluten-free? No worries! Choose a gluten-free chocolate pudding mix alongside almond or oat milk. For the base, use gluten-free chocolate cookies to maintain that irresistible crunch. Be sure to check for certified gluten-free options to keep your graveyard pudding cookie cups safe for everyone. Happy haunting with your delicious treats! For more gluten-free recipes, check out Gluten-Free Girl.
With these variations, you can delight everyone at your Halloween gathering or any festive occasion!
Cooking Tips and Notes for Graveyard Pudding Cookie Cups
Making graveyard pudding cookie cups is not only fun but also super simple! Here are some tips to make your spooky treats stand out:
- Pudding Consistency: Ensure your pudding mixture is well-blended before folding in the Cool Whip—this adds a delightful lightness.
- Layering: For better presentation, use clear cups so guests can admire the layers. The contrasting colors create a visually appealing effect.
- Decorative Elements: Get creative with decorations! Add more unique candies like gummy spiders or chocolate crumbles for added texture.
- Serving Suggestions: Chill the cups before serving; the flavors meld beautifully when they sit for a little while.
For more insights, you might enjoy checking out Incredible Edible Decorations or Creative Cupcake Ideas. Enjoy your spooky baking!
Serving Suggestions for Graveyard Pudding Cookie Cups
These delightful graveyard pudding cookie cups are perfect for any spooky gathering or Halloween party! To enhance your chilling dessert experience, consider these fun serving tips:
-
Presentation Matters: Serve your cookie cups on a decorative platter surrounded by faux spider webs or Halloween-themed decorations. This sets the mood and makes the treat even more enticing!
-
Themed Drinks: Pair these cups with themed drinks like “witch's brew” punch or spooky apple cider. The contrast of flavors will keep your guests coming back for more.
-
Mix it Up: Encourage creativity! Provide different toppings like crushed candy bars, sprinkles, or chocolate shavings for guests to customize their cups.
-
Sharing is Caring: Consider making mini versions in smaller cups for sharing. This is a hit for potlucks or casual gatherings, allowing everyone to get a taste without too much guilt.
With these suggestions, your graveyard pudding cookie cups will undoubtedly steal the spotlight! For more Halloween ideas and themed recipes, check out sites like Food Network and Taste of Home for inspiration. Enjoy!
Time Breakdown for Graveyard Pudding Cookie Cups
Preparation time
Getting started on your graveyard pudding cookie cups will take about 15 minutes. This includes gathering your ingredients and prepping those cute, little spooky tombstones.
Assembly time
Once the prep is done, assembling these delicious cups will take another 20 minutes. You'll find it's a fun and straightforward process!
Total time
In all, you’ll be looking at roughly 35 minutes to create these delightful treats. Perfect for a quick Halloween snack to impress your friends!
If you're looking for additional inspiration, consider browsing through popular dessert tutorials on YouTube or Pinterest to see creative variations!
Nutritional Facts for Graveyard Pudding Cookie Cups
When indulging in these graveyard pudding cookie cups, it's handy to know what you're treating yourself to! Here’s a brief look at their nutritional profile:
- Calories: Each cookie cup contains approximately 220 calories, making them a fun yet calorie-rich dessert.
- Sugar Content: With around 15 grams of sugar per cup, these treats are definitely a sweet way to celebrate!
- Saturated Fats: Enjoy about 7 grams of saturated fats in each serving, attributed mainly to the creamy pudding and whipped topping.
For more nutritional insights or healthier alternatives, consider exploring Healthline's guide on dessert nutrition. It's essential to enjoy treats like these in moderation, so why not share them at a party? Your friends will love them!
FAQs about Graveyard Pudding Cookie Cups
Can I make these in advance?
Absolutely! Graveyard pudding cookie cups are perfect for preparing ahead of time. You can assemble the pudding and layers a day before your event. Just keep the cups covered in the fridge to maintain freshness. Add the festive decorations like the Milano tombstones and gummy worms just before serving for that fresh look!
What other decorations can I use?
Feel free to get creative! Besides the traditional decorations, consider using caramel sauce for a spooky effect or edible glitter for some sparkle. Licorice strands can mimic creepy vines, or you could scatter mini chocolate bats or spiders around your cups. The possibilities are endless!
How do I store leftover pudding cups?
If you have any graveyard pudding cookie cups left, simply cover them tightly with plastic wrap or transfer them to an airtight container. They can last in the fridge for up to three days, so enjoy them while they stay fresh! Need tips on storage? Check out sites like Food Storage Guidelines for more expert advice.
Conclusion on Graveyard Pudding Cookie Cups
In summary, Graveyard Pudding Cookie Cups are a delightful twist on festive treats that are sure to impress guests at any Halloween gathering. Their playful design combined with delicious flavors makes them perfect for sharing. So, dive into this easy recipe and create your own hauntingly fun dessert!
Graveyard Pudding Cookie Cups: Easy Indulgence for Spooky Treats
Equipment
- Stand Mixer
- Food Processor
- clear plastic cups
Ingredients
Pudding Mixture
- 5.1 oz Chocolate Instant Pudding Mix
- 3 cups Milk
- 8 oz Cool Whip
Cookie Toppings
- 24 Oreo Cookies
- 6 Milano Double Chocolate Cookies
- Black Frosting or Black Edible Marker
- 6 Candy Pumpkins
- Googley Eyes
- Gummy Worms
Instructions
Preparation Steps
- With black frosting (with a small frosting top) or with an edible marker, write RIP on each of the Milano cookies creating a tombstone. Set aside.
- In a stand mixer, whisk together pudding mix and milk together on medium speed for 2 minutes.
- Fold in cool whip until well blended.
- Crush Oreos until they are fine crumbs using a food processor.
- Sprinkle 3-4 tablespoon of crumbs into the bottom of 6 clear 9 oz. clear plastic cups.
- Press a few googley eyes around the edges between the crumbs and the cup so it looks like they are peaking out.
- Spoon in a layer of pudding on evenly on top.
- Repeat the last three step one more time.
- End the layers by sprinkling more crumbs on top until they almost reach the lip of the cup.
- Firmly insert one cookie tombstone into the center of each pudding cup.
- Gently press in a candy pumpkin beside each tombstone.
- Embellish with gummy worms if desired.

Leave a Reply